MODEL H8225 21⁄2 GALLON PAINT TANK WITH GUN INSTRUCTION MANUAL COPYRIGHT © SEPTEMBER, 2007 BY GRIZZLY INDUSTRIAL, INC. WARNING: NO PORTION OF THIS MANUAL MAY BE REPRODUCED IN ANY SHAPE OR FORM WITHOUT THE WRITTEN APPROVAL OF GRIZZLY INDUSTRIAL, INC.
����������������������������������������������������������������������� �������������������������������������������������������������� ���������������������������������������������������������������������� �������������������������������������������������������������������� ������������������������ ������������������������������������������������������������������ �������������������������������������������������������������������� ����������������������������������������������������������������� ����������
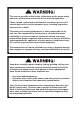
SAFETY For Your Own Safety Read Instruction Manual Before Operating This Equipment The purpose of safety symbols is to attract your attention to possible hazardous conditions. This manual uses a series of symbols and signal words which are intended to convey the level of importance of the safety messages. The progression of symbols is described below. Remember that safety messages by themselves do not eliminate danger and are not a substitute for proper accident prevention measures.
7. AVOID ENTANGLEMENTS. Do not wear loose clothing, gloves, neckties, rings, bracelets, or other jewelry, which may get caught in moving parts, when operating this tool. Wear a protective hair covering to contain long hair. 8. USE CORRECT AIR PRESSURE. Exceeding the maximum PSI rating of this tool may cause unpredictable operation or bursting. 9. DISCONNECT AIR PRESSURE before servicing, changing accessories, or moving to another location. Never leave this tool unattended when connected to air. 10.
Additional Safety Instructions for Paint Tanks 1. READ THIS MANUAL. This manual contains proper operating instructions for this paint tank with spray gun. 2. DESIGN MODIFICATIONS. Do not modify the tank design or construction. Drilling into the tank or weld attachments, or altering its design, could weaken the tank. 3. CLEANING AND MAINTENANCE. Clean and dry the tank and lid according to the instructions in this manual.
INTRODUCTION Specifications Foreword The specifications, details, and photographs in this manual represent the Model H8225 as supplied when the manual was prepared. However, owing to Grizzly’s policy of continuous improvement, changes may be made at any time with no obligation on the part of Grizzly. Paint Tank If you have any comments regarding this manual, please write to us at the following address: Type of Feed...................................Suction Air Inlet......................................
SETUP Unpacking Inventory Your paint tank was carefully packaged for safe shipping. If you discover any damage after you have signed for delivery, immediately call Customer Service at (570) 5469663 for advice. H8225 Inventory ............................... Qty A. Paint Tank 21⁄ 2 Gallon ......................... 1 B. Lid ........................................................ 1 C. Regulator Assembly ............................ 1 D. Spray Gun ........................................... 1 E.
Tank Assembly Pressure Gauge Lift Handle Regulator Assembly Air Inlet Fitting Air Outlet Fitting Fluid Outlet Adapter Safety Valve Figure 2. Regulator and lift handle installed on paint tank. To assemble the paint tank: 6. Connect the material hose to the fluid outlet adapter on the tank lid. 1. Apply Teflon tape to all male pipe threads. 2. Thread the lift handle into the center hole on the tank lid (see Figure 2) and secure with the hex nut. 7.
Spray Gun Assembly 2. Pattern Control: Adjusts the spray pattern from a round pattern to a wide fan. 3. Air Flow Control: Controls the fluid pressure inside the spray gun. Make sure all connections are tight enough to prevent air leaks but not so tight as to damage the tool. 4. Atomizing Cap: Controls the spray pattern from vertical to horizontal. Controls 5. Trigger: Two stage trigger. Stage one only releases compressed air for blowing off the work piece. Stage two sprays material.
OPERATIONS Tank Regulator The pressure regulator on the paint tank controls the amount of pressure in the paint tank and the spray gun. The following are operating guidelines for internal and external spray guns: Internal Mix Guns: Use higher tank pressures up to the full amount of air pressure being delivered to the spray gun. However, do not exceed 50 PSI at the spray gun or in the paint tank. External Mix Guns: Use lower tank pressures—approximately 12 PSI for most external mix guns.
Tank Setup To use your paint tank and spray gun: 1. Thoroughly mix and strain your paint to remove undissolved particles that could block the flow of material to the gun. Read the manual before operation. Become familiar with this tool, its safety instructions, and its operation before beginning any work. Serious personal injury may result if safety or operational information is not understood or followed. 2.
Spraying The Model H8225 siphon feed spray gun set is designed to spray a wide variety of materials such as lacquers, stains, primers, multi-component paints, clear coats, acrylics, epoxies etc. It is ideal for auto body and woodworking projects. 8. Use the pattern control knob to adjust the spray fan to your desired pattern. To use your spray gun: 1.
�� ��� 12. Overlap each stroke by 50%. This will ensure even coverage as shown in Figure 6. Overlapping less than 50%, as shown in the figure to the right, may lead to missed spots or streaky results. Holes Stroke Figure 7. Set up for horizontal stroke direction with vertical fan pattern. Yes No Figure 6. Overlap technique. Stroke 13. The spray stroke should have even consistency and parallel edges. If it doesn't, please refer to Troubleshooting on Page 15. Holes Holes Figure 8.
CLEANING AND LUBRICATION Cleaning the Tank 3. Turn the tank regulator T-handle counterclockwise until you no longer feel spring tension. Proper cleaning is the best way to ensure trouble free performance from your paint tank. If your tank is not thoroughly cleaned, damage and poor operation will result. Problems caused by improper cleaning will not be covered by the warranty. Clean the tank immediately after each use. To clean your paint tank: 1. DISCONNECT THE AIR SUPPLY FROM THE TANK! 4.
Cleaning the Spray Gun Proper cleaning is the best way to ensure trouble free performance from your spray gun. If your gun is not thoroughly cleaned, damage and poor spraying will result. Problems caused by improper cleaning will not be covered by the warranty. Clean the spray gun immediately after each use. 5. Unscrew the atomizing cap and the fluid tip. The fully disassembled gun should look like Figure 11. 6. Rinse these parts thoroughly in solvent, then dry with compressed air or let air dry.
Spray Gun Lubrication A. B. C. D. E. D A Lubricate the following areas with a nonsilicon spray gun lubricant after cleaning. Atomizing Cap Threads Air Valve Packing Trigger Pin Pattern Control Fluid Control Knob Allow the lubricant to coat threads, and run into gun body to lubricate all moving parts and seals. B E C Figure 12. General lubrication points.
Tank Troubleshooting Symptom Possible Cause Solution Air escaping from regulator port. 1. Broken or damaged diaphragm in tank regulator. 1. Replace tank regulator. Pressure dropping slowly on regulator. 1. Dirty or worn valve seat in regulator. 2. Loose air fittings leaking air. 1. Replace tank regulator. 1. Defective lid gasket. 2. Wing screw loose. 1. Replace lid gasket. 2. Tighten wing screws evenly. 3. Clean rim and gasket. Fluid or air leak at lid gasket. 3.
Spray Gun Troubleshooting Symptom Possible Cause Solution Fluttering or spitting spray. 1. Dry or worn fluid tip seat permits air to seep into fluid passage. 1. Tighten fluid tip or replace seat with new one. 2. Material level too low. 2. Add material. 3. Fluid tip or filter obstructed. 3. Clean. 4. Dry needle packing. 4. Lubricate needle. 1. Atomizing cap holes are obstructed. 1. Clear holes. 2. Build-up on top or bottom of fluid tip. 2. Clean. 3.
Symptom Possible Cause Solution Excessive overspray. 1. Fluid pressure too high. 2. Gun is too far from surface. 1. Reduce fluid pressure. 2. Keep gun at recommended distance. 3. Slow down and maintain consistent, even parallel stroke. 3. Spraying too fast. Unable to control spray fan. 1. Pattern adjustment screw is not seating properly. 2. Atomizing cap is loose. 1. Clean or replace. Runs and sags. 1. Damaged seal. 1. Replace damaged seals. Material leaks from gun. 1. Fluid tip loose. 2.
H8225 PAINT TANK �� �� �� �� �� �� �� � � � �� �� � �� �� � �� � � � � �� �� �� REF PART # DESCRIPTION REF PART # DESCRIPTION 1 2 3 4 5 6 7 8 9 10 11 FLUID OUTLET ADAPTER FLUID TUBE HINGE PIN COTTER PIN LID CLAMP WING SCREW M10-1.5 X 40 FLUID OUTLET ADAPTER HEX NUT M8-1.25 HANDLE M8-1.
H8225 SPRAY GUN ��� ��� ��� ��� ��� ��� ��� ��� ��� ��� ��� ��� ��� ��� ��� ��� ��� ��� ��� ��� ��� ��� ��� ��� ��� ��� ��� ��� ��� ��� ��� REF PART # DESCRIPTION REF PART # DESCRIPTION 101 102 103 104 105 106 107 108 109 110 111 112 113 114 115 116 AIR INLET PLUG BLOCK GUN BODY DIRECTION PIPE FLUID ADJ. NEEDLE SPECIAL WASHER FLUID CONTROL SCREW FLUID ADJ. SCREW PATTERN ADJ. SCREW O-RING 2.5 X 2.1 PATTERN ADJ. KNOB SNAP RETAINER PATTERN ADJ.