ǵ DIGITAL TERRESTRIAL RECEIVER DTR 1521 DEUTSCH ENGLISH FRANÇAIS
CONTENTS ____________________________________________ 2 4 General information 4 4 4 Packing contents Receiving digital stations Special features of your digital receiver 5 Set-up and safety 6-8 Overview 6 7 8 The front of the digital receiver The back of the digital receiver The remote control 9-10 Connection/preparation 9 9 9 10 10 10 Connecting the antenna Connecting the television Connecting a video recorder Connecting a hi-fi system Connecting the power cord Putting batteries in the remot
22-25 Additional functions 22 22 22 22 22-23 24-25 25 Selecting the audio language Displaying and hiding subtitles Switching audio channels Calling up teletext Timer functions Recording timer Switching the voltage for an active indoor antenna on and off 26-28 Special settings 26-27 28 System settings Connecting the digital receiver to a PC 29-30 Information 29 30 Technical data Troubleshooting ENGLISH CONTENTS _________________________________________________ 3
GENERAL INFORMATION __________________ Packing contents 1 2 3 4 5 6 DTR 1521 Digital Terrestrial Receiver Remote control 2 batteries for the remote control (2 x 1.5 V, Micro type, e.g. R03 AAA) Euro/AV (Scart) cable Power cord Operating manual Receiving digital stations To use your DTR 1521 digital receiver you need a digital outdoor or indoor antenna. Unlike analogue broadcasting, not every station has its own transmission frequency.
SET-UP AND SAFETY ___________________________ °C C To ensure that this high quality, easy-to-use digital receiver gives you lasting entertainment and enjoyment, please note the following information. 2h This digital receiver is designed to receive, record and play back video and audio signals. Any other use is expressly prohibited. -T -T When setting up the digital receiver, make sure it is in a horizontal position and that the mains socket is easily accessible.
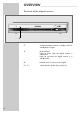
OVERVIEW ____________________________________________ The front of the digital receiver -T A Ǽ 6 Switches the digital receiver to standby, and from standby back on again. A Mode indicator. Lights up green when the digital receiver is switched on. Lights up red when the digital receiver is in standby mode. IR Infrared sensor for remote control signals. P+ P– Switch channels up and down one by one.
OVERVIEW ____________________________________________ The back of the digital receiver OUTPUT TER. DIGITAL AUDIO OUT EURO AV 2 VCR EURO AV 1 DO NOT REMOVE COVER HAZARD - LIVE PARTS RS 232 TV G.RP 42 Serial Number VHF/UHF 5V max. 30 mA 220-240 V 50/60 Hz 10 W DIGITAL TERRESTRIAL RECEIVER DTR 1521 INPUT TER. VHF/UHF 5 V ј max. 30 mA Antenna socket for the digital rooftop or indoor antenna. OUTPUT TER. Antenna socket for looping through an analogue antenna signal.
OVERVIEW ____________________________________________ The remote control Ǽ DTV/VCR MENU EXIT CH Switches the digital receiver to standby, and from standby to the channel last selected. DTV/VCR Switches between TV mode (internal output signal) and external input signal (e.g. VCR). 1…0 Numerical keys for directly entering menu commands, channel numbers, date, time etc. MENU Opens the main menu. EXIT For quitting the current menu. Red button Scrolls back a page in teletext mode.
CONNECTION/PREPARATION _____ TV INPUT TER. OUTPUT TER. R DIGITAL AUDIO OUT EURO AV 2 VCR EURO AV 1 DO NOT REMOVE COVER HAZARD - LIVE PARTS RS 232 TV L DIGITAL TERRESTRIAL RECEIVER DTR 1521 AV2 R DEC. - AV 2 L AV1 220-240 V 50/60 Hz 10 W G.RP 42 Serial Number VHF/UHF 5V max. 30 mA AUDIO L O U T I N R R EURO - AV 1 ń Connecting the antenna INPUT TER. OUTPUT TER. 1 DIGITAL AUDIO OUT Plug the cable of the indoor or roof antenna into the »INPUT TER.
CONNECTION/PREPARATION________________________ Connecting a hi-fi system INPUT TER. OUTPUT TER. DIGITAL AUDIO OUT EUR 1 VHF/UHF 5V max. 30 mA Plug a standard coaxial cable into the »DIGITAL AUDIO OUT« socket on the digital receiver and the corresponding socket on the hi-fi. Connecting the power cord 1 DO NOT REMOVE COVER HAZARD - LIVE PARTS RS 232 G.RP 42 ber Plug the power cord »220-240 V ~ 50/60 Hz« into the wall socket.
SETTINGS ______________________________________________ The digital receiver is set at the factory so that it is ready for operation after you connect it. The precondition is a functioning digital antenna system. You only need to correct the local time difference, select the menu language (default »German«) and then perform a station search. 1 2 Switch on the television and select the AV input for the digital receiver. Press »Ǽ« to switch on the digital receiver from standby mode.
SETTINGS ______________________________________________ Setting the menu language Channels Favorites Settings Scan Timer 1 Press »MENU« to open the main menu. 2 Select the main menu item »Settings« with »VOL – a« or »VOL + s« and press »OK« to confirm. 3 Select »Language Settings« with »CH + A« or »CH – S« and press »OK« to confirm. 4 Select »Menu Language« with »CH + A« or »CH – S«. 5 Select the language with »VOL – a« or »VOL + s«. 6 Press »EXIT« three times to finish the setting.
SETTINGS ______________________________________________ Manual station search You can look for stations directly using the manual station search. Channels Favorites Scan Mode Settings Scan 1 Select the main menu item »Scan« with »VOL – a« or »VOL + s« and press »OK« to confirm. 2 Select »Scan Mode« with »CH + A« or »CH – S« and press »VOL – a« or »VOL + s« to select »Manual Scan«. 3 Select »Channel Number« with »CH + A« or »CH – S« and use the numerical buttons »1 ...
SETTINGS ______________________________________________ Editing the station list You can change the order of preset stations as required and delete stations you do not need. Before editing a station according to your needs you may carry out a preparatory or basic sorting. Sorting stations basicly Channels Favorites Localtime/Timer Language Settings Video Output Settings Scan 1 Select the main menu item »Settings« with »VOL – a« or »VOL + s« and press »OK« to confirm.
SETTINGS ______________________________________________ Deleting individual stations Channels Favorites Settings Scan 1 Select the main menu item »Channels« with »VOL – a« or »VOL + s« and press »OK« to confirm. – The TV station list appears. 2 Press »CH + A« or »CH – S« to select the station. 3 Select the option »1-Delete« with the numerical button »1« and press »OK« to confirm. 4 Press »EXIT« twice to finish the setting. Timer TV 1. ARD 2. ZDF 3.
SETTINGS ______________________________________________ List of favourite stations Creating groups of favourites You can select your favourite stations and save them in a group. Channels Favorites Settings Scan Select the main menu item »Favorites« with »VOL – a« or »VOL + s« and press »OK« to confirm. 2 Select the option »1-Add« using the numerical button »1«. 3 Select the group of favourites with »CH + A« or »CH – S« and press »OK« to confirm.
SETTINGS ______________________________________________ Adjusting the digital receiver to the television set Specifying the video signal at the Euro AV output You can choose »CVBS« (normal picture quality) or »RGB« (high picture quality). The default setting is »RGB«. Channels Favorites Localtime/Timer Language Settings Settings Scan 1 Select the main menu item »Settings« with »VOL – a« or »VOL + s« and press »OK« to confirm.
SETTINGS ______________________________________________ Language settings Selecting the audio language Here you can find information on the number of audio channels (i.e. the language of the current TV programme). With programmes broadcast in more than one language, you can select the language you prefer. Channels Favorites Localtime/Timer Settings Scan Timer English 2 Select »Language Settings« with »CH + A« or »CH – S« and press »OK« to confirm.
BASIC FUNCTIONS ______________________________ Switching on and off 1 Press »Ǽ« to switch on the digital receiver from standby mode. – The mode indicator lights up green. 2 Press »Ǽ« to switch the digital receiver to standby mode. – The mode indicator lights up red. Note: The only way to disconnect the digital receiver from the mains supply is to unplug the mains adapter. Mode selection You can choose between TV and RADIO modes. 1 Press »TV/RADIO« to select the mode.
BASIC FUNCTIONS ______________________________ Muting the sound ı 1 Press »MUTE « to mute the sound. – Display: » «. 2 Press »MUTE « to turn the sound back on. – Display: » « disappears. – You can hear the sound at the volume previously set. ı ı ı Selecting preset channels 1 To switch up or down channels one by one, press »P + « or »P –« on the device or »CH + A« or »CH – S« on the remote control. 2 To run through the channels, press and hold down »CH + A« or »CH – S« on the remote control.
BASIC FUNCTIONS ______________________________ Electronic programme guide (EPG) The TV guide provides information on the current station such as the title and descriptions of the current and next programmes. Service Name 09:30 10:00 ARD a No Information ZDF No Information SAT.1 No Information Ľ arte 11:00 s Press »EPG« to open the electronic programme guide. 2 Press »CH + A« or »CH – S« to switch between stations.
ADDITIONAL FUNCTIONS _________________ Selecting the audio language If a programme is broadcast in more than one language, you can select the language directly. 1 Select the language by pressing »LANG« repeatedly. Displaying and hiding subtitles 1 Press »SUBTITLE« to show the subtitles. – »Subtitle On« briefly appears on the screen. 2 Press »SUBTITLE« again to hide the subtitles. – »Subtitle Off« briefly appears on the screen.
ADDITIONAL FUNCTIONS _________________ Channels Favorites Settings Scan GMT+1 Localtime/Timer Time Zone Language Settings Current Time Video Output Auto Power Off On Sort Channels Time: 00:00 00 Auto Power On Off Time: 00:00 System Setting 5 Select »On« with »VOL – a« or »VOL + s«. as 6 Select »Time« with »CH + A« or »CH – S«. as 7 Enter the hours with the numerical buttons »1 ... 0«. Press »VOL + s« to switch to the minutes. 8 Enter the minutes with the numerical buttons »1 ...
ADDITIONAL FUNCTIONS _________________ Recording timer You can program up to 10 different recordings using the recording timer. The times of the recordings may not overlap. Your video recorder must also be programmed accordingly. Programming the recording timer Channels Favorites Settings Timer: 1 Start Time: 00:00 Stop Time: 00:00 Date: dd/mm/yy 00/00/00 Scan Timer as < OK > -Select Channel 4.
ADDITIONAL FUNCTIONS _________________ Deactivating a programmed recording Channels Favorites Settings 1 Timer : Scan as Start Time: 20:15 Stop Time: 21:45 Date: dd/mm/yy 28/03/05 < OK > -Select Channel 1.ARD Status: Off 1 Select the main menu item »Timer« with »VOL – a« or »VOL + s« and press »OK« to confirm. 2 Select »Timer« with »CH + A« or »CH – S« and select the timer number with »VOL – a« or »VOL + s«.
SPECIAL SETTINGS ______________________________ System settings The system settings are protected by the same code you use to block stations. Channels Favorites Setiings Scan Timer 1 Press »MENU« to open the main menu. 2 Select the main menu item »Settings« with »VOL – a« or »VOL + s« and press »OK« to confirm. 3 Select »System Setting« with »CH + A« or »CH – S« and press »OK« to confirm. 4 Enter the six-digit code using the numerical buttons »1 ... 0« and press »OK« to confirm.
SPECIAL SETTINGS ______________________________ Resetting the digital receiver to its original state Channels Favorites Localtime/Timer Language Settings Video Output Settings Scan Timer System Info Change Pin Code With this function you can delete all custom settings and reset the digital receiver to its original state. 1 Select »Factory Reset« with »CH + A« or »CH – S« and press »OK« to confirm. – All custom settings are deleted. 2 Press »EXIT« three times to finish the setting.
SPECIAL SETTINGS ______________________________ Connecting the digital receiver to a PC The serial interface »RS 232« allows you to connect to a PC. You can use this connection for software updates and for uploading and downloading other data. To do this, you need a serial cable with a 1:1 assignment, i.e. all the pins are directly connected. Depending on the PC, the cable needs either a 9- or a 15-pin D-SUB socket, and a 9-pin D-SUB plug for connection to the receiver.
INFORMATION_____________________________________ Technical data TV/radio stations: 500 in total Reception range: 174 – 230 MHz (VHF) 470 – 862 MHz (UHF) Hyperband tuner with: – VHF/UHF (Band III-Band V) – Antenna loop-through function – Bandwidth: 7MHz and 8MHz – COFDM modes: 2k and 8k – Constellation: 16QAM, 64QAM, QPSK – Antenna power supply +5 V/ max. 40 mA Video data rate: Max.
INFORMATION ___________________________________________ Troubleshooting If a fault occurs, first refer to this information before you take the digital receiver for repair. If you are unable to rectify the fault using the information given here, contact your local dealer or service specialist. Under no circumstances should you attempt to repair the digital receiver yourself, as this will invalidate the guarantee.