FLAMMABLE VAPOUR IGNITION RESISTANT POWER VENTED WATER HEATER INSTALLATION AND OPERATING INSTRUCTIONS Read and understand these instructions thoroughly before starting. WARNING: Improper installation, adjustment, alteration, service, or maintenance can cause injury or property damage. Refer to this manual. For assistance or additional information, consult a qualified installer, service agency, or the gas utility.
This page intentionally left blank. May be used for notes or to record other installation information.
TABLE OF CONTENTS I) Introduction . . . . . . . . . . . . . . . . . . . . . . . . . . . . . . . . . . . . . . . . . . . . . . . 4 Consumer Responsibilities . . . . . . . . . . . . . . . . . . . . . . . . . . . . . . . . . . . . . II) Safety . . . . . . . . . . . . . . . . . . . . . . . . . . . . . . . . . . . . . . . . . . . . . . . . . . . . 5 Code Requirements For Installations In Canada . . . . . . . . . . . . . . . . . . . . Code Requirements For Installations In The United States . . . . . . . . . . .
Your safety and the safety of others is very important. We have provided many important safety messages in this manual and on your appliance. Always read and obey all safety messages. This is the safety alert symbol. This symbol alerts you to potential hazards that can kill or hurt you and others. All safety messages will follow the safety alert symbol and either the word “DANGER” or “WARNING”. DANGER You can be killed or seriously injured if you don’t immediately follow instructions.
II) SAFETY This water heater is design-certified by CSA International as a Category I, non-direct vented water heater which takes its combustion air either from the installation area or from air ducted to the unit from the outside. In addition to the installation instructions found in this manual, the water heater must be installed in accordance with all local and provincial or state codes or, in the absence of such, with the latest editions of the following specifications.
Relief Valve Requirements (T&P) All water heaters must be fitted with a proper temperature and pressure relief valve. These valves must be certified as meeting the requirements of the “Standard For Relief Valves For Hot Water Supply Systems, ANSI Z21.22/CSA 4.4”. If this water heater has been exposed to flooding, freezing, fire or any unusual condition, do not put it into operation until it has been inspected and approved by a qualified service technician.
to the area adjacent to the water heater or to lower floors of the structure (see “IMPORTANT” notice on the previous page). Before installing this water heater, consideration and planning must be given to the following details: • Proximity to walls and other objects (see “Clearance and Accessibility”). • Access to gas supply (see “Gas Supply”). • Routing and support of the vent piping and termination (see “Venting”).
This gas piping must be installed in accordance with all local and provincial or state codes or, in the absence of such, the latest edition of “Natural Gas and Propane Installation Code” CAN/CSA-B149.1 (Canada), or “National Fuel Gas Code” ANSI Z223.1 (NFPA 54) (U.S.A.). Note: When installing gas piping, apply sealing compounds approved for use with natural and propane gas. 1. Install a readily accessible manual shut-off valve in the gas supply line as recommended by the local utility.
Air Requirements Important: Air for combustion and ventilation must not come from a corrosive atmosphere. Any failure due to corrosive elements in the atmosphere is excluded from warranty coverage.
Confined Space Air Requirements for U.S. Installations (a) PERMANENT OPENINGS CONFINED SPACE UNCONFINED SPACE EQUIPMENT LOCATED IN CONFINED SPACES; ALL AIR FROM INSIDE THE BUILDING. (b) COMBUSTION AIR DUCT PERMANENT 300mm VENTILATION (12 in.) AIR. 300mm (12 in.) ABOVE GRADE OR SNOW LINE GRADE CONFINED SPACE BASEMENT INSTALLATION, EQUIPMENT LOCATED IN CONFINED SPACES; ALL AIR FROM OUTDOORS (c) 300mm (12 in.) OUTDOORS AIR DUCT 300mm (12 in.
Venting This water heater has a power vent system that discharges all it's combustion products outdoors. The heater must be properly vented for removal of exhaust gases. Correct installation of the vent pipe system is mandatory for the safe and efficient operation of this water heater and is an important factor in the life of the unit.
SEALANT ATTACH 90° TERMINATION ELBOW 305mm (12 in.) MIN. SEALANT GROUND LEVEL OR MAXIMUM SNOW LINE Figure 8 Vent Termination Exterior Installation BRACKET ATTACH 90° TERMINATION ELBOW 305mm (12 in.) MIN. VENT RISER SEALANT CONDENSATION TRAP & DRAIN GROUND LEVEL OR MAXIMUM SNOW LINE VENT PIPING MAY BE SLOPED IN ANY DIRECTION, AS LONG AS A WATER TRAP IS NOT CREATED IN THE VENTING SYSTEM. THE SLOPE SHOULD BE KEPT TO A MINIMUM SO AS NOT TO EXERT ANY UNDUE STRESS ON THE PIPE.
76mm (3 in.) MIN. LENGTH • TERMINATION MAY BE 90° ELBOW OR A “T” ELBOW • • • 450mm (18 in.) • • ROOF LINE • • • • A VENT USED IN A SPECIAL VENTING SYSTEM WITH POSITIVE VENT PRESSURE AND PASSING THROUGH A ROOF SHALL EXTEND AT LEAST 450mm (18 in.) ABOVE THE HIGHEST POINT WHERE IT PASSES THROUGH THE ROOF SURFACE AND ANY OTHER OBSTRUCTION WITHIN A HORIZONTAL DISTANCE OF 450mm (18 in.). A VERTICAL VENTING SYSTEM MUST BE SUPPORTED EVERY 2.4m (8 ft.). • • Support all horizontal pipe runs every 1.2m (4 ft.
Vent Pipe Runs All Power Vented water heaters generate a certain amount of operational noise. In order to minimize noise transmission to floor joists though hangers, place some soft material such as foam rubber, approximately 12mm (1/2 in.) thick, between hangers and the vent pipes. 1. Horizontal runs must not, under any circumstances, run downhill then run uphill thus forming a valley where condensation can accumulate and block the vent pipe. 2. Horizontal runs require a minimum 3mm (1/8 in.) rise per 1.
4. Tighten the upper gear clamp to ensure the vent pipe is firmly secured and gas tight. 5. Check that the lower gear clamp is firmly seated, secured and gas tight. WATER VENT PIPE HEATER SUFFIX SIZE MODEL PRESSURE SWITCH SETTING 6. As a final check, the vent pipe should be gently moved side to side and vertically. There should be no slippage or movement of the vent pipe within the coupling. 7. Seal around the termination assembly where it passes through the wall, inside and out, with silicone sealant.
FOLLOW THE TEMPERING VALVE MANUFACTURER'S INSTRUCTIONS LD CO TEMPERED WATER TO FIXTURE TER WA T&P VALVE AND DISCHARGE LINE HOT WATER OUTLET TEMPERING VALVE (SET TO 49°C (120°F)) COLD WATER INLET Figure 18 Tempering Valve Installation 5. Install a shut-off valve in the cold water inlet line. It should be located close to the water heater and be easily accessible. The owner/operator must be shown the location of this valve and be given instructions on how to use it to shut off the water to the heater.
in the water heater. The valve’s relief pressure must not exceed the working pressure of the water heater as stated on the data plate. Important: Only a new temperature and pressure relief valve should be used with your water heater. Do not use an old or existing valve as it may be damaged or not adequate for the working pressure of the new water heater. Do not place any valve between the relief valve and the tank. The Temperature and Pressure Relief Valve: • Must not be in contact with any electrical part.
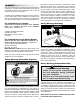
WARNING * ROTATE LEFT (CCW) TO REMOVE Electrical Shock Hazard • Disconnect power before servicing. • Replace all parts and panels before operating. • Failure to do so can result in death or electrical shock.
Installation Checklist Check Here Water Heater Location 1. Centrally located with the water piping system. Located as close to gas piping and vent pipe system as possible. 2. Located indoors and in a vertical position. Protected from freezing temperatures. 3. Proper clearances from combustible surfaces maintained and not installed directly on a carpeted floor. 4. Provisions made to protect the area from water damage. Drain pan installed and piped to an adequate drain. 5.
IV) LIGHTING & OPERATING INSTRUCTIONS FOR YOUR SAFETY READ BEFORE OPERATING POUR VOTRE SÉCURITÉ, LISEZ AVANT DE METTRE EN MARCHE WARNING: If you do not follow these instructions exactly, a fire or explosion may result causing property damage, personal injury or loss of life. ATTENTION: Quiconque ne respecte pas à la lettre les instructions dans la présente notice risque de déclencher un incendie ou une explosion entraînant des dommages, des blessures ou la mort. A. This appliance does not have a pilot.
V) OPERATION First Lighting CAUTION: Read before proceeding. If you do not follow these instructions exactly, a fire or explosion may result, causing property damage, personal injury or loss of life. This appliance is equipped with an ignition device, which automatically lights the pilot. Do not try to light manually with a match. The temperature dial is adjusted to its lowest temperature position when shipped from factory. Gas Control/Thermostat 12.
When using a gas fired water heater there is a risk of flammable vapours entering the combustion chamber, being ignited by the burner flame and causing a flashback. In order to detect such flammable vapours before they enter the combustion chamber, this water heater is equipped with a flammable vapour sensor (FVS). It is a chemical-absorption based sensor that is connected to the gas control/thermostat (see Figures 21 & 22).
Water Heater Operation WARNING: Keep the area around the heater clear and unobstructed. Figure 24 shows the water heater’s sequence of operation when a call for heat is initiated. The ignition control module will attempt to light the burner three times. If the ignition control does not detect ignition it will enter lockout mode, indicated by a three flash error code.
complaint associated with the anode rod is a “rotten egg smell” produced from the presence of hydrogen sulfide gas dissolved in the water. Do not remove this rod permanently as it will void any warranties, stated or implied. A special anode can be ordered if water odour or discolouration occurs. This rod may reduce, if not eliminate, water odour problems. The water supply system may require special filtration equipment from water conditioning company to successfully eliminate all water odour problems.
Temperature and Pressure Relief Valve WARNING • • • • VII) COMBO HEATING WARNING: Keep the area around the heater clear and unobstructed. Explosion Hazard If the temperature and pressure relief valve is dripping or leaking, have a licensed plumber repair it. Do not plug valve. Do not remove valve. Failure to follow these instructions can result in death or an explosion. Manually operate the temperature and pressure relief valve at least once a year to make sure it is working properly (see Figure 27).
Installation The heating mode may be one of the following options: A. A fan coil/air handler (Figure 28). B. A hydronic baseboard (finned tube) loop/In floor heating (Figure 29). The following is a list of requirements for the installation of the heating loop to the water heater. 1. Install shut-off valves and unions so that the water heater can be isolated from the heating module should servicing of the water heater become necessary. 2.
VIII) TROUBLESHOOTING GUIDE (Robertshaw 2000WDER) SYMPTOM POSSIBLE CAUSE(S) CORRECTIVE ACTION BLOWER WILL NOT START. 1. No Power to unit. 2. Thermostat setting too low. 3. Defective air pressure switch (must be open at start-up before blower is energized). 4. Defective blower. 5. Disconnected or loose wire. 6. Control locked-out. 1. Plug in power cord, check fuses/supply voltage. 2. Increase thermostat temperature setting. 3. Replace air pressure switch. 4. Replace blower. 5. Repair/reconnect wires. 6.
IX) PARTS REFERENCE ILLUSTRATION 1 2 3 4 5 28 27 26 31 29 6 30 25 23 24 22 21 6 REAR VIEW 20 7 19 8 32 33 34 35 9 18 17 10 11 36 12 37 13 14 16 38 15 41 FRONT VIEW 1. 2. 3. 4. 5. 6. 7. 8. 9. 10. 11. 12. 13. 14. 15. 16. 17. 18. 19. 20. 21.
~ Certificate of Warranty ~ Warranty Code: See Rating Label Serial Number prefix for Warranty Code. Reduced warranty period applies to Newfoundland.