GT 800/1/2/3 USER AND INSTALLATION MANUAL 1
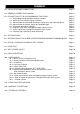
SUMMARY 1.0 - INSTALLATION AND CONNECTIONS Page. 3 2.0 - GENERAL CONNECTION DIAGRAM Page. 5 3.0 - DESCRIPTION OF THE PROGRAMMABLE FUNCTIONS 3.1 - Self-coding vehicle indicators impulses number 3.2 - Switches/Discriminators signals stabilizer 3.3 - Memorization of switches/discriminators signals only after actuator signals 3.4 - Memorisation of actuator signals of changeable type 3.5 - Anti-hijack door signal stabilizer 3.6 - Acoustic signal when arming/disarming the alarm system 3.
1.0 - INSTALLATION AND CONNECTIONS WARNINGS: - Place the GT800 alarm in the engine compartment, away from direct sources of water spray and high tension wiring. - Solder and isolate all connections. - Isolate the wires not connected. - The alarm system should be mounted by a professional installer. 1 - Connect the BROWN wire to O/E vehicle earth. 2 - Connect the RED wire to a permanent 12 volts supply (use the supplied 15 Amp fuse). 3 - Connect the PINK wire of the alarm (max.
14 - The RED/BROWN, YELLOW/BROWN, RED/GREY and YELLOW/GREY wires must be connected to the original vehicle central door locking system as indicated on the vehicles installation guides supplied by GT, or following the section DESCRIPTION OF THE ALARM SYSTEM ARMING/DISARMING COMMAND WIRES (Page 8). 15 - Connect the GREEN/YELLOW wire to O/E vehicle earth to carry out the DOORS LOCK/ UNLOCK SIGNALS SELF-CODING procedure and to carry out the RAPID TEST (page 8-9).
2.0 - GENERAL CONNECTION DIAGRAM LEGEND: = FUSE TO BE INSERTED 22 21 20 19 18 17 16 15 14 13 12 11 10 9 8 7 6 5 4 3 2 1 RED LED - Pos. 10 BLACK/RED - Pos. 14 AMP AMP LED/BUTTON BLACK - Pos. 17 ULTRASONIC TRANSDUCRES RED A MP A AM P RED - Pos. 10 WHITE RED WHITE POSITIVE +12 V 15A RED - Pos. 10 GREEN/BROWN - Pos. 2 EARTH BROWN - Pos. 9 COMFORT NEGATIVE COMMAND BONNET/BOOT PIN SWITCHES GREEN - Pos. 7 BLUE/VIOLET - Pos. 12 YELLOW - Pos.
3.0 - DESCRIPTION OF THE PROGRAMMABLE FUNCTIONS 3.1 - Self-coding vehicle indicators impulses number. When you enable this function it is possible to self-code the indicators flashes number to the alarm system when doors are locking (system arming) and when doors are unlocking (system disarming). 3.2 - Switches/Discriminators signals stabilizer. When you activate this function it is possible to recognize these signals to the alarm system if they would be of impulsive type (polling). 3.
ALARM SYSTEM FUNCTION NUMBER OF PRESSES OF THE LED BUTTON NUMBER OF LED BUTTON /LED FLASHES FOR THE FUNCTIONS STATUS CHECK LED BUTTON CONDITION The DEFAULT programming are in “bold” LED OFF LED ON Self-coding indicators impulses number 1 1 Disabled Enabled Switches/Discriminators signals stabilizer 2 2 Deactivated Activated Memorisation of switches/discriminators signals only after actuator signals 3 3 Disabled Enabled Memorisation of actuator signals of changeable type 4 4 Disabled
5.0 - DESCRIPTION OF THE ALARM SYSTEM ARMING/DISARMING COMMAND WIRES A - Using the RED/BROWN and RED/GREY wires you can arm and disarm the alarm using the original vehicle remote, or door key lock. - RED/BROWN WIRE: Connect to the vehicle wire that changes state when locking the doors. - RED/GREY WIRE: Connect to the vehicle wire that changes state when unlocking the doors. Note: with this connection the YELLOW/BROWN and YELLOW/GREY wires have to be connected to O/E vehicle earth.
6 - Unlock the vehicle using the original remote control, after a couple of seconds the alarm will emit 2 visual signals (indicators), and 3 acoustic signals indicating the end of self coding and the doors will unlock. Warning: The procedure can be considered carried out correctly only if the operations are in compliance with the points 5 and 6. On the contrary wait that the alarm system comes out automatically from the procedure (the alarm system will emit an acoustic signal).
The RAPID TEST procedure can be stopped in two ways: A - After about 2 minutes from the test function activation, the alarm system emits a long acoustic signal and it comes out automatically if any other sensor has not been activated. B - Pressing the door locking button from the original vehicle handset the alarm system emits a long acoustic signal and it comes out from the function.
10 .0 - USER MANUAL 10.1 - ALARM SYSTEM ARMING/DISARMING. Locking the doors using the original remote control handset, the alarm system will arm and it will generate 1 acoustic signal (if the function is activated you will obtain also a visual signal supplied by the indicators). Unlocking the doors using the original remote control handset, the alarm system will disarm and it will generate 2 acoustic signals (if the function is activated you will obtain also 2 visual signals supplied by the indicators).
10.6 - EMERGENCY DISARMING WITH “GT CARD CODE”. In case of emergency (i.e. the battery of the original vehicle handset is discharged, etc.) it is possible to disarm the alarm system using the GT CARD CODE. It is necessary to carry out the following procedure: 1 - Take the “GT CARD CODE” which you have received at the time of installation. 2 - Open the door with the original vehicle key, the alarm starts sounding for about 30 seconds. 3 - Enter the vehicle and close the door.
In case of Hijack ... 1 - If the ANTI-HIJACK FUNCTION has been reserved, when the driver’s door is opened, the LED BUTTON will extinguish. 2 - When the door is closed and after approx. 60 seconds the ANTI-HIJACK will activate (ignition ON or OFF). All input triggers circuits are active (boot, bonnet, doors and ignition). When the ignition is switched OFF the vehicle will be immobilised and you will not be able to start the vehicle.
12.0 - WARRANTY CONDITIONS This Certificate should be kept in a safe place and produced for verification should technical assistance be required. Inability to produce this Certificate may affect your warranty rights. Warranty period begins from date of purchase and is valid for 24 months. Should technical assistance be required during the warranty period, you should take your vehicle and this Certificate to either the original installer or the nearest GT Auto Alarm Service Centre for inspection.
13.0 - TECHNICAL FEATURES GT800: - Input voltage - Current draw (Disarmed alarm) - Current draw (Armed alarm) - Positive output when the alarm is armed - Negative intermittent output in alarm - Engine immobilisation relay contact capacity - Operating temperature - 5 sec. delay time when arming - 60 sec.
Getronic S.r.l. Via Calcinate no. 12 21026 Gavirate (VA) Italy Tel. +39 0332 756011 Fax + 39 0332 731162 www.gtalarm.it InstGT800UKRev00.