
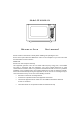
User's Manual

9
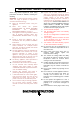
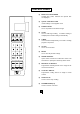
SIGNALS DURING OVEN SETTINGS
ONE SIGNAL: Oven accepts the entry.
TWO SIGNALS: Oven does not accept the entry, check and try again.
SETTING THE CLOCK
1. Touch CLOCK pad.
2. Use the number pads to enter the correct
time.
3. Touch CLOCK pad again.
NOTE:
When the oven is first plugged in or when power
resumes after a power interruption, the display will
show ENTER CLOCK TIME. If you prefer to not
have the clock displayed, touch RESET.
·You can check the clock time while cooking is in
progress by touching the CLOCK pad.
SETTING THE OVER TIMER
1. Touch TIMER.
2. Enter the amount of time by touching the
number pads.
3. Touch START/STOP.
NOTE:
·Time countdown can be seen in display for 5
seconds before clock or cooking time is returned
to display.
·Touch TIMER and then touch RESET to cancel
TIMER during timing process.
SETTING A COOKING PROGRAM
A. One-stage Cooking
1. Use the number pads to set a cooking time.
You can set a cooking time from one second
to 99 minutes and 99 seconds.
2. If you want to set a power level other than
100% power, touch POWER LEVEL, and
then use the number pads to enter the power
level.
3. Touch START/STOP to start cooking.
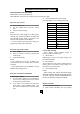
Use single digits to set a cooking power level:
Number pad Cooking power
1,0 100%
9 90%
8 80%
7 70%
6 60%
5 50%
4 40%
3 30%
2 20%
1 10%
0 0%
B. Two-stage Cooking
Some recipes require different stages of
cooking at different temperatures.
1. SET STAGE 1:
Follow steps 1 and 2 in “One-stage Cooking”. DO
NOT TOUCH START
2. SET STAGE 2:
Touch COOK then enter proper cooking time and
(lower) power level. (Most 2-stage recipes use
lower power for second stage.)
3. Touch START/STOP.
NOTE:
·
After cooking, the system will sound beeps
with END in display. And the beeps will continue
to sound every two minutes automatically until
the door is opened or any pad is touched.
SPEED DEFROST
1. Touch SPEED DEFROST.
2. Enter desired defrosting time by touching
O
O
P
P
E
E
R
R
A
A
T
T
I
I
O
O
N
N
I
I
N
N
S
S
T
T
R
R
U
U
C
C
T
T
I
I
O
O
N
N
S
S