
User guide

O
O
p
p
e
e
r
r
a
a
t
t
i
i
n
n
g
g
I
I
n
n
s
s
t
t
r
r
u
u
c
c
t
t
i
i
o
o
n
n
s
s
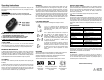
The instrument is a non-contact infrared laser thermometer. Simply aim the
thermometer at the target and press the ‘Scan key’ to display the surface
temperature.
Laser Information:
By partially pressing the ‘Scan key’, the device will measure the
temperature of the target. When the ‘Scan key’ is fully depressed, the
laser operates.
CAUTION!
1. WHEN DEVICE IS IN USE, DO NOT LOOK DIRECTLY INTO THE LASER
BEAM–PERMANENT EYE DAMAGE MAY RESULT.
2. USE EXTREME CAUTION WHEN OPERATING THE LASER.
3. NEVER POINT THE DEVICE TOWARD ANYONE’S EYES.
4. KEEP OUT OF REACH OF CHILDREN.
°C OR °F MODE
To change the units from °C to °F or from °F to °C, first turn the instrument
ON by pressing the ‘Scan key’, then press the ‘Mode key’ four times, the ‘°C’
or ‘°F’ symbol will flash, press the ‘Scan key’ to change to temperature units.
MINIMUM OR MAXIMUM MODE
To utilize the thermometer’s Minimum or Maximum mode, turn the instrument
ON by pressing the ‘Scan key’, press the ‘Mode key’ once for Minimum, twice
for Maximum. The ‘MIN’ or ‘MAX’ icon will flash, then press the ‘Scan key’ to
set operation for the MIN or MAX mode. The thermometer will display the MIN
or MAX temperature value measured while the Scan key was pressed.
LOCK MODE
The LOCK mode continuously monitors temperature without pressing the
SCAN key.
To utilize the thermometer’s LOCK mode, turn the instrument ON by pressing
the ‘Scan key’, then press the ‘Mode key’ three times for the LOCK mode
function. The LOCK icon will flash, then press the ‘Scan key’ to confirm and
set the LOCK mode. The thermometer will continuously display temperature
for up to 60 minutes or until the ‘Scan key’ is pressed again.
EMISSIVITY
The infrared thermometer has a factory default emissivity setting of 0.95. The
emissivity of the thermometer can be changed from 0.05 (5E) to 1.00 (100E),
but changes should only be made by experienced personnel. To change
emissivity, turn the instrument ON by pressing the ‘Scan key’, then press the
‘Mode key’ five times to select the emissivity function. The 95E will flash on the
LCD screen, then press the ‘Scan key’ to adjust the emissivity value, press the
‘Mode key’ again to set the desired emissivity value and exit the set-up screen.
For information relating to the emissivity of specific materials, please contact
the nearest retailer. Caution: non-contact infrared thermometers are not
recommended for measuring the temperature of shiny or polished metals.
LCD ERROR MESSAGES
The thermometer incorporates visual diagnostic messages as follows:
「 」
‘Hi’ or ’Lo’
is displayed when the temperature being
measured is outside of the range of the instrument, ‘Hi’
when higher than +250°C (482°F) and ‘Lo’
when lower
than –55°C (-67°F).
「 」
「 」
‘Er2’
is displayed when the thermometer is exposed to
rapid changes in the ambient temperature. ‘Er3’
is
displayed when the ambient temperature of the
thermometer EXCEEDS 0°C (32°F) OR +50°C (122°F)
.
In both cases you should allow plenty of time (minimum
30 minutes) for the thermometer to stabilize
to the
working/room temperature.
「 」
「 」
For all other error messages it is necessary to reset the
thermometer. To reset it, turn the instrument off, remove
the battery and wait for a minimum of one minute, reinsert
the battery and turn ON
. If the error message remains
please contact th
e Service Department for further
assistance.
BATTERIES
The thermometer has two separate batteries. The battery closer to the side of
the laser beam output is for laser operation only. The other battery is
dedicated to temperature measurements. The thermometer can measure
temperature accurately, even without the laser battery.
The thermometer provides a visual indication of battery status as follows:
‘
Battery OK
’
:
measurements
are possible
‘
Battery Low
’
: battery needs to
be replaced, measurements
are possible
‘
Battery
Depleted’
:
measurements are
not possible
BATTERY REPLACEMENT
When the ‘Low Battery’ icon indicates the battery is low, the battery should be
replaced immediately with a CR2032 lithium cell. The battery is located under
the twist cover on the back of the thermometer. Please note: It is important to
turn the instrument OFF before replacing the battery otherwise the
thermometer may malfunction.
Dispose of used batteries properly and keep away from children.
STORAGE & CLEANING
The sensor lens is the most delicate part of the thermometer. The lens should
be kept clean at all times, care should be taken when cleaning the lens using
only a soft cloth or cotton swab with water or medical alcohol, allowing the lens
to fully dry before using it, do not submerge any part of the thermometer. The
thermometer should be stored at room temperature between -20 to 65°C (4 to
149°F).
SPECIFICATIONS
Measurement Range
-
55 to +250
°C
(
-
67
to 48
2
°F
)
Ambient Operating Range
0 to 50°C
(32
to 122°F
)
Accuracy
±
2% of reading or
±
2
°
C
(4
°
F)
whichever is
greater
Resolution
(-9.9 to 199.9°C)
0.1
°C
/ 0.1
°F
(s
electable
)
Response Time
(90%)
1 second
Distance
-
to
-
Spot
ratio
(field-of-view)
6:1
(i.e., measures a 1
-
inch spot at a
6-inch distance)
Emissivity
Range
0.95
default
–
adjustable
from
0.05 to 1.00
Battery Life
T
yp. 40hr, minimum 30hr
(auto power OFF after 15 seconds)
Battery
2 CR2032 batteries
Dimensions
22.5 x 50 x 103mm(0.9×2.0×4.0 inch)
Weight
65 grams (2.29 oz)including
batteries
EMC/RFI
Readings may be affected if the instrument is operated within radio frequency
electromagnetic field strength of approximately 3 volts per meter, but the
performance of the instrument will not be affected.
WARRANTY
The thermometer is guaranteed for a period of one year from the date of
purchase against mechanical and electrical manufacturing defects. There are
no user serviceable parts inside the instrument. Any attempted repair by
unauthorized persons voids the warranty.
Infrared Thermometer by: