
User Manual
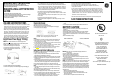

USE AND CARE INSTRUCTIONS
• When the product is placed on a live tree, the tree should be well
maintained and fresh. Do not place on live trees in which the needles
are brown or break off easily. Keep the tree holder filled with water.
• If the product is placed on a tree, the tree should be well secured and stable.
• Before using, or reusing, inspect product carefully. Discard any products
that have cut, damaged or frayed wire insulation or cords, cracks in the
lampholders or enclosures, loose connections, or exposed copper wire.
•
When storing the product, carefully remove the product from wherever
it is placed, including trees, branches, or bushes, to avoid any undue
strain or stress on the product conductors, connections and wires.
• When not in use, store neatly in a cool, dry location protected from sunlight.
Install Class 2 Power Supply To String:
NOTE:
Use only this GE branded, Class 2 Power Supply, Model
SA3A-050-3000, manufactured by TDC that was provided with this product.
DO NOT use this adapter with any other product.
1. Remove the Power Supply from its packing box.
2. The LED string is fitted with a 2-pronged fitting.
3. Align the notch in fitting with the inner tab on end
of Power Supply
{Fig. 1}
4. Fully insert the fitting into the Power Supply
{Fig. 2}
5. Screw the collar completely onto the Power Supply turning clockwise
{Fig. 3
}
Operate the Remote
:
1. Remove the remote from its packing box.
Note:
The batteries were pre-installed at the factory.
2. Pull out the plastic film from the battery cover to energize the remote.
{Fig. 1}
3. The remote has two buttons
{Fig. 2}:
a.
ON/OFF
– Press to turn the set OFF; press again to turn the set ON.
b.
Function
– Press to change the light pattern to the next mode.
NOTES:
1. Fully inserting the plug on the Class 2 Power Supply into a working outlet energizes the string.
2. When using the remote to turn ON your set there may be up to a 2 second delay
before the light pattern starts working.
3. To change light patterns it is recommended to wait 2 seconds each time after pressing
the Function button until you reach the desired pattern.
4. If for any reason the signal from the remote (transmitter) to the control box (receiver)
hangs up, please turn off and then restart the power to the set.
5. If a power interruption, the system’s memory keeps the last light pattern displayed.
6
.
The maximum effective operating distance of the remote is 33
′
(10m)
Setting Same Light Pattern On Multiple Sets
Before installing your sets you will need to preset each string to the same light pattern.
1. Plug one set into a working 120V outlet.
2. Using any remote press the Function button until you have selected the desired
lighting effect and note that pattern from the remote.
3. Unplug the set and then plug in the next set into the same outlet for ease of controlling.
4. With the remote follow Steps 2 and 3 setting the same light pattern (same function )
as the previous set.
5. When the strings are all set to the same function, power up all sets using multiple
outlets. They will all light displaying the same pattern as the control module contains
a built-in memory function. Once plugged in each set will start through their pattern.
6.To have all sets start together, press OFF on your remote and now press ON.
7. Install your sets. Follow step 6 to get all your sets operating on the same light pattern.
Notes:
1. With all sets lighted, pressing the Function button will change all sets to the same
(next) pattern.
2. These are Radio Frequency controlled devices. ALL sets within the effective range
will be affected and controlled using any one remote.
3. To have different lighting patterns, in Step 2 set each string to a different function.
4. To group sets together to their own function follow the above setting one group to its
same function and then the second to their same yet different function.
5. If used with a mechanical/digital timer, only one timer must control all sets. In this
case, do not turn sets off using the remote or sets will not turn on with timer.
Fig. 2
Fig. 3
Fig.1
Fig. 1
Fig. 2
6.
Setting the same light pattern works ONLY with lights sets having the same number
of LEDs.
7. Due to component tolerances there will be cycle time differences between sets.
BATTERY CAUTION:
•
Always purchase the correct size and grade of battery most suitable for the
intended use.
• Replace all batteries of a set at the same time.
• Clean the battery contacts and also those of the device prior to battery installation.
• Ensure the batteries are installed correctly with regard to polarity (+ and -).
• Remove batteries from equipment which is not to be used for an extended period
of time.
•Remove used batteries promptly.
NOTE:
LEDs in this set are non-replaceable. Tampering with this set will
void the warranty.
This device complies with Part 15 of the FCC Rules.
Operation is subject to the following two conditions:
this device may not cause harmful interference, and
this device must accept any interference received, including interference that may
cause undesired operation.
Modifications not approved by the party responsible for compliance could void user’s
authority to operate the equipment.
NOTE:
This equipment has been tested and found to comply with the limits for Class
B digital device, pursuant to Part 15 of the FCC Rules. These limits are designed to
provide reasonable protection against harmful interference in a residential installation.
This equipment generates, uses and can radiate radio frequency energy and, if not
installed and used in accordance with the instructions, may cause harmful interference
to radio or television reception, which can be determined by turning the equipment off
and on, the user is encouraged to try to correct the interference by one or more of the
following measures:
*
Reorient or relocate the receiving antenna.
*
Increase the separation between the equipment and the receiver.
*
Connect the equipment into an outlet on a circuit different from that to which
the receiver is connected.
*
Consult the dealer or an experienced radio/TV technician for help.
INSIDE OF COMPARTMENT
OUT
SIDE OF COMPARTMENT
For Indoor and Outdoor Use
120 V 60 Hz
If You Need Assistance or Have
Any Questions With Set-Up or
Operation Please Call Us Toll
Free: 1-877-398-7337
or visit us on the web at
www.santasbestcraft.com
Santa’s Best Craft, LTD.,
1133 South 16
th
Street,
Manitowoc, WI 54221-1387
○
C
2010 Santa’s Best Craft, LTD.,
7F., No. 35, Guangfu N. Rd
Taipei, Taiwan 10560
All rights reserved.
This is not a toy, for decorative use only.
PRINTED IN CHINA
IMPORTANT
SAFETY
INSTRUCTIONS
LED 50L G35 Color Burst light show Model: RGB-G35-50
When using electrical products, basic precautions should always
be followed including the following:
READ AND FOLLOW ALL SAFETY INSTRUCTIONS
CAUTION:
•
To reduce the risk of fire and electric shock:
a) Do not install on trees having needles, leaves or branch coverings
of metal or materials which look like metal, and
b) Do not mount or support strings in a manner that can cut or
damage wire insulation.
•
This is an electrical product
-
not a toy! To avoid the risk of fire, burns, personal injury
and electric shock it should not be played with or placed where small children can reach it.
•
Do not use seasonal products outdoors unless marked suitable for indoor and
outdoor use. When products are used in outdoor applications, connect the
product to a Ground Fault Circuit Interrupting (GFCI) outlet. If one is not provided
contact a qualified electrician for proper installation.
• This seasonal use product is not intended for permanent installation or use.
•
Do not mount or place near gas or electric heaters, fireplaces, candles or other
similar sources of heat.
• Do not secure the wiring of the product with staples or nails, or place on sharp
hooks or nails.
• Do not let lamps rest on the supply cord or on any wire.
• Unplug the product when leaving the house, when retiring for the night, or if left
unattended.
•
Do not use this product for other than its intended use.
• Do not hang ornaments or other objects from cord, wire, or light string.
• Do not close doors or windows on the product or extension cord as this may
damage the wire insulation.
•
Do not cover the product with cloth, paper or any material not part of the product when in use.
• This product has a polarized plug (one blade is wider than the other) as a feature to
reduce the risk of electric shock. This plug will fit in a polarized outlet only one way. If
the plug does not fit fully in the outlet, reverse the plug. If it still does not fit, contact a
qualified electrician. Do not use with an extension cord unless plug can be fully
inserted. Do not alter or replace the plug.
• Read and follow all instructions that are on the product or provided with the product.
SA
VE THESE INSTRUCTIONS