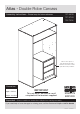
Atlas - Double Robe Carcass Assembly Instructions - Please keep for future reference 157/3309 151/4739 152/7458 There is the option of purchasing an Internal 3 Drawer Chest that can be placed inside your Robe Dimensions Width - 100cm Depth - 59.5cm Height - 212.5cm IMPORTANT This unit MUST be fixed to a wall using both of the brackets supplied.
Safety and Care Advice Important - Please read these instructions fully before starting assembly • Warning: This unit weighs approximately 49kgs. Please lift with care. • Make sure you have enough space to layout the parts before starting. • Check you have all the components and tools listed on pages 2 and 3. • Do not stand or put weight on the product, this could cause damage. • Remove all fittings from the plastic bags and separate them into their groups.
Components - Panels If you have damaged or missing components, call the Customer Helpline: 08456 400800 quoting the reference numbers below Please check you have all the panels listed below 2 Top/Base (D2395A) (1000 x 592mm) x 2 3 Fixed Shelf (D2397A) (968 x 590mm) 1 Universal End (D2396A) (2074 x 591mm) x 2 4 Hanging Rail (FHR960) (960mm long) x 2 5 Back (X2100-994) (2100 x 994mm) 2
If you have damaged or missing components, call the Customer Helpline: 08456 400800 quoting the reference Components - Fittings numbers below Please check you have all the fittings listed below Note: The quantities below are the correct amount to complete the assembly. In some cases more fittings may be supplied than are required.
Assembly Instructions If you have damaged or missing components, call the Customer Helpline: 08456 400800 quoting the reference numbers below Step 1 If you are just fitting 1 hanging rail, the fixed shelf will need to go here. Follow Steps 2 and 3. Are you fitting 1 or 2 hanging rails or, a shelf pack? Step 2 Prepare the left end Refer to step 1 and, if you have chosen to fit 1 hanging rail, screw 2 metal dowels B into the left end 1 .
Assembly Instructions Step 3 Prepare the right end Refer to step 1 and, if you have chosen to fit 1 hanging rail, screw 2 metal dowels B into the right end 1 . Only follow Steps 2 and 3 if you are just fitting 1 hanging rail. If you are fitting 2 hanging rails, follow Step 4 and 5. J J B K B K Note: Tighten the metal dowels up fully against the panels. K 1 To fit the rail holder K , screw through its top hole with screw J and into the shallow mark hole drilled in the right end 1 .
Assembly Instructions Step 5 Prepare the right end Only follow Steps 4 and 5 if you are fitting 2 hanging rails. If you are just fitting 1 rail, follow Step 2 and 3. J Refer to step 1 and, if you have chosen to fit 2 hanging rails, screw 2 metal dowels B into the right end 1 . J B K K Note: Tighten the metal dowels up fully against the panels. K B To fit the 2 rail holders K screw through the top hole with screw J and into the shallow mark hole drilled in the right end 1 .
Assembly Instructions Step 7 Join the fixed shelf to the right side If you have fitted the 2 metal dowels in this position, the fixed shelf will go here. Push the fixed shelf 3 onto the right side 1 . Use a screwdriver to tighten the 2 large locking nuts C fitted to the fixed shelf 3 . Note: Turn the large locking nuts C as far as they will go - more than 1/2 a turn. 3 1 Finished front edge Finished front edge B C Step 8 The following diagrams will show the fixed shelf at the top end of the unit.
Assembly Instructions Step 9 G Prepare the base M Screw the 6 feet M into the shallow mark holes on the base 2 using screws G . M M M M 2 Finished front edge M Step 10 Fit the base Attach the base 2 to the ends 1 using 6 screws F and tighten them using the allen key .E .
Assembly Instructions Step 11 F Fit the top F Attach the top 2 to the ends 1 using 6 screws F and tighten them using the allen key E . Unit colour on the top surface F 2 F 2 F F 1 1 a: Step 12 E Finished front edge The measurement from top corner X to bottom corner X must be equal to the measurement from top corner Y to bottom corner Y Fit the back a: Square up the unit by making sure that measurement x to x equals y to y. b: Place the back b: x D y 5 onto the unit.
Assembly Instructions Step 13 IMPORTANT Fit the 2 brackets This unit MUST be fixed to a wall using both of the brackets supplied. The unit must be level and square before fitting the brackets. To prevent possible overbalancing, we recommend that this unit is secured to a suitable wall by use of the 2 brackets L fitted to the top of the unit. I L Fixings are not supplied, as they will need to suit the wall type and the length of screws will depend on the distance from the back of the unit to the wall.
Assembly Instructions Step 14 Fit the hanging rail(s) Push the hanging rail(s) . 4 into the rail holders K fitted to the side panels. 4 4 K Step 15 Fit the doors and, if required, the internal chest Please refer to the instructions packed with the doors or chest. Door Chest If you need help or have damaged or missing parts, call the Customer Helpline: 08456 400800 and quote the reference numbers on the component pages.