01 Safety Warnings Welcome 2 SOUND MENU Important Information 2 TIME MENU 19 19 Safety notice 3 OPTION MENU 19 Warning and cautions 4 LOCK MENU 20 EPG Menu(Electronic Program Guide) 20 02 Introduction Main Parameter DVB-S2 21 5 First Time Installation 21 Base Stand Assembly Instruction 7 Satellite Managment 21 Wall Mounting Installation Guidelines 8 Program Edit 22 Control Panel 9 Signal Information 22 Rear/Side Sockets 9 CI Information 22 Connecting to your Haier TV
01 Safety warnings Thanks for buying this 32" LED LCD TV . This guide will help you set up and begin using your TV. 32" FULL HD 1080P Digital LED LCD TV Remote control AAA battery x2 Instruction Manual Quick start guide YPbPr Connect Cable Stand Now you can get started! IMPORTANT INFORMATION READ ALL INSTRUCTIONS BEFORE USE AND KEEP FOR FUTURE REFERENCE. CAUTION TO REDUCE THE RISK OF ELECTRIC SHOCK, DO NOT REMOVE COVER (OR BACK).NO USER SERVICEABLE PARTS INSIDE.
Safety notice Warning: To avoid any injury caused by lean of the product, please always ensure the whole product was placed within the table surface in horizontal.
WARNING AND CAUTIONS Warning High voltages are used in the operation of this television receiver. Do not remove the cabinet back from your set. Refer servicing to qualified service personnel. Warning To prevent fire or electrical shock hazard, do not expose the television receiver to rain or moisture. Caution Do not trap the power supply cord under the television receiver. Caution Never stand on, lean on, or suddenly push the television or its stand. You should pay special attention to children.
Introduction 02 Introdution CAUTION INSTALLATION Never tamper with any components inside the TV, or any other adjustment controls not described in this manual. All LED-TV's are high voltage electrical equipment. When you clean dust or any water drops off the SCREEN or CABINET or around any of the buttons or connectors, the power cabled should be removed from the power socket. Wipe the TV with a soft, dry, dust free cloth.
Introduction PC PRESET MODE RESOLUTION V.Freq.(KHz) H.Freq.(KHz) 1 640x480 60 31.47 2 800x600 60 37.88 3 1024x768 60 48.36 4 1360x768 60 47.7 5 1280x1024 60 63.98 6 1920x1080 60 66.
Introduction Base Stand Assembly Instruction 1. Insert the stand support pillar into the stand as the arrow indicated direction, and then fastened with three screws. 2. Insert the stand Ass'y into back cover as the arrow indicated direction,and then fastened with two screws. INSTALLATION NOTES Locate the TV in a room where light does not strike the screen directly. Total darkness or a reflection on the screen can cause eyestrain. Soft and indirect lighting is recommended for comfortable viewing.
Introduction WALL MOUNTING INSTALLATION GUIDELINES This television can be wall mounted as follows: 1.Place the LED LCD Television onto a solid surface. Please place some soft material over the front of the screen to protect it from any damage. 2.Remove the screws from the lower part of the television, where the base joins to the TV, and take away the stand (put the stand somewhere safe for future use). 3.
Introduction Front control panel 3 SOURCE 1 MENU 2 CH+ 3 1 2 CHVOL+ 4 VOLSTANDBY ≤8m 1 30 Remote control sensor. Indicator LED: Blue: Power On ; Red: Stand By. Key board. 2 3 5 30 1 2 3 SOURCE MENU CH+/CH- 4 VOL+/VOL- 5 STANDBY Display the input source menu. Display main MENU. In TV mode,press CH+ or CH- to change the channel up and down. In MENU, press CH+ or CH- to select items . Adjust sound level. In MENU,adjust the item that you selected.
Introduction Connecting to your Haier TV CVBS, DVD Player or other machine with YPbPr/YCbCr. G B R AC-INPUT 100-240V~ 50/60Hz YPbPr VIDEO Y L W LNB IN R SCART R CVBS, DVD Player or other machine with CVBS/S-Video.
Introduction Connecting to your Haier TV Connecting a DVD player / Satellite / cable set top box receiver / games console / PC or Laptop There are several options to connecting a DVD player / Satellite or Cable set top box receiver / games console / PC or Laptop to your TV. Option 1 SCART Connect a SCART cable (not supplied) from the SCART socket on the TV to the DVD player / Satellite or cable set top box receiver or games consol.
Introduction COMMON INTERFACE The common interface (CI) slot is designed to accept the conditional Access (CA) Module and Smart card in order to view the pay TV programmes and additional services. Contact your Common Interface service provider to get more information about the modules and subscription. Please noted that CA modules and smart cards are neither supplied nor optional accessories from us.
Remote Control 03 Remote Control Insert Batteries Into the Remote Control 1. Remove the battery cover. 2. Inserting the 2 AAA 1.5V batteries making sure the polarity(+ or -) of the batteries matches the polarity marks inside the unit 3. Mount the battery cover. Replace with new batteries when the TV set begins to show the following symptoms: Operation is unsteady or erratic. Sometimes the TV set does not function with Remote Control Unit. Remark: 1) Alkaline Battery Recommeded.
Remote Control TELETEXT Press: TEXT SELECTING A PAGE DIRECT ACCESS TO THE ITEMS INDEX SUB PAGE HOLD REVEAL LIST You will obtain: E Teletext is an information system broadcast by certain channels which can be consulted like a newspaper. It also offers access to subtitles for viewers with hearing problems or who are not familiar with the transmission language(cable networks, satellite channels, etc.) This is used to call or exit teletext modes.
Operation 04 OPERATION Installation Guide The installation guide only appear when the TV first time turn on or reset to factory set. 2). Press the▲▼buttons to select DVB-T/DVB-C and then press the OK button to confirm. Please select an OSD language Deutsch French English Italiano Spanish Nederlands OK Mode Select a. If you select DVB-T, the next step is to select the Tune type and country then press the OK button to start tuning.
Operation 5). After tuning is complete, the channels are arranged in a preset order. If you wish to skip channels, modify the preset order or rename channels, select Programme Edit under the Channel menu. 4). In the Tune Type menu, press the◀▶buttons to select ATV / DTV / DTV + ATV. Press the▼button and then press the◀▶▼▲buttons to select the country where you will operate the TV.
Operation 1.2 )Auto Tuning (DVB-C) 1). Press the MENU button and then press the▼▲ buttons to select the CHANNEL menu and then press the OK button. 2). Press the▼▲buttons to select Auto Tuning and then press the OK button. CHANNEL Germany Italy Norway Greece Luxembourg Poland Hungary Nederlands Portugal Auto Tuning OK PICTURE OK SOUND TIME OPTION CADTV Manual Tuning ATV Manual Tuning Programme Edit Signal Information CI Information Software Update(USB) LOCK MENU BACK MOVE OK OK 3).
Operation 2). Press the▼▲buttons to select DTV Manual Tuning and then press the OK button. CHANNEL PICTURE Auto Tuning DTV Manual Tuning OK SOUND TIME OPTION ATV Manual Tuning Programme Edit Signal Information CI Information Software Update(USB) 3). The CADTV Manual Tuning screen will pop up. Press the▼▲buttons to select(Frequency /Symbol (ks/s/QAM Type QAM) press the OK button to commence the search of that channel.
Operation Move: Use the Arrow Buttons to select the channel you wish to move. Then press the Yellow Button to select Move function. Once active use the Arrow Buttons to move and then press OK to confirm. Skip: Press▼▲to choose the program , press teletext blue button to skip this program, The will show on the right side of the program .Choose the skipped program, press blue button again , you can cancel the skip ,The will disappear . Favourite: 3.SOUND MENU The third item of the MENU is the SOUND MENU.
Operation Automatic Power-down 1.If after 4 hours from switch on and no changes have been made to the TV, for example no channel or volume changes,the TV will start the automatic power down sequence. And pop-up window will appear on screen. Seconds to Automatic power-down Please press any Key to Cancel After 150 seconds the TV will automatically switch to standby. To override the automatic shutdown press any button on the remote control. 2.
Operation 8.DVB-S2 Operation 8.1First Time Installation Please press the source button to enter input menu and use/ direction buttons to select DVB-S2 and press OK key to confirm. The Channel List for ASTRA is already installed. You are now ready to watch TV. If you are using different satellites please follow the system settings instructions to set up the satellite.
Operation 8.2.2 Transponder Press GUIDE to switch the list to show transponders of the focused satellite. Also you can press GUDIE to switch back to satellites' list. Add transponder: Press RED to add a new transponder. It can't save an existing TP under the same satellite. Edit transponder: Press GREEN to edit the focused transponder. It can't save an existing TP under the same satellite. Delete transponder: Press YELLOW to delete the focused transponder. Press OK to confirm.
Operation Time: An overview will be shown about the broadcast to the selectet date to current time from the programms. - Select the “Date / Timer” display and press ◀ / ▶ to edit the date. Channel:An overview will be shown about the broadcast course of the selectet channel on day you edit befor. - Select the programm display and press ◀ / ▶ to switch the channel Remind:Use BLUE botton to open the reminder setting. Press “Ok” to acknowledge the edit settings.
Operation 9.PVR function 1.Prepare to record the program Select Disk PVR function only works in DTV. From OPTION MENU enter into PVR File System In “OPTION MENU”, please choose “check PVR File System”. Click “OK”, until “checking”change into “Success”. Note: please check the term “speed”. If it is “HD support”, that means the speed of USB device is available for time shift and record. If not, please format the device, to make sure the device available.
Operation (Suggest to format the device by “High Speed Fs...”, which can speed up the record.) Format disk 2.Record the program As playing the DTV/DVB-S2 source, choose the channel and click “record”, the record frame will pop up. Click ”record” again, the record frame will disappear and the “REC” icon still on the left top. It will disappear until Format disk Warning! All data will be lost. Start Exit you click “stop”. 3.
Operation 10.Timeshift function Prepare to record the program This TV allows you to pause and record the currently watched digital program to a USB storage device, and to resume to the point where it was paused. Please do not unplug the USB storage device when the Time Shift function is activated. Approximately 4GB of memory buffers about offer 140 minutes. Formatting a USB 2.0 storage device will be needed. Save your original data before formatting.
Operation Time Shift limitations: 1. When the Time Shift feature is activated, only the PLAY/PAUSE/STOP/FWD/REV/ VOL+/VOL-/MUTE keys and some basic operation keys (OK /EXIT/navigation keys) are available. 2. Video playback may not be smooth and skip if USB recording speed does not meet the minimum requirements . 3. Do Not remove USB disk or switch off the power during Time Shift operations. It will abort once the signal is lost. 4. Do Not remove the signal source during Time Shift operations. 5.
Operation 11.USB Player Press source key, and select USB in source list, press OK button to enter the USB menu. play 00:04:22 00:04:22 AB Pause FB FF Prev. Next Stop Repeat ALL Set A Haier Innovation Life Press◀▶to select the function icon, press OK button to confirm the function. Press▼or EXIT button to exit the control bar except for music. PHOTO MUSIC USB2.0 EXIT TEXT Back MOVIE OK Move Select Please make sure that the USB device have plugged in the slot.
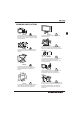
Trouble Shooting 05 Trouble shooting Trouble phenomenon Symptom Inspection Check Picture Audio Snow Noise antenna position, direction or connection Ghost Normal audio antenna position, direction or connection Interference Noise electronic equipment,car/ motorcycle,fluorescent light Normal Picture Mute Volume(check if mute is activated or if the audio system connections are not correct) No picture Mute No colour Normal audio Colour control Picture breaking up Normal audio or weak retune
Trouble Shooting Trouble Shooting My TV does not display the picture on my laptop / PC when connected. I have connected my PC/Laptop to the TV and get a picture but no sound. Why ? Most PC's and laptops when connected with a VGA Plug (the blue 15 pin plug on your PC or laptop) require you to press some buttons on your key board to get a picture on a TV or other external display. This is usually the F7 (Dell) or F4 (HP / Samsung) or F5 (Toshiba).
Trouble Shooting Trouble Shooting Digital TV Problems and possible Solutions. Picture Breaks into Pixels A typical example of a reception problem includes the break up of pictures (pixilation) or the picture freezing, sometimes there are clicking or squeaking sounds or the sound drops out or there is NO reception at all. Your picture may break into pixels due to the digital video signal dropping.
Trouble Shooting Specification 32" FULL HD 1080P Digital LED LCD TV Television picture quality: FULL HD Integrated digital. Screen Size: 81cm Resolution 1920x1080 pixels 50Hz. DTV Tuner Decorder DVB-T, DVB-C,DVB-S2 16/32/64/128/256 QAM modulation MPEG2,MPEG4,H.264 Connectivity: 2 HDMI sockets. 1 SCART socket. PC input socket. Component video socket. Composite. 1 USB port. 1 Headphone port. 1 LNB.
LCD-Fernseher mit LED-Hintergrundbeleuchtung Bitte lesen Sie diese Bedienungsanleitung vor der Inbetriebnahme des Geräts sorgfältig durch und bewahren Sie diese für späteres Nachschlagen auf.
Inhaltsverzeichnis Inhaltsverzeichnis 01 Sicherheits- und Warnhinweise Willkommen 2 TONMENÜ Wichtige Informationen 2 ZEITMENÜ 19 19 Sicherheitshinweise 3 EINSTELLUNGSMENÜ 19 Warnhinweise 4 SPERRMENÜ 20 EPG-Menü (Elektronische Programmzeitschrift) 20 02 Einleitung Parameter 5 Standfuß montieren 7 Wandmontage 8 Vorderes Bedienfeld 9 TV-Anschlussfeld 9 Fernseher anschließen 10 Common Interface 12 DVB-S2 21 Satelliten 21 Kanalbearbeitung 22 Signalinformationen 22 22 22 CI
Sicherheits- und Warnhinweise 01 Sicherheits- und Warnhinweise WILLKOMMEN Vielen Dank, dass Sie sich für diesen 32" Zoll LED LCD-Fernseher entschieden haben. Diese Anleitung hilft Ihnen bei der Einstellung und Bedienung Ihres Fernsehers.
Sicherheits- und Warnhinweise SICHERHEITSHINWEISE Warnung: Zur Vermeidung von Feuer und Stromschlag öffnen Sie nicht das Gerätegehäuse. Es befinden sich keine vom Verbraucher wartbaren Teile im Innern des Gerätes. Wenden Sie sich mit Wartungs- und Reparaturarbeiten stets an den autorisierten Kundendienst. Warnung: Zur Vermeidung von Feuer und Stromschlag setzen Sie das Gerät nicht Regen oder Feuchtigkeit aus.
Sicherheits- und Warnhinweise WARNHINWEISE Warnung Dieser Fernseher wird mit Hochspannung betrieben. Öffnen Sie nicht das Gerätegehäuse. Wenden Sie sich mit Wartungs- und Reparaturarbeiten stets an den autorisierten Kundendienst. Warnung Zur Vermeidung von Feuer und Stromschlag setzen Sie das Gerät nicht Regen oder Feuchtigkeit aus. De Vorsicht Klemmen Sie das Netzkabel nicht unter dem Fernseher ein.
Einleitung 02 Einleitung ACHTUNG INSTALLATION Machen Sie sich nicht an Bauteilen im Fernsehgerät oder an irgendwelchen anderen Einstellungssteuerungen zu schaffen, die nicht in diesem Handbuch beschrieben sind. Alle LEDFernsehgeräte sind elektrische Hochspannungsgeräte. Wenn Sie Staub oder Wassertropfen von dem Bildschirm oder dem Gehäuse oder um die Knöpfe oder Anschlüsse herum abwischen, sollte das Stromkabel aus der Steckdose aus gesteckt sein.
Einleitung PC VGA-Timingtabelle De Auflösung V. Freq. (kHz) H. Freq. (kHz) 1 640x480 60 31.47 2 800x600 60 37.88 3 1024x768 60 48.36 4 1360x768 60 47.7 5 1280x1024 60 63.98 6 1920x1080 60 66.
Einleitung Montageanleitung für den Standfuß 1. Stecken Sie die Stütze in Richtung des Pfeils in den Standfuß und befestigen Sie sie anschließend mit den drei Schrauben. 2. Stecken Sie die Standfußbaugruppe in Richtung des Pfeils in die Rückwand und befestigen Sie sie anschließend mit den zwei mitgelieferten Schrauben. HINWEISE ZUR INSTALLATION Stellen Sie den Fernseher vor direkter Sonneneinstrahlung geschützt auf.
Einleitung WANDMONTAGE Dieser Fernseher kann wie folgt an der Wand montiert werden: 1.Legen Sie den Fernseher mit dem Bildschirm auf eine flache Arbeitsfläche. Legen Sie ein Tuch unter, um den Bildschirm zu schützen. 2.Schrauben Sie die Halterung für den Standfuß unten am Fernseher ab (bewahren Sie den Standfuß für späteren Gebrauch auf ). De 3.Schrauben Sie den Fernseher mit vier vorgesehenen Schrauben an eine VESA-Wandhalterung (beides nicht mitgeliefert).
Einleitung Seitliches Bedienfeld 3 SOURCE 1 MENU 2 CH+ 3 1 2 CHVOL+ 4 VOLSTANDBY ≤8m 1 2 3 30 5 30 Sensor für Fernbedienung Status-LED: BLAU: eingeschaltet ROT: Stand-by-Modus 1 2 3 SOURCE MENU CH+/CH- Funktionstasten 4 VOL+/VOL- 5 STANDBY Eingangsquellen aufrufen. Hauptmenü anzeigen. Im TV-Modus schalten Sie mit CH+ oder CHzwischen den Kanälen auf und ab. Im MENÜ wählen Sie mit CH+ oder CH- einen Menüpunkt. Lautstärke einstellen. Im MENÜ stellen Sie den gewählten Menüpunkt ein.
Einleitung Anschließen an Ihren Haier Fernseher CVBS, DVD-Player oder anderes Gerät mit YPbPr/YCbCr G B De R AC-INPUT 100-240V~ 50/60Hz YPbPr VIDEO L W Y R LNB IN SCART R CVBS, DVD-Player oder anderes Gerät mit CVBS/S-Video USB HDMI2 HDMI1 COMMON INTERFACE (CI) COMMON INTERFACE (CI) HEADPHONE PC AUDIO VGA RF Audio/Video Gerät mit HDMI G Grün (Y) B Blau (Pb/Cb) W Weiß (AUDIO-L ) R Rot (AUDIO-R, Pr/Cr) Y Gelb (VIDEO) LCD-Fernseher mit LED-Hintergrundbeleuchtung DE-10
Einleitung Anschließen an Ihren Haier Fernseher Anschließen eines DVD-Players / Satellits / Kabel-SetTop-Box-Receivers / einer Spielkonsole / eines PCs oder Laptops. Es gibt mehrere Optionen zum Anschließen eines DVDPlayers / Satelliten- oder Kabel-Set-Top-Box-Receivers / einer Spielkonsole / eines PCs oder Laptops an Ihren Fernseher.
Einleitung COMMON INTERFACE Der Schacht Common Interface (CI) dient der Aufnahme des Conditional Access Moduls (CAM) und der SmartCard für Bezahlsender. Bitte wenden Sie sich an Ihren Dienstanbieter für weitere Informationen. Bitte beachten Sie, dass CI-Module und SmartCards von uns nicht geliefert werden. Detaillierte Informationen zur benutzten CIKarte werden angezeigt. Drücken Sie OK, um das Kartenmenü aufzurufen. Finden Sie detaillierte Anleitungen in der Bedienungsanleitung des Moduls.
Fernbedienung 03 Fernbedienung Batterien in die Fernbedienung einsetzen 1. Öffnen Sie das Batteriefach. 2. Setzen Sie 2 AAA 1,5-V-Batterien mit korrekter Polarität ein, so wie im Batteriefach angezeigt. 3. Schließen Sie das Batteriefach wieder. Tauschen Sie die Batterien aus, wenn die Reichweite der Fernbedienung nachlässt. Bitte beachten Sie: 1) Benutzen Sie Alkali-Batterien. 2) Bei längerer Nichtbenutzung oder wenn die Batterien erschöpft sind, entnehmen Sie sie bitte aus der Fernbedienung. 1.
Fernbedienung VIDEOTEXT Drücken Sie: TEXT SEITE WÄHLEN UNTERSEITEN DIREKT AUFRUFEN INDEX Sie haben folgende Funktion: E Videotext ist ein Informationssystem, das von einigen Sendern übertragen wird und wie eine Zeitung aufgebaut ist. Hier haben Sie ebenfalls Untertitel für Hörgeschädigte (Kabelnetzwerke, Satellitenkanäle usw.). Mit dieser Taste rufen Sie den Videotext auf oder Sie verlassen ihn. Eine Liste mit Menüpunkten wird angezeigt. Jede Seite hat eine 3-stellige Nummer.
BEDIENUNGSHINWEISE 04 BEDIENUNGSHINWEISE Installation Der Installationsmodus erscheint nur beim ersten Start des Fernsehers oder nach Zurücksetzen des Fernsehers auf Werkseinstellungen. 2). Drücken Sie▼▲die Tasten,um DVB-T/DVB-C auszuwählen und drücken Sie dann die OK Taste, um zu bestätigen. DVB Auswahlart Bitte wählen Sie eine OSD Sprache aus Deutsch Französisch Englisch Italienisch Spanisch Niederländisch OK a.
BEDIENUNGSHINWEISE 5). Nachdem der Suchlauf abgeschlossen ist, werden die Kanäle in einer vorgegebenen Reihenfolge angeordnet. Wenn Sie Kanäle überspringen möchten, ändern Sie die voreingestellte Reihenfolge oder nennen Sie die Kanäle um, wählen Sie Programme bearbeiten im Kanalmenü. Tuning typ Kanal einstellen TV DTV Radio Daten : : : : 4). Im Tuning Typ Menü drücken Sie die Tasten◀▶, um ATV, DTV oder DTV + ATV auszuwählen..
BEDIENUNGSHINWEISE 1.2 ) Automatischer Kanalsuchlauf (DVB-C) Tuning typ 1). Drücken Sie die MENU Taste und drücken Sie anschließend die ▲▼ Tasten um das Menü Kanal auszuwählen und drücken Sie dann die OK Taste. Deutschland Italien Norwegen Griechenland Luxemburg Polen 2). Drücken Sie die ▲▼ Tasten, um den Automatischen Niederlande Ungarn Suchlauf auszuwählen und drücken Sie dann die OK Taste.
BEDIENUNGSHINWEISE 2). Drücken Sie die ▲▼ Tasten, um den DTV Manuellen Suchlauf auszuwählen und bestätigen Sie mit OK. KANAL BILD Automatisches Tuning DTV Manuelles Tuning OK TON ZEIT OPTION ATV Manuelles Tuning Programme bearbeiten Signalinformationen CI Daten Software-Aktualisierung (USB) 3). Der Bildschirm für den CADTV Manuallen Suchlauf wird angezeigt.
BEDIENUNGSHINWEISE 3.TONMENÜ Verschieben Mit den Navigationstasten wählen Sie den zu verschiebenden Kanal, dann drücken Sie die gelbe Taste. Mit den Navigationstasten verschieben Sie den Kanal, mit OK bestätigen Sie die neue Position. Das dritte Menü ist das Tonmenü (SOUND). Hier stellen Sie die Klangeffekte wie Höhen, Bässe, Balance usw. ein. Drücken Sie ▲▼ zur Navigation und OK zur Bestätigung.
BEDIENUNGSHINWEISE 1. Wenn nach 4 Stunden nach dem Einschalten an dem TV Gerät keine Änderungen vorgenommen wurden, d.h. es wurde kein Kanal gewechselt oder keine Lautstärke geregelt, schaltet sich das Gerät automatisch in den Ruhemodus. Ein Informations-Fenster erscheint auf dem Bildschirm. Sekunden bis zur automatischen Abschaltung Bitte drücken Sie eine beliebige Taste zum Abbrechen Nach 150 Sekunden schaltet das Fernsehgerät automatisch in den Ruhemodus um.
BEDIENUNGSHINWEISE 8.DVB-S2-Betrieb 8.1Erste Installation Drücken Sie SOURCE zum Aufrufen des Signalquellenmenüs, dann wählen Sie mit den Pfeiltasten DVB-S2 und drücken Sie OK zur Bestätigung. Die Kanalliste für ASTRA ist bereits installiert. Sie können nun fernsehen. BITTE BEACHTEN SIE Zum Einstellen auf andere Satelliten folgen Sie bitte den Anleitungen unter Systemeinstellungen.
BEDIENUNGSHINWEISE 8.2.2 Transponder Drücken Sie GUIDE, um zur Liste der Transponder für den aktuellen Satelliten umzuschalten. Alternativ drücken Sie GUDIE, um zur Satellitenliste zurückzuschalten. Transponder hinzufügen: Drücken Sie die ROTE Taste, um einen neuen Transponder hinzuzufügen. Ein bestehender Transponder kann nicht unter dem gleichen Satelliten gespeichert werden. Transponder bearbeiten: Drücken Sie die GRÜNE Taste, um den aktuellen Transponder zu bearbeiten.
BEDIENUNGSHINWEISE Zeit: Ein Überblick der Sendungen des gewählten Tages wird angezeigt. - Wählen Sie „Date / Timer“ und drücken Sie ◄/►, um das Datum zu ändern. Kanal: Ein Überblick der Sendungen des gewählten Kanals am zuvor gewählten Datum wird angezeigt. - Wählen Sie die Programmanzeige und drücken Sie ◄/► zum Umschalten des Kanals. Erinnerung: Mit der BLAUEN Taste rufen Sie das Erinnerungsmenü auf. Drücken Sie OK zur Bestätigung. Die Einstellungen werden in Ihrer Planungsliste gespeichert.
BEDIENUNGSHINWEISE 9.PVR-Funktion 1.Vorbereitung der Aufnahme Festplatte auswählen Die Aufnahme- und Time-Shift-Funktion funktionieren nur bei digitalem Fernsehempfang (DVB-T, -C oder S2). Rufen Sie im Optionsmenü PVR-Dateisystem (PVR File System) auf, hier wählen Sie „Prüfe PVR-Dateisystem“ (Check PVR File System). Drücken Sie OK, bis „Prüfung läuft“ (Checking) zu „Prüfung erfolgreich“ (Success) umschaltet. Bitte beachten Sie: Überprüfen Sie den Punkt Geschwindigkeit (Speed).
BEDIENUNGSHINWEISE (Wir empfehlen, das Gerät mit „High Speed FS“ zu formatieren, wodurch sich die Aufnahme beschleunigt.) Festplatte formatieren Festplatte formatieren Warnung! Alle Daten gehen verloren. Start 2.Programm aufzeichnen Während der DTV/ DVB-S2 -Wiedergabe wählen Sie den gewünschten Kanal, dann drücken Sie „Aufnahme“ (Record) zur Anzeige des Aufnahmemenüs. Drücken Sie erneut „Aufnahme“ (Record). Das Aufnahmemenü erlischt und „REC“ wird oben links im Bild angezeigt.
BEDIENUNGSHINWEISE 10.TimeShift-Funktion Vorbereitung der Aufnahme Mit dieser Funktion können Sie das aktuelle Programm unterbrechen und auf einem USB-Speichermedium zwischenspeichern. Sie können die Sendung zu einem späteren Zeitpunkt weitersehen. Die Wiedergabe startet zeitversetzt, ab der Unterbrechung. BITTE BEACHTEN SIE: Ziehen Sie das USB-Speichermedium während der aktivierten TimeShift-Funktion nicht ab. 4 GB Speicher puffern ca. 140 Minuten. BITTE BEACHTEN SIE: De Das USB 2.
BEDIENUNGSHINWEISE Limitierungen der TimeShift-Funktion: 1. Bei aktivierter TimeShift-Funktion stehen Ihnen nur WIEDERGABE/PAUSE/STOPP/VORLAUF/RÜCKLAUF/VOL+ /VOL-/MUTE sowie einige allgemeine Funktionstasten (OK /EXIT/Navigation) zur Verfügung. 2. Die Videowiedergabe ist nicht gleichmäßig und kann springen, falls die USB-Aufnahmegeschwindigkeit nicht den Mindestanforderungen entspricht. 3. Ziehen Sie das USB-Speichermedium nicht ab, schalten Sie das Gerät während der TimeShift-Funktion nicht aus.
BEDIENUNGSHINWEISE 11.USB-Media-Player Drücken Sie die SOURCE-Taste (Eingangsquellen) auf Ihrer Fernbedienung um die Signalquellen anzuzeigen und wählen Sie „USB“ aus. Drücken Sie dann OK, um das USB-Menü aufzurufen. USB2.0 MUSIK EXIT TEXT ZURÜCK 00:04:22 AB Pause FB FF Vorherige Nächste Stopp Repeat ALL Satz A Drücken Sie zur Auswahl der Funktion und OK zur Bestätigung. Drücken Sie oder EXIT auf Ihrer Fernbedienung um die Steuerleiste zu verlassen. (Außer bei Musik.
BEDIENUNGSHINWEISE 12.Hotel-Modus: Um in den Hotel-Modus zu gelangen, geben Sie bitte die folgenden Tastenkombinationen auf Ihrer Fernbedienung ein: Drücken Sie erst „Source“ und geben auf dem Ziffernfeld „1001“ ein. HOTEL MENÜ Hotelmodusbetrieb Bedienfeldsperrung Max. Lautstärke Signal quelle Starten Start Kanal Menüanzeige einrichten Quelländerung eingeben Auf USB Festplatte speichern Laden...
Störungserkennung 05 Störungserkennung Problem Überprüfen Bild Ton verschneit gestört Schatten normaler Ton Störungen normales Bild kein Bild keine Farbe Bild verschwindet keine Farbe Sie sehen einen schwarzen Balken oben und unten.
Störungserkennung Fehlerbehebung Mein Fernseher zeigt nicht das Bild auf meinem Laptop/PC, wenn er eingeschaltet ist. Ich habe meinen PC/Laptop an den Fernseher angeschlossen und empfange ein Bild, aber keinen Ton. Warum? Das Bild hat keine automatische Größenanpassung beim Senderwechsel. Ich habe gerade an einen DVD-Player oder einen anderen Artikel in meinem Fernseher angeschlossen, und er funktioniert nicht.
Störungserkennung Problembehandlung bei dem Digitalfernsehen und möglich Lösungen Bild zerlegt sich in Pixel Ein typisches Beispiel für ein Empfangsproblem stellt das Auseinanderbrechen von Bildern (Pixilation) oder das Einfrieren der Bilder dar, manchmal gibt es Klick- oder quietschende Geräusche oder der Ton fällt aus oder es gibt gar KEINEN Empfang. Ihr Bild kann in Pixel aufgrund des digitalen Videosignalausfalls brechen.
Störungserkennung Spezifikationen 32" FULL HD 1080P digitaler LED LCD TV Bildqualität: FULL HD Integriert digital. Bildschirmdiagonale: 81 cm Auflösung 1920x1080 Pixel 50 Hz. DTV-Tuner Decoder DVB-T, DVB-C, DVB-S2 16/32/64/128/256 QAM Modulation MPEG2, MPEG4, H.264 Anschlüsse: 2 x HDMI. 1 x SCART. PC-Eingang. Component Video. Composite. 1 x USB-Port. 1 x Kopfhörerbuchse. 1 x LNB .