
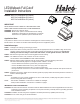
Installation Guide

© 2015 Halco Lighting Technologies, LLC. All rights reserved. Halco is a registered trademark of Halco Lighting Technologies.
All sizes and specications are subject to change.
Halco Lighting Technologies | 2940 Pacic Drive | Norcross, GA 30071 | Toll Free 800.677.3334 | Phone 770.242.3612 | Fax 800.880.0822 | halcolighting.com | Atlanta | Carlstadt | Cleveland | Houston | Los Angeles | Phoenix
LED
Wallpack Full Cutoff
Installation Instructions
Models: WPFC1/CL25BZ50/LED (99910)
WPFC2/CL43BZ50/LED (99911)
WPFC3/CL63BZ50/LED (99912)
IMPORTANT
READ INSTRUCTIONS CAREFULLY BEFORE INSTALLING.
KEEP THESE INSTRUCTIONS FOR FUTURE REFERENCE.
WARNING - Risk of re or electric shock.
WARNING - Make certain power is switched OFF before starting
installation or attempting any maintenance. Consult an
electrician if not qualied to prevent electrical shock
Application/ Use:
This product is rated for use in wet locations and designed for surface mounting only.
Mount xture to an outdoor wet location rated electrical junction box supplied by others.
Installation steps:
STEP 1: Unhinge front housing by loosening (2) screws.
STEP 2: Position the xture over the junction box and mark the appropriate holes to be drilled to align the housing
correctly over the junction box then secure with hardware provided with the junction box. Use silicone
caulking on back of housing in contact with wall surface, to seal against moisture, and insects.
STEP 3: Pull wires through center hole of mounting plate and rear housing.
STEP 4: Use additional screws, bolts, fasteners to secure to the wall.
DO NOT RELY ON FASTENERS AT THE JUNCTION BOX.
STEP 5: With the electrical power switched off at the circuit breaker, make the following connections.
This xture automatically adjusts for voltages between 120VAC - 277VAC.
• Connect Fixture Ground wire to junction box ground screw terminal.
• Connect the Black xture lead to the (+) Hot Line supply lead.
• Connect the White xture lead to the (-) Common supply lead.
• Use approved wire connectors to connect xture leads to supply leads and make wire splices inside the
junction box.
STEP 6: Replace front Housing, make sure that the lens gasket is properly sealed around the perimeter of the lens to
ensure a weather tight seal.
IMPORTANT:
To weather proof your outdoor installation, be sure to seal all holes, conduit plugs and photo controls in
xture housing with silicone caulking.
NOTE: *Wet location installation: Construction is suitable for downlight.
*Damp location installation: Construction is suitable for uplight.
IMPORTANT SAFETY INFORMATION:
CAUTION: This xture must be wired in accordance with the National Electrical Code and applicable local codes and
ordinances. Proper grounding is required to insure personal safety. Carefully observe grounding procedure
under installation section.
CAUTION: Installation and servicing of this equipment should be performed by qualied personnel only.
CAUTION: Do not mount near gas or electrical heaters.
®