
User's Manual

POST-ASSEMBLY
GAS CONNECTION
CONNECT THE REGULATOR TO THE LP TANK - VERY IMPORTANT:
• THE REGULATOR SHALL NOT BE IN A LOCATION THAT WILL ATTAIN A TEMPERATURE
ABOVE 140 °F (60°C) .
• THE REGULATOR SHALL INCORPORATE A PRESSURE RELIEF VALVE OR
OVERPRESSURE DEVICE.
• THE INLET OF THE PRESSURE REGULATOR SHALL BE FITTED TO CONNECT THE
TYPE I CONNECTION OF THE TANK VALVE PER ANSI Z21.81/CSA 6.25.
1. Make sure tank valve is in its full OFF position (turn clockwise to stop).
2. Check tank valve to ensure it has proper external male threads (type I connection per ANSI
Z21.81/CSA 6.25).
3. Make sure all burner knobs are in their OFF position.
4. Remove the protective cap from LP tank valve. Always use cap and strap supplied with valve.
5. Inspect valve connection port and regulator assembly. Look for any damage or debris.
Remove any debris. Inspect hose for damage. Never attempt to use damaged or plugged
equipment. Contact your local LP gas supplier for repair.
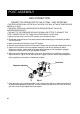
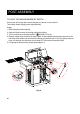
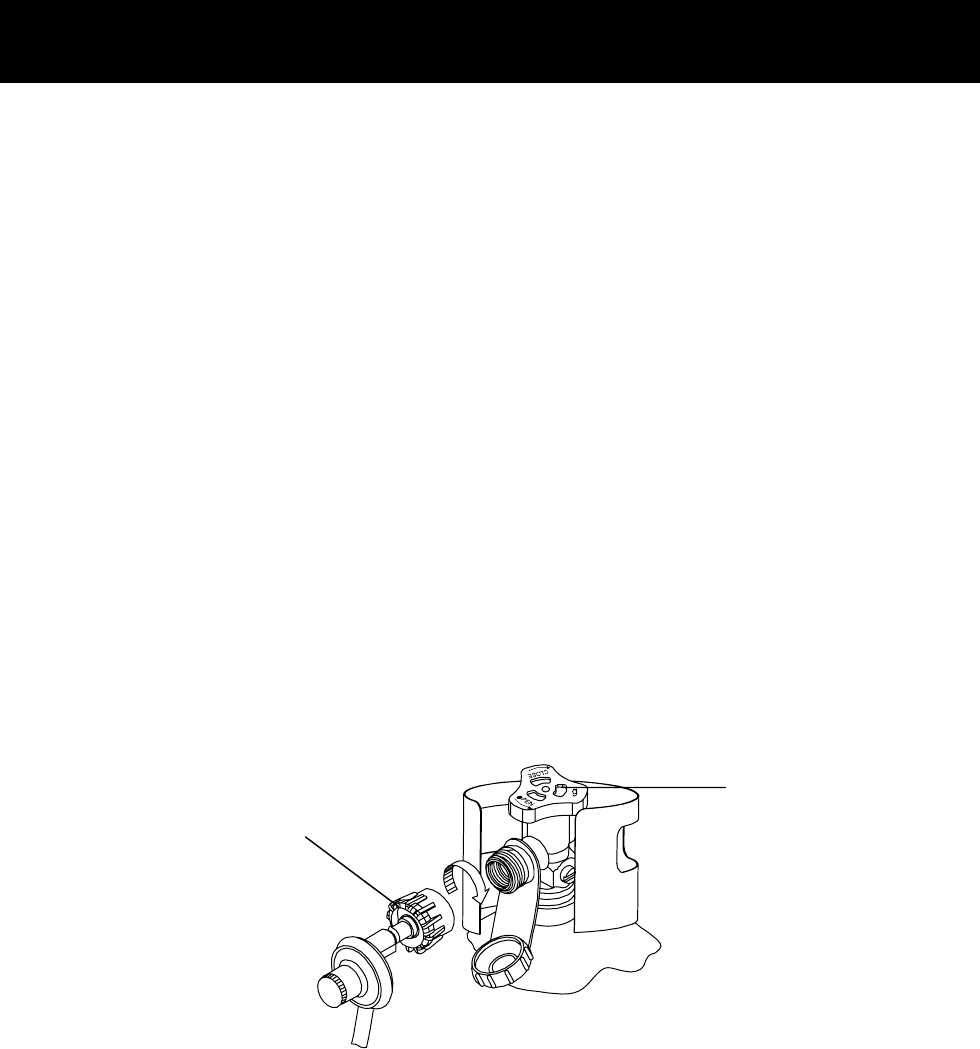
6. When connecting regulator assembly to the valve, hand-tighten nut clockwise to a positive
stop as shown in Fig.16. Do not use a wrench to tighten. Use of a wrench may damage the
quick-coupling nut and result in a hazardous condition.
Tank Valve
Regulator Assembly
Fig.16
7. Open tank valve fully (counterclockwise). Use a soapy water solution to check all connections
for leaks before attempting to light grill. If a leak is found, turn tank valve OFF and do not use
grill until a local LP gas supplier can make repairs.
24