Item # 317-768 Model # BPT12-13D USE AND CARE GUIDE VENTILATION FAN READ AND SAVE THESE INSTRUCTIONS Questions, problems, missing parts? Before returning to the store, call Hampton Bay Customer Service 8 a.m.-6 p.m., EST, Monday-Friday 1-877-527-0313 HAMPTONBAY.COM THANK YOU. We appreciate your trust and confidence in Hampton Bay with your purchase of this ventilation fan. At Hampton Bay we make quality products to help you improve your home and give you the peace of mind about your choice.
Table of Contents Package Contents.........................................................6 Table of Contents ............................................................ 2 Safety Information........................................................... 2 Installation.........................................................................7 Warranty ........................................................................... 3 Care & Cleaning.............................................................
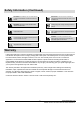
Safety Information (Continued) WARNING: Not suitable for use as a range hood or in areas where hazardous or explosive vapors are present. IMPORTANT: You may want to consult with a professional electrician regarding the wiring of your ventilation fan. WARNING: FOR USE IN NON FIRE-RELATED INSTALLATIONS ONLY. IMPORTANT: Exercise care to not damage existing wiring when cutting or drilling into walls or ceilings. WARNING: FOR USE IN ONE-AND-TWO FAMILY DWELLINGS ONLY.
Pre-Installation Do not install ventilation fan in areas where the duct work will require configuration as shown. PLANNING FOR SUCCESSFUL INSTALLATION When installing the ventilation fan in a new construction site, install the main body of the fan and duct work during the rough‑in construction of the building. The grill should be installed after the finished ceiling is in place. When installing in existing construction, use the dimensions on page 10 to determine the required hole size for the ceiling.
Pre-Installation (continued) TOOLS REQUIRED Hammer Safety goggles Phillips screwdriver Duct clamp Duct tape Level Electrical tape Drill MATERIALS REQUIRED Duct vent Duct piping HARDWARE INCLUDED NOTE: Hardware shown to actual size. Part AA BB Description Quick connect Long wood screw (Ø4x30) Quantity 3 4 5 www.hamptonbay.com Please contact 1-877-527-0313 for further assistance.
Pre-Installation (continued) PACKAGE CONTENTS Part A B C Description Fan Body Spring clips Grill 6 www.hamptonbay.com Please contact 1-877-527-0313 for further assistance.
Installation 1 2 Preparation for mounting Determine thickness of finished ceiling board (* measurement shown). Place main body (A) against ceiling joist in desired location. Ensure bottom of main body (A) hangs down below joist to account for finished ceiling board. Mounting fan body Use long wood screws (BB) to loosely attach both sides of main body to joist (right side shown). Ensure ventilation fan is level and that proper clearance is given for finished ceiling board.
Installation (continued) 3 4 Using quick connect Connecting electrical wiring WARNING: Wiring must comply with all applicable electrical codes. Turn OFF power before removing or installing connectors. WARNING: Ensure main power is off. WARNING: COPPER TO COPPER ONLY. Do not use on Aluminum wire. □ □ CAUTION: Accessory part AA (quick connect) should meet installation instructions below. □ NOTE: Connector is reusable on solid wires of the same wire gage or smaller.
Installation (continued) 5 6 Connecting duct work □ □ □ Install a circular duct to outlet and secure it with duct tape or clamps. Install duct work in a straight line with minimal bends. Fan must be ventilated to the exterior. Installing fan grill □ □ 9 Insert the mounting springs (B) into the grill (C). Squeeze mounting springs together, and insert into main body. www.hamptonbay.com Please contact 1-877-527-0313 for further assistance.
Care & Cleaning □ Before servicing or cleaning unit, disconnect the power supply at the panel and lock to prevent the power from being turned on. If the panel cannot be locked, clearly mark the panel with a warning tag to prevent the power from being turned on. □ Remove grill by squeezing springs and pulling down. □ Wash and clean the grill in a sink and dry with a cloth. □ Remove dust and dirt from the fan housing with a vacuum cleaner.
Service Parts BPT12-13D SERVICEABLE PARTS Part number Description HM0000004 Quick connectors Quantity 3 UB40403001 ABPTD01303 Long wood screws 4 Grill, spring clip and buckle 1 ABPTD01302 Complete assembled fan and housing 1 BGPA020004 Duct outlet with damper 1 11 www.hamptonbay.com Please contact 1-877-527-0313 for further assistance.
Questions, problems, missing parts? Before returning to the store, call Hampton Bay Customer Service 8 a.m.-6 p.m., EST, Monday-Friday 1-877-527-0313 HAMPTONBAY.COM Retain this manual for future use.
Artículo núm. Modelo núm. 317-768 BPT12-13D GUÍA DE USO Y MANTENIMIENTO VENTILADOR REPASE Y GUARDE ESTAS INSTRUCCIONES ¿Preguntas, problemas o piezas faltantes? Antes de regresar a la tienda, llama al Servicio al Cliente de Hampton Bay de 8 a.m. a 6 p.m., Hora Estándar del Este, de Lunes a Viernes 1-877-527-0313 HAMPTONBAY.COM GRACIAS. Apreciamos tu seguridad y confianza en Hampton Bay al comprar este ventilador.
Índice Contenido del Paquete .............................................. 18 Índice ............................................................................... 14 Información de Seguridad ........................................... 14 Instalación ...................................................................... 19 Garantía........................................................................... 15 Cuidado y Limpieza ...................................................... 22 Pre-Instalación.
Información de Seguridad (continuación) ADVERTENCIA: No es adecuado para usar como campana de extracción o en lugares donde haya vapores peligrosos o explosivos. IMPORTANTE: Al cortar o taladrar en una pared o techo, ten cuidado de no dañar el cableado existente. ADVERTENCIA: SÓLO PARA USO EN INSTALACIONES SIN CLASIFICACIÓN CONTRA INCENDIOS. IMPORTANTE: Es recomendable que consultes a un electricista profesional para que te asista con el cableado de tu ventilador.
Pre-Instalación No instalar el ventilador en áreas donde la red de conductos requerirá una configuración como se muestra en la siguiente figura: PLANIFICAR UN ENSAMBLADO EXITOSO Cuando instales el ventilador en un nuevo sitio de construcción, instala el cuerpo principal del ventilador y la red de conductos durante la instalación de las tuberías del edificio. La rejilla se debe instalar después de que el techo terminado esté en su lugar.
Pre-Instalación (continuación) HERRAMIENTAS NECESARIAS Gafas de seguridad Martillo Destornillador Phillips Nivel Cinta de electricista Taladro MATERIALES NECESARIOS Ducto de ventilación Abrazadera para ducto Cinta para ducto Tubería para ducto HERRAJES INCLUIDOS NOTA: Se muestra el tamaño real de los herrajes. Pieza AA BB Descripción Conector Rápido Tornillo de madera largo (Ø4x30) Cantidad 3 4. 17 www.hamptonbay.
Pre-Instalación (continuación) CONTENIDO DEL PAQUETE Pieza A B C Descripción Cuerpo del ventilador Sujetadores de resorte Rejilla 18 www.hamptonbay.
Instalación 1 Preparar el montaje 2 Determina el grosor del plafón terminado (*se muestra la medida). Coloca el cuerpo principal (A) contra la viga del techo en la ubicación deseada. Asegúrate de que la parte inferior del cuerpo principal (A) cuelgue debajo de la viga para que haya espacio para el plafón terminado. Montar el cuerpo del ventilador Usa tornillos de madera largos (BB) para unir sin apretar, ambos lados del cuerpo principal a la viga (se muestra el lado derecho).
Instalación (continuación): 3 Cómo usar el conector rápido 4 Cómo conectar el cableado eléctrico ADVERTENCIA: El cableado debe cumplir con todos los códigos eléctricos pertinentes. APAGA la electricidad antes retirar o instalar los conectores. ADVERTENCIA: Asegúrate que la electricidad esté apagada. □ ADVERTENCIA: SÓLO COBRE CON COBRE. No usar en cables de aluminio. □ PRECAUCIÓN: La pieza del accesorio AA (conector rápido) debe cumplir con las instrucciones de instalación siguientes.
Instalación (continuación): 5 Cómo conectar la red de conductos □ □ □ Cómo instalar la rejilla del ventilador 6 Instala el ducto circular al tomacorrientes y asegúralo con la cinta adhesiva para ductos o con las abrazaderas. Instala los conductos en línea recta, evitando en lo posible curvarlos. El ventilador debe tener un ducto de salida hacia el exterior. □ □ 21 Inserta los resortes de montaje (B) en la rejilla (C). Aprieta los resortes de montaje e insértalos en el cuerpo principal. www.
Cuidado y Limpieza □ Antes de revisar o limpiar la unidad, desconecta el suministro de electricidad en el panel y cierra con llave el panel para evitar que activen la corriente. Si no se puede cerrar con llave el panel, márcalo claramente con una etiqueta de advertencia para evitar que activen corriente. □ Quita la rejilla apretando los resortes y empujando hacia abajo. □ Lava y limpia la rejilla en un fregadero y seca con un paño.
Piezas de Repuesto BPT12-13D PIEZAS REPARABLES Número de pieza HM0000004 Descripción Conectores rápidos 3 UB40403001 ABPTD01303 Tornillo de madera largo 4. Rejilla, sujetador de resorte y hebilla 1 ABPTD01302 Ventilador ensamblado y carcasa completos Salida de ducto con regulador de tiro 1 BGPA020004 Cantidad 23 1 www.hamptonbay.
¿Preguntas, problemas o piezas faltantes? Antes de regresar a la tienda, llama al Servicio al Cliente de Hampton Bay de 8 a.m. a 6 p.m., Hora Estándar del Este, de Lunes a Viernes 1-877-527-0313 HAMPTONBAY.COM Conserva este manual para referencias futuras.
Article n° 317-768 Modèle n° BPT12-13D GUIDE D'UTILISATION ET D'ENTRETIEN VENTILATEUR D'AÉRATION LISEZ ET GARDEZ CES INSTRUCTIONS Questions, problèmes, pièces manquantes? Avant de retourner au magasin, veuillez communiquer avec le service à la clientèle Hampton Bay entre 8 h et 18 h, HNE, du lundi au vendredi 1 877 527-0313 HAMPTONBAY.COM MERCI. Nous vous remercions de la confiance que vous avez témoignée à Hampton Bay en achetant ce ventilateur d'aération.
Table des matières Table des matières........................................................ 26 Contenu de l'emballage ............................................. 30 Consignes de sécurité ................................................. 26 Installation...................................................................... 31 Garantie........................................................................... 27 Nettoyage et entretien..................................................
Consignes de sécurité (suite) MISE EN GARDE : N'est pas conçu pour servir au-dessus d'une cuisinière ou dans des zones où des vapeurs nocives ou explosives sont présentes. MISE EN GARDE : UNIQUEMENT POUR UNE UTILISATION DANS DES INSTALLATIONS N'AYANT PAS TRAIT AU FEU. MISE EN GARDE : UNIQUEMENT POUR UNE UTILISATION DANS DES RÉSIDENCES POUR UNE OU DEUX FAMILLES. REMARQUE : Assurez-vous que la taille du conduit d'aération correspond à un minimum d'évacuation. Ne réduisez pas.
Pré-installation PRÉPARATION POUR UNE INSTALLATION RÉUSSIE Lors de l'installation du ventilateur d'aération dans une nouvelle construction, installez le corps principal du ventilateur et le conduit d'aération pendant la phase de plomberie brute de la construction du bâtiment. La grille devrait être installée une fois que le plafond fini est en place.
Pré-installation (suite) OUTILS REQUIS Lunettes de sécurité Marteau Tournevis cruciforme Ruban isolant Niveau Perceuse MATÉRIEL REQUIS Évent de conduit Collier pour conduit Ruban adhésif Tube pour conduit QUINCAILLERIE FOURNIE REMARQUE : Quincaillerie illustrée à la grandeur nature Pièce AA BB Description Connecteur rapide Vis à bois longue (Ø 4 x 30) Quantité 3 4 29 www.hamptonbay.com Veuillez composer le 1 877 527-0313 pour une assistance supplémentaire.
Pré-installation (suite) CONTENU DE L'EMBALLAGE Pièce A B C Description Corps du ventilateur Pinces à ressort Grille 30 www.hamptonbay.com Veuillez composer le 1 877 527-0313 pour une assistance supplémentaire.
Installation 1 2 Préparation au montage Déterminez l'épaisseur du panneau-plafond fini (*illustration de la prise de mesure) Placez le corps principal (A) contre la solive de plafond à l'emplacement désiré. Vérifiez que le bas du corps principal (A) pend en dessous de la solive pour prendre en compte l'épaisseur du panneau-plafond fini. REMARQUE : Par exemple, si l'épaisseur du panneauplafond fini est de 1,9 cm (3/4 po), le corps principal (A) devrait dépasser la solive de 1,9 cm (3/4 po).
Installation (suite) 3 Utilisation d'un connecteur rapide 4 Branchements du câblage électrique MISE EN GARDE : Le câblage doit être conforme à tous les codes électriques applicables. Coupez le courant électrique avant de retirer ou d'installer les connecteurs. MISE EN GARDE : CUIVRE À CUIVRE SEULEMENT. Ne l'utilisez pas sur un fil en aluminium MISE EN GARDE : Assurez-vous que le courant électrique est coupé.
Installation (suite) Raccordement du conduit d'aération 5 □ □ □ Installation de la grille du ventilateur 6 Installez un conduit d'aération circulaire sur la sortie et fixez-le avec du ruban adhésif ou des colliers pour conduit. Installez le conduit d'aération selon une ligne droite avec le moins de coudes possibles. Le ventilateur doit évacuer vers l'extérieur. □ □ Insérez les pinces à ressort (B) dans la grille (C). Pincez les pinces à ressort et insérez-les dans le corps principal. 33 www.
Nettoyage et entretien □ Avant d'entretenir ou de nettoyer l'unité, coupez le courant électrique au tableau et verrouillez le tableau pour éviter que le courant ne soit remis. Si le tableau ne peut pas être verrouillé, affichez un avertissement bien visible sur le tableau pour empêcher que le courant ne soit rétabli. □ Pour réduire les risques d'incendie, évacuez toujours l'air des ventilateurs vers l'extérieur et conformément aux codes locaux.
Pièces de rechange PIÈCES DE RECHANGE POUR BPT12-13D Pièce n° Description Quantité HM0000004 Connecteurs rapides 3 UB40403001 ABPTD01303 Vis à bois longues 4 Grille, pince à ressort et boucle 1 ABPTD01302 Ventilateur complètement assemblé et boîtier 1 BGPA020004 Sortie de conduit d'aération avec registre 1 35 www.hamptonbay.com Veuillez composer le 1 877 527-0313 pour une assistance supplémentaire.
Questions, problèmes, pièces manquantes? Avant de retourner au magasin, veuillez communiquer avec le service à la clientèle Hampton Bay entre 8 h et 18 h, HNE, du lundi au vendredi 1 877 527-0313 HAMPTONBAY.COM Conservez ce guide pour un usage ultérieur.