
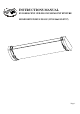
Instructions / Assembly

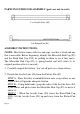

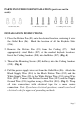

PARTS INCLUDED FOR ASSEMBLY (parts are not to scale):
ASSEMBLY INSTRUCTIONS:
Page 4
1 ea Fixture Pan (#1)
1. Carefully unpack the fixture. Lay out all parts on a clean surface.
2. Detach the Acrylic Lens (#4) from the Fixture Pan (#1).
1 ea Acrylic Lens (#4)
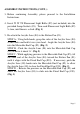
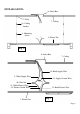
(NOTE: This fixture comes with two end caps, one that is fixed and one
that is moveable. Before beginning, identify the Moveable End Ca
p
(#5)
and the Fixed End Cap (#19) by pulling on them to see if they move.
The Moveable End Cap (#5) is spring-loaded and will return to its
original position after it is moved.)
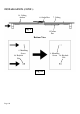
STEP
A - Place the fully assembled fixture onto a rug surface or any
surface that will provide adequate friction.
STEP B
– Using both hands, grasp the sides of the Acrylic Lens (#4)
at the center and push it into the Moveable End Cap (#5) to move it
about ½”.
STEP C
– When the Acrylic Lens (#4) clears the Fixed End Cap
(#19), lift the Acrylic Lens (#4) up and away from the Fixture Pan
(#1).