
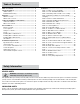
Instructions / Assembly


Pre-installation
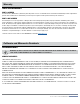
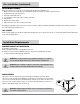
BEFORE YOU START:
CHECK YOUR ORDER
Make sure the product label on each carton matches the product numbers on your order and project plan. Contact Hampton Bay Customer Service if there
are any damaged, missing, or incorrect cabinets. Do not install if damaged or parts are missing.
READ THIS ENTIRE GUIDE
Before starting the installation, read this entire guide to familiarize yourself with the precautions for installing cabinetry.
Any installation of any product not performed according to the methods presented in this guide could void the warranty of the product.
4
WARNING: If the installation is performed in an unsafe or incorrect manner, a cabinet could fall off
the wall and result in serious injury or death.
TOOLS REQUIRED:
Safety
Glasses
Drill Stud
Finder
Measuring
Tape
4 ft. Level Pencil Phillips
Screwdriver
Protractor
Compass
THINGS TO CONSIDER:
KNOW YOUR PROJECT
Take time to review your installation project; what cabinets you have and how they will fit together. This will determine where you should start your
installation. Make sure appliance locations, windows, and entryways are considered.
Read through these instructions, noting any special requirements your cabinets may need for installation.
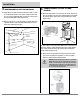
Cabinets such as Oven, Base Corner, Wall Bridge, Microwave and Base Cabinets in a corner have special
requirements. Some of these special requirements may be found in the Installation How-To section of these
instructions.
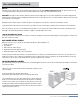
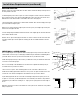
CABINET SUPPORT BRACES
Well-made braces make installation easier and more accurate.
Install a straight 1 x 2 ledger board on the Wall Cabinet Bottom Level Line, fastened into wall studs with
2-1/2" screws. This is the most stable support method, though it requires minor repairs to patch screw
holes after the ledger board is removed.
Make a “T” brace from 2 x 4's. Pad the top with carpeting. Reinforce where the 2 x 4's join with a plywood
gusset.
If the base cabinets are not yet installed, make the “T” brace long enough to reach the lowest spot on the
floor (about 55" high).
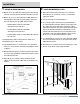
#10 Round Washer
Head with No. 2 Square
Recess Drive Wall
Attachment Screws
(provided through
your Customer Service
Representative). Pre-
drill a 7/32" clearance
hole through backrail of
cabinet at the wall stud
Ledger Board
“T” Brace
Electric Drill
Wall Outline
WARNING: THD Cabinets are not intended to be free-standing units, they must be attached to a wall stud or anchored to the floor to
achieve sufficient stability. Failure to comply with these guidelines will void all warranties and claims.