Quick Check® 890 Bar Code Verifier Quick Check® ImageData ™ User’s Guide
Disclaimer Hand Held Products, Inc. (“Hand Held Products”) reserves the right to make changes in specifications and other information contained in this document without prior notice, and the reader should in all cases consult Hand Held Products to determine whether any such changes have been made. The information in this publication does not represent a commitment on the part of Hand Held Products.
Table of Contents Chapter 1 - Getting Started Introduction........................................................................... 1-1 Unpacking the QC890 Verifier............................................. 1-1 QC890 Verifier Features....................................................... 1-1 Using the QC890 Verifier..................................................... 1-2 Scan Button........................................................................... 1-2 Scan Button LEDs........................
Calibrating the QC890 Verifier ............................................ 3-2 Scanning Properly Using a Pen/Mouse Wand...................... 3-3 Calibrating an External Pen/Mouse Wand ........................... 3-4 Scanning Properly Using the QC3800V Linear Imager:...... 3-5 Calibration Log..................................................................... 3-6 Reflectometer Mode ............................................................. 3-7 Chapter 4 - Maintenance Cleaning the External Devices.....
1 Getting Started Introduction The Quick Check® 890 Verifier System (QC890) is a professional quality control system for verifying the readability and standards compliance of printed linear bar code symbols. This verification system implements an integrated approach that consists of the QC890 Verifier unit and the Quick Check® ImageData (QCID) software.
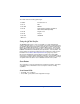
The verifier tests the following symbologies: Codabar Interleaved 2 of 5 Code 11 MSI Code 16K PDF417 Code 39 Reduced Space Symbology (RSS-14, RSS Limited, RSS Expanded) Code 49 Regular 2 of 5 Code 93 Telepen Code 128 UPC/EAN IATA 2 of 5 Using the QC890 Verifier The QC890 Verifier offers a choice of Automatic, 5, 6, and 10 mil aperture settings. External devices (i.e., mouse wands, pen wands, and linear imagers) are available with apertures designed to match the most common X dimensions.
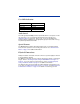
User LED Indications LED Indication Cause Green Solid Green Flash Red Solid Red Flashing Charging Good read Error condition Low battery Audio Sound An audio signal (default ON) provides a quick indication if a scan passes or fails the current test. You can change the pitch/volume of these beeps (see Illumination Timer on page B-1). After a scan, one short, high pitch beep indicates that the symbol passes an appropriate group of tests, while one long, low pitch beep indicates that it fails.
Specifications Item Specification Dimensions 7” (18cm)W x 6”(15.cm)H x 5.4” (14cm)D Weight 1 lb 8 oz (680 grams) Temperature Storage: -20° to 70°C Operational: 0° to 50°C Humidity 20% to 95% RH non condensing Battery Built-in factory - Lithium Ion rechargeable Internal Battery Note: Batteries are factory replaceable only. You must return your unit to Hand Held Products for replacement (see Product Service and Repair on page 5-1).
2 Quick Check ImageData Quick Check ImageData The Quick Check ImageData (QCID) program was designed for use in conjunction with the QC890 Verifier. Use of any other hardware devices with this program is not supported. Installation of the QCID software for your appropriate operating system is included on the CD-ROM that accompanied your verifier. The QCID is the graphical interface to the Quick Check 890 Verifier. The verification results can be saved for later reference.
Note: Please review the file, readme.htm, in the install location prior to running the QCID. Connect the QC890 Verifier to the host as shown in the illustration below. 1 2 USB COM Port Emulation Scan the following bar code to program the QC890 Verifier to emulate an RS232-based COM Port. After connecting the QC890 Verifier and upon successful installation of the USB driver, the driver will use the next available COM Port.
RS-232 Serial Communication Interface An RS-232 interface requires no additional drivers. Connect the QC890 Verifier to the host as shown in the illustration below. RS-232 Selections Scan the following bar code to select RS-232 communications.
Using the QC890 Verifier with Bluetooth Devices Note: If you chose to use the USB or RS-232 interfaces, the Bluetooth communication interface automatically turns off. The QC890 Verifier may be used with Bluetooth devices (e.g., laptop, PC, PDA, etc.). Scanning the Bluetooth bar code below turns the Bluetooth option on in the QC890 Verifier. Default = Off.
Enabling Your Device for Bluetooth After scanning the appropriate Bluetooth connection bar code, you need to run the Quick Check ImageData application to enable the Bluetooth radio in your device (PC, PDA, or Mobility Systems device) in order to look for the QC890 Verifier.
Once the QC890 Verifier is recognized, it appears in the list of available devices. Select the QC890 Verifier to which you want to bond and select Next. You will be asked if you need a passkey to add your device. The default passkey for all Hand Held Products QC890 verifiers is “1234.” The Wizard loads the QC890 Verifier information into your device. You may be given a choice of selecting a check box if you want your QC890 Verifier to be set as the default device to which Quick Check ImageData connects.
Once you select Finish, your device is ready to communicate with the QC890 Verifier via the assigned ports. Make a note of the assigned port number. You will need to know this port number in the following installation steps. Enabling QCID for Bluetooth 1. Once you open the QCID application, click on File -> Preferences. 2. Choose the assigned incoming port number reported in the Add Bluetooth Device wizard. 3. Click OK. 4. Your QC890 Verifier then connects to the QCID application.
Using Quick Check ImageData For the PC version of Quick Check ImageData, start Quick Check ImageData by clicking on Start->Programs->Hand Held Products->Quick Check ImageData or double click the Quick Check ImageData icon on your desktop (set up during installation). For the Windows Mobile for Pocket PC version, start Quick Check ImageData by clicking on Start ->Programs. Select the Quick Check ImageData icon.
Windows Mobile for Pocket PC Main Screen Help System The Quick Check ImageData program has an extensive help system to aid in the verification of your bar codes. Please refer to the help files for questions regarding the verification process and for specific questions regarding the QCID program.
2 - 10 Quick Check® 890 User’s Guide
3 Using the Quick Check 890 Verifier System Scanning a Bar Code Symbol Using the QC890 Verifier Note: Calibration is a requirement of the ISO/IEC standards. Without proper initial calibration, the values displayed may not be accurate. Please be sure to calibrate the QC890 Verifier prior to scanning bar codes and when you change apertures and/or external scanning devices. 1. Place the QC890 Verifier on top of the symbol. 2. Press the scan button on top of the unit to turn on illumination.
4. For the Windows Mobile for Pocket PC version, select Device and then Scan from the Scan Data tab. Calibrating the QC890 Verifier Note: Calibration is a requirement of the ISO/IEC standards and must be performed with each aperture change. When calibrating the QC890 Verifier system, the QC890 Verifier must be connected to QCID.
the illumination will turn off. If the calibration process is successful, the following screen displays. 5. Enter the prompted data (Name and Location) and press OK. The following screen displays. 6. If the unit does not calibrate, contact Hand Held Products Technical Support (see Technical Assistance on page 2). Scanning Properly Using a Pen/Mouse Wand 1. Turn on the verifier and confirm that it is operational (i.e., does not need to be charged or calibrated). 2.
• If you hear a single beep tone followed by another single beep of the same tone, it signifies a good read. • If you hear a single beep and then a beep of a different tone, the unit detected an error in the scanned symbol. Calibrating an External Pen/Mouse Wand 1. Using the proper scan technique described in step 4 above, scan the reflectance page. You will hear a single beep after the first good scan and the following display appears: 2.
3. After you type in your name and location, click OK. The following message appears: Note: When using the external QC3800V linear imager, it does not report ISO/ IEC reflectance parameters; therefore no calibration is necessary or possible. Scanning Properly Using the QC3800V Linear Imager: 1. The best reading position for the QC3800V linear imager is 6 inches (150mm) from the surface of the bar code to the face of the scanner, with an angle of incidence of 15 degrees from perpendicular.
Note: The QC3800V reading width (includes quiet zones) is 6 inches. Note: The QC3800V is the only device that can be used as a non-contact input device with a QC890 Verifier unit. The QC3800V should not be used with any decoders, terminals, or other brand of verifiers. Calibration Log The Calibration Log records the instances when calibration was performed. It records the Date/Time set on your PC, serial number of the QC890 Verifier being calibrated, and the name and location of the operator.
The Calibration Log looks like this: Reflectometer Mode Note: The Reflectometer Mode is only available for use with the mouse/pen wands. Reflectometer Mode measures the spot reflectance of the area at which the imager is “looking.” 1. To activate the Reflectometer, click on the Reflectometer icon ( ) on the tool bar below the menu options. The Reflectometer window opens. 2. Place the scanning device on any surface to see the spot reflectance of that surface.
3-8 Quick Check® 890 User’s Guide
4 Maintenance Cleaning the External Devices Occasionally the scanner tip or window may become partially obstructed by ink, paper fibers, or other particulate deposits (such as wax or varnish). To ensure reliable scanning, you should periodically check and, if necessary, clean the tip with a soft cloth. Note: Damaged tips for the pen wand should be replaced. Consult your dealer or Hand Held Products Product Service and Repair Department for details (see Product Service and Repair on page 5-1).
4-2 Quick Check® 890 User’s Guide
5 Customer Support Product Service and Repair Hand Held Products provides service for all its products through service centers throughout the world. To obtain warranty or non-warranty service, return the unit to Hand Held Products (postage paid) with a copy of the dated purchase record attached. Contact the appropriate location below to obtain a Return Material Authorization number (RMA #) before returning the product.
Asia Pacific Hand Held Products Asia/Pacific Telephone: +852-2511-3050 Fax: +852-2511-3557 E-mail: apservice@handheld.com Japan Hand Held Products Japan Telephone: +81-3-5770-6312 Fax: +81-3-5770-6313 E-mail: apservice@handheld.com Online Product Service and Repair Assistance You can also access product service and repair assistance online at www.handheld.com.
México Teléfono: Teléfono: E-mail: (800) 782-4263, opción 8, opción 3 (704) 998-3998, opción 8, opción 3 latechsupport@handheld.com Europe, Middle East, and Africa: TelephoneEuropean Ofc: Int+31 (0) 40 79 99 393 U.K. Ofc: Int+44 1925 240055 E-mail: eutechsupport@handheld.com Asia Pacific: Telephone: E-mail: Int+852-3188-3485 or 2511-3050 aptechsupport@handheld.com Online Technical Assistance You can also access technical assistance online at www.handheld.com. Limited Warranty Hand Held Products, Inc.
EXCEPT AS MAY BE OTHERWISE PROVIDED BY APPLICABLE LAW, THE FOREGOING WARRANTY IS IN LIEU OF ALL OTHER COVENANTS OR WARRANTIES, EITHER EXPRESSED OR IMPLIED, ORAL OR WRITTEN, INCLUDING, WITHOUT LIMITATION, ANY IMPLIED WARRANTIES OF MERCHANTABILITY OR FITNESS FOR A PARTICULAR PURPOSE. HAND HELD PRODUCTS’ RESPONSIBILITY AND PURCHASER’S EXCLUSIVE REMEDY UNDER THIS WARRANTY IS LIMITED TO THE REPAIR OR REPLACEMENT OF THE DEFECTIVE PRODUCT.
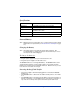
A Apertures Pen/Mouse Wand Aperture Selection The table below is a handy reference to help you choose the proper aperture size required for the size/type bar code you wish to verify. This data is based on the standard ISO/IEC 15416 Bar code Print Quality Test Specification - Linear Symbols. Aperture Diameter (in .001”)/Aperture Ref. No. Aperture Diameter "X" Dimension Range (in inches) "X" Dimension Range (in mm) 03 0.075 0.004" to 0.007" 0.100 to 0.180 05 0.125 0.0071" to .013” .0180 to 0.
A-2 Quick Check® 890 User’s Guide
B Menu Setting Bar Codes The QC890 bar code verifiers are programmed in the factory for the most common settings. If you need to change these settings, programming is accomplished by scanning the bar codes included in this chapter. An asterisk (*) next to an option indicates the default setting.
If there are no scans during the “scanner power time-out timer” interval, the QC890 Verifier goes into power down mode. Whenever a scan occurs, the “scanner power time-out timer” is reset.
C Symbology Defaults - Operation The default QC890 symbologies and operation are listed below: • Codabar* • Interleaved 2 of 5* • Code 11** • MSI*** • Code 16K*** • PDF417*** • Code 39* • Reduced Space Symbology (RSS-14, RSS Limited, RSS Expanded)*** • Code 49*** • Regular 2 of 5*** • Code 93* • Telepen** • Code 128* • UPC/EAN* • IATA 2 of 5 *** • Unrecognized*** * Enabled by default. Can be scanned when disabled. ** Disabled by default. Can be scanned when disabled.
C-2 Quick Check® 890 User’s Guide
Hand Held Products, Inc. 700 Visions Drive P.O.