HAND HELD PRODUCTS Dolphin™ 7200 Handheld Computer and HomeBase™ User’s Guide 7200/UG Rev.
Copyright Copyright © March 2001 Hand Held Products. All rights reserved. Portions of the software described in this document copyright © Microsoft Corporation. All Rights Reserved. Information in this document is subject to change without notice. The software described in this document is furnished under a license agreement. The software may be used or copied only in accordance with the terms of this agreement.
Table of Contents Before You Begin ................................................................................ 7 Welcome............................................................................................................... 7 Safety .................................................................................................................... 8 Required Safety Labels............................................................................................................... 8 RF Energy..
Image Engine ............................................................................................................................ 32 Lanyard Eyelet for Optional Wrist Strap .................................................................................. 32 Battery Well.............................................................................................................................. 32 Reset Switch ..........................................................................................
Hub of the System .............................................................................................. 94 Dolphin 7200 HomeBase Parts and Functions ................................................... 95 Charging Batteries In The Dolphin 7200 HomeBase ............................................................... 97 Charging Batteries In The Dolphin 7200 HomeBase ............................................................... 98 Setting Up For Communications ......................................
Warranty Information ....................................................................................... 152 Who Is Covered By The Warranty ......................................................................................... 152 What’s Covered By The Warranty ......................................................................................... 152 What’s Not Covered By The Warranty ..................................................................................
Before You Begin Welcome C ongratulations on the purchase of your new Dolphin 7200 handheld computer. You have made a wise choice in selecting the Dolphin 7200, a device known worldwide for its ergonomic shape, light weight, versatility and single-handed data collection features. The patented shape allows true, one-handed operation and fits either hand comfortably.
Safety The Dolphin 7200 handheld computer/bar code scanner meets or exceeds the requirements of all applicable standards organizations for safe operation. However, as with any electrical equipment, the best way to ensure safe operation is to know the possible risks. The following safety guidelines are designed to protect both you and others around you. Please read them carefully before using your Dolphin.
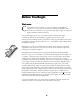
Label for WLIF radio-equipped terminals Label for 802.
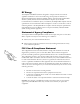
RF Energy The Dolphin 7200 RF™ terminal is designed to comply with the most current applicable standards on safe levels of RF energy developed by the Institute of Electrical and Electronics Engineers (IEEE) and the American National Standards Institute (ANSI) and has been recommended for adoption by the Federal Communications Commission (FCC). In addition, the Dolphin RF complies with the specifications for an intentional radiator in Subpart C of Part 15 of the FCC’s code of federal regulations.
Canadian Notice This equipment does not exceed the Class B limits for radio noise emissions as described in the Radio Interference Regulations of the Canadian Department of Communications. Le present appareil numerique n’emet pas de bruits radioelectriques depassant les limites applicables aux appareils numeriques de la classe B prescrites dans le Reglement sur le brouillage radioelectrique edicte par le ministere des Communications du Canada.
Regulatory and Safety Agency Approvals Parameter Specification U.S.A. Canada Europe FCC Part 15, Class A IEC 0003 EN 55022 (CISPR22) Class A ETS 300 826 Type Certified Others EMC 89/336/EEC EN 50082-1:1997, EN55024 RF Approvals U.S.A. Canada Europe FCC Part 15.
Microwaves The radio in the Dolphin RF terminal operates on the same frequency band as a microwave oven. Therefore, if you use a microwave within range of the Dolphin RF terminal you may notice performance degradation in your wireless network. However, both your microwave and your wireless network will continue to function. The Dolphin Batch terminal does not contain a radio, and therefore, is not affected by microwave ovens.
Chapter 1 Getting Started Summarizes the Dolphin’s features, functions and accessories and getting it started for the first time.
C H A P T E R 1 G E T T I N G S T A R T E D About the Dolphin 7200 Handheld Computer The Dolphin is a handheld computer and imager/bar code scanner designed for easy, single-handed data collection. It has a 386 33 MHz microprocessor that runs with GSDOS and is PC-compatible. Accessories for the Dolphin The Dolphin 7200 is part of a data collection system that includes accessories specifically designed for vehicle, desktop and hub operations.
C H A P T E R N O T E Use your Dolphin only with accessories supplied, recommended or approved by Hand Held Products, Inc. Use of non-approved accessories can be dangerous and will invalidate any warranty or liability claims. 1 G E T T I N G S T A R T E D Contact your Value-Added Reseller for more information. For details about how to install or use any of these accessories, refer to the documentation provided with the product.
C H A P T E R 1 G E T T I N G S T A R T E D These following options are available for the Dolphin 7200 terminal: .
C H A P T E R 1 G E T T I N G S T A R T E D Using Dolphin for the First Time This section will show you how to: 1. Be sure that you’ve received all items included with your Dolphin order 2. Charge the battery 3. Turn the Dolphin on and off 4.
C H A P T E R 1 G E T T I N G S T A R T E D After deep cycling the battery, you may charge the battery using one of these methods: • Place the battery in the auxiliary battery well on the Dolphin HomeBase™. Time to Charge: 3 hours • Place the battery in the 10-slot Dolphin multiple battery charger. Time to Charge: 3 hours • Install the battery in the Dolphin, place the Dolphin in the HomeBase and connect the HomeBase to an external power source.
C H A P T E R 1 G E T T I N G S T A R T E D 3 Turning the Dolphin On And Off Turning On the Dolphin 1. Install the charged battery pack in the Dolphin. 2. Hold the Dolphin in the palm of your hand so that you can press the ON/SCAN key easily with your thumb. 3. Press the ON/SCAN key to turn the Dolphin on. Your Dolphin will boot up just like a desktop PC and the title screen for the HHP Demo Application will appear on the display.
C H A P T E R 1 G E T T I N G S T A R T E D To set the date on a numeric Dolphin: 1. Press to put the Dolphin in alpha mode. 2. Enter at the Dolphin’s DOS prompt. See the section called Using the Numeric Keypad in Chapter 2 for more information. 3. Press to put the Dolphin back in numeric mode. 4. Enter the new date . 5. Press .
Chapter 2 Dolphin Basics Describes system features and explains how to use the Dolphin’s keypad, display, batteries, drives and scanner.
C H A P T E R 2 D O L P H I N B A S I C S System Features CPU The Dolphin’s computing power is provided by a highly integrated AMD ELAN SC310 386SX 33 MHz microprocessor. Disk Drives The Dolphin contains two disk drives that provide storage for system files, applications, and data. A third drive is also present if you purchase the FLASH expansion option. N O T E Drive B is an image of the A drive and not a physical drive.
C H A P T E R 2 D O L P H I N B A S I C S Liquid Crystal Display (LCD) The alphanumeric, scrollable LCD consists of nine rows with 20 character positions per row and 119 x 73 graphics pixels, which are software addressable. The electroluminescent backlight allows you to view the display in low light conditions. To conserve power, the backlight is automatically turned off after 30 seconds. The on/off function and contrast is software programmable.
C H A P T E R 2 D O L P H I N B A S I C S Using the Alphanumeric Keypad The Dolphin’s alphanumeric, splash-resistant keypad has 36 epoxy coated keys. The keyboard’s yellow background enhances the readability of the numeric and special character keys. The Dolphin’s ON/SCAN key “wakes” the terminal from sleep mode. Its position also allows convenient one-handed bar code scanning.
C H A P T E R 2 D O L P H I N B A S I C S Key Combinations For Keypad Functions and Special Characters Use the key combinations listed below to access certain keypad functions or to use special characters that are not defined on the Dolphin keypad. Key Combination Function/Special Character ESC (SHIFT + BKSP) The ESC function performs a cancel action. The SPC function moves the cursor forward one space at a time.
C H A P T E R 2 D O L P H I N B A S I C S Using the Numeric Keypad The Dolphin’s numeric, splash-resistant keypad has 20 epoxy coated keys. The large, amber-color keys are large, easy-to-read, and comfortably spaced to help prevent errors in data entry. Digits can be entered without using the shift key. Though designed primarily for numeric data entry, you can use the SHIFT key to switch between numeric and alpha modes or to use special characters.
C H A P T E R 2 D O L P H I N B A S I C S Key Combinations For Keypad Functions and Special Characters Key Combination Function ESC (SHIFT + BKSP) The ESC function performs a cancel action. LIGHT (SHIFT + SP) This action toggles the LCD backlight on and off. Press the SHIFT key to put the Dolphin in alpha mode and press the SP key once. CONTR (SHIFT + SP+SP) The CONTR function adjusts the LCD contrast. Press the SHIFT key to put the Dolphin in alpha mode and press the SP key twice.
C H A P T E R 4. 2 D O L P H I N B A S I C S To display the third letter/symbol, press the key next to the desired letter/symbol three times within one second. For example, to enter a letter “G” into the Dolphin terminal, press the SHIFT key to put the Dolphin in alpha mode. Press the “9” key once and the letter “G” will be entered. To enter a “T” into the Dolphin terminal, press the SHIFT key to put the Dolphin in alpha mode. Press the “1” key twice and the letter “T” will be entered.
C H A P T E R 2 D O L P H I N B A S I C S Alpha mode -- alphabetic characters are active Numeric mode -- numeric characters are active 30
C H A P T E R 2 D O L P H I N B A S I C S Back Panel Features This section describes features on the Dolphin’s back panel. The alphanumeric and numeric Dolphins have identical back panels.
C H A P T E R 2 D O L P H I N B A S I C S Laser Engine The Dolphin 7200 is currently available with five scanning options: • • • • • Standard range Long range High density scanning High visibility scanning No scan engine The laser engine converts reflected light into a digital pattern that represents the bar code data. A clear window covers the laser engine to protect it from dust and dirt.
C H A P T E R 2 D O L P H I N B A S I C S Maintaining the Dolphin’s Batteries CAUTION: Use only the 3.6V battery packs provided by Hand Held Products. The use of any other battery pack in the Dolphin 7200 terminal will void your warranty and may result in damage to the Dolphin terminal or battery. There are two batteries in the Dolphin: Internal NiMH Backup Battery N O T E Never insert the Dolphin into the HomeBase without the NiMH main battery pack inserted.
C H A P T E R 2 D O L P H I N B A S I C S NiMH Battery Pack The 3.6V, 1500 mAh Nickel-Metal-Hydride (NiMH) battery pack is the primary power source for the Dolphin. Other Nickel-Metal-Hydride batteries may be approved by Hand Held Products, Inc. to work with your Dolphin. Contact Hand Held for more information. N O T E Keep a charged battery pack in the Dolphin at all times to conserve the internal back-up battery.
C H A P T E R 2 D O L P H I N B A S I C S Storing Batteries To maintain top performance from batteries, follow the guidelines below when storing them: • Avoid storing batteries outside of the specified range of -4 to 104° F (-20 to 40°C) or in extremely high humidity. • For prolonged storage, do not keep batteries stored in the terminal. • During long-term storage, battery deactivation may tend to occur which may cause charging to stop early during recharging after storage.
Chapter 3 Dolphin® 7200 RF Handheld Computer 36
C H A P T E R 3 D O L P H I N 7 2 0 0 R F H A N D H E L D C O M P U T E R About the Dolphin 7200 RF Handheld Computer The Dolphin 7200 RF® terminal integrates the basic functionality of the Batch terminal with an 802.11b or a WLIF™ interface that allows the terminal to communicate with a host computer via a wireless local area network (WLAN). Both radio options operate in the 2.4 GHz frequency band.
C H A P T E R 3 D O L P H I N 7 2 0 0 R F H A N D H E L D C O M P U T E R Configuring Your 802.11b- Compliant Dolphin 7200 RF Terminal The Dolphin 7200 RF Utilities program provides basic functions required to prepare your terminals for use. The program also includes a Scan Demo, Help, and an Inventory Control demo. When you cold-boot or reset the terminal, the title screen shown below appears. Press the key to continue.
C H A P T E R 3 D O L P H I N 7 2 0 0 R F H A N D H E L D C O M P U T E R F1-Scan F1-Scan Menu This option demonstrates how the Dolphin 7200 RF terminal scans bar codes. Press F1 to configure the terminal to read linear barcodes. Follow the directions on the screen to set-up which bar codes you want the terminal to read. Once the terminal is configured, press and then the Button to scan a bar code.
C H A P T E R 3 D O L P H I N 7 2 0 0 R F H A N D H E L D F3-HHP Demo F3-HHP Demo The HHP Demo is a sample inventory control program.
C H A P T E R 3 D O L P H I N 7 2 0 0 R F H A N D H E L D C O M P U T E R F1-COM Menu F1-COM Menu Use this menu to send and receive files when transmitting data via HomeBase or VehicleBase to the local area network. Press to send a file. Press to receive a file. For more information on sending or receiving files with the Dolphin 7200 HomeBase, see the section on Setting Up For Communications in Chapter 7.
C H A P T E R 3 D O L P H I N 7 2 0 0 R F H A N D H E L D C O M P U T E R F3-DOS Prompt Press to exit to the DOS prompt. F4-RF Menu Press and the menu below will appear. Use options from this menu to configure the Dolphin 7200 RF for use in your wireless local area network.
C H A P T E R 3 D O L P H I N 7 2 0 0 R F H A N D H E L D C O M P U T E R F1 RF Setup To configure the terminal for use in a local area network, press and enter the data for each of the options on the screen shown below: RF Setup Menu You cannot change the MAC address on the Dolphin terminal. Each terminal has its own unique factory-set MAC address. The MAC address is a standardized data link layer address that is required for every port or device that connects to a LAN.
C H A P T E R 3 D O L P H I N 7 2 0 0 R F H A N D H E L D C O M P U T E R F2 SET NODE N O T E Reset the Dolphin terminal by pressing and releasing the , and keys. All three keys must be held down and released at the same time. Press F2 to set a system name for the Dolphin 7200 RF terminal. Enter a value for the NODE option and press . Once the NODE is written, the Dolphin 7200 RF terminal must be reset to activate the new NODE.
C H A P T E R 3 D O L P H I N 7 2 0 0 R F H A N D H E L D C O M P U T E R Setting WEP Modes And Keys On The 802.11b Radio Card This section describes how to set WEP (Wired Equivalent Privacy) modes and keys on the Cisco® 802.11b radio card. WEP is used to encrypt and decrypt data signals transmitted between Wireless LAN (WLAN) devices. WEP is an optional IEEE 802.
C H A P T E R 3 D O L P H I N 7 2 0 0 R F H A N D H E L D C O M P U T E R Running the WEP.BAT Utility This section describes usage and command line options for the WEP.BAT utility. N O T E Reset the Dolphin terminal by pressing and releasing the , and keys. All three keys must be held down and released at the same time. Note: The WEP.BAT file must be run with the radio driver NOT loaded.
C H A P T E R 3 D O L P H I N 7 2 0 0 R F H A N D H E L D C O M P U T E R Example 1: To configure WEP using the batch mode, create the keys.txt file using a text editor as shown: Sample ASCII keys.txt file for 40-bit encryption where x is the key code: ASCII xxxxx xxxxx xxxxx xxxxx xxxxx Sample HEX keys.
C H A P T E R 3 D O L P H I N 7 2 0 0 R F H A N D H E L D C O M P U T E R Example 2: To set the WEP keys using an ASCII character string via the Dolphin terminal keyboard, enter C:\> WEP ASCII 11111 X 33333 X There are four WEP keys to set. To skip a key code, enter for each blank entry. In the example above, only keys 1 and 3 have a value; 2 and 4 have no value. An ASCII character string of 5 characters sets 40-bit encryption and 13 characters sets 128-bit encryption on the terminal.
C H A P T E R 3 D O L P H I N 7 2 0 0 R F H A N D H E L D C O M P U T E R Example 4: To display the radio’s WEP settings, enter C:\>WEP STATUS Result: The terminal will displays the settings as shown below: WEP128 encryption Key 1 Len:13 Key 2 Len:13 Key 3 Len:13 Key 4 Len:13 key index is 1 (i.e. the active key) Note: The first line indicates the capability of the radio; not the encryption level.
C H A P T E R 3 D O L P H I N 7 2 0 0 R F H A N D H E L D C O M P U T E R WLIF™-Compliant Dolphin 7200 RF Terminal The WLIF-compliant Dolphin 7200 RF™ terminal incorporates a high performance radio that uses frequency hopping spread spectrum technology compliant to the Proxim ® WLI Forum/OpenAir™ specification. The radio operates at a data rate of up to 1.6 megabits per second, with 15 independent channels available.
C H A P T E R 3 D O L P H I N 7 2 0 0 R F H A N D H E L D C O M P U T E R F4 Utilities Menu Press , the following screen will appear: F4-Utility Menu The F1, F2 and F3 functions on the Utility menu for WLIF-compliant terminals are the same as the 802.11b-compliant terminals. For more information, refer to the section on the Utility Menu in the configuring 802.11b terminals section.
C H A P T E R 3 D O L P H I N 7 2 0 0 R F H A N D H E L D C O M P U T E R F1 RF Setup To configure the terminal for use in a local area network, press and enter the data for each of the options on the screen shown below. F1-RF Setup F1 SET SECURITY ID N O T E Reset the Dolphin terminal by pressing and releasing the , and keys. All three keys must be held down and released at the same time. N O T E Press to set the Security ID.
C H A P T E R 3 D O L P H I N 7 2 0 0 R F H A N D H E L D C O M P U T E R F3 R/W IP ADDRESS Press to enter the IP address. Once the IP Address is written, the Dolphin 7200 RF terminal must be reset to activate the new IP Address. N O T E The Security ID, Radio Domain and Subnet Mask on the Dolphin terminal must match the settings on the access point. The IP address is a 32-bit address assigned to hosts using TCP/IP.
C H A P T E R 3 D O L P H I N 7 2 0 0 R F H A N D H E L D C O M P U T E R Host Connectivity Hand Held Products offers several host connectivity options for Dolphin 7200 RF wireless LAN solutions. Direct Connect TN Client software is a thick-client solution that connects Dolphin 7200 RF™ computers directly to host applications via TN3270, TN5250 or TNVT terminal emulation using industry-standard TCP/IP protocol.
C H A P T E R 3 D O L P H I N 7 2 0 0 R F H A N D H E L D C O M P U T E R Thin-Client Terminal Emulation Hand Held Products’ thin-client terminal emulation solution uses a Universal Gateway to provide host connectivity. The Universal Gateway connects to the hosts such as AS/400, ES/9000 and HP/6000 via Ethernet and communicates to the application via Ethernet for 3270, 5250 or telnet for DEC VT220 terminal emulation environments. Host Universal Gateway Controller Access Point Dolphin RF™ v.
C H A P T E R 3 D O L P H I N 7 2 0 0 R F H A N D H E L D C O M P U T E R Terminal Emulation Keyboard Overlays There are host-specific keyboard overlays supporting all necessary program keys, character sets, and control and display functions.
C H A P T E R 3 D O L P H I N Numeric 3270 7 2 0 0 R F H A N D H E L D Numeric 5250 57 C O M P U T E R Numeric VT220
Chapter 4 Dolphin™ 7200 with iButton Reader Handheld Computer Describes the iButton reader and how to use it.
C H A P T E R 4 A B O U T T H E D O L P H I N R E A D E R H A N D H E L D C O M P U T E R 7 2 0 0 W I T H I B U T T O N About Dolphin with iButton Reader Handheld Computer The Dolphin with iButton Reader handheld computer integrates the basic functionality of the Dolphin Batch terminal with iButton™ technology that allows the terminal to read and write data from and to iButtons. The iButton reader is a function and feature extension of the Batch terminal.
C H A P T E R 4 A B O U T T H E D O L P H I N R E A D E R H A N D H E L D C O M P U T E R 7 2 0 0 W I T H I B U T T O N Working with iButtons In order to communicate with an iButton, the Dolphin iButton reader must make proper contact with the iButton during the time frame of the communication session. Intermittent contact can result in slow data communication or the need for reattempts.
C H A P T E R 4 A B O U T T H E D O L P H I N R E A D E R H A N D H E L D C O M P U T E R 7 2 0 0 W I T H I B U T T O N Read/write iButton types that Dolphin iButton reader can read/write to include: • DS 197X range EEPROM Devices • DS 199X range NVRAM devices (with the exception of DS1990A, which is read only) • DS 1954 Crypto iButton • DS 1963 Monetary iButton Compatible read-only iButton types that Dolphin iButton reader can read include: • DS 1990A Serial number iButton • DS 1920 Te
Chapter 5 Dolphin™ 7200 with Image-Capture Handheld Computer 62
C H A P T E R 5 D O L P H I N 7 2 0 0 H A N D H E L D C O M P U T E R W I T H I M A G E - C A P T U R E About Dolphin 7200 with Image-Capture™ Handheld Computer The Dolphin 7200 Image-Capture handheld computer incorporates a low-power, high-resolution camera to electronically capture and store images such as signatures, airbills, and damaged cartons. The terminal can also be used to also scan barcodes when equipped with a laser scanner.
C H A P T E R 5 D O L P H I N 7 2 0 0 H A N D H E L D C O M P U T E R W I T H I M A G E - C A P T U R E 2. Press the ON/SCAN button to take an image. Use the live video image on the terminal screen as a guide for positioning and aiming the terminal at the target. You may find it helpful to start by moving the terminal further away and then in closer to the target. The active screen image will have a slightly degraded appearance compared to the captured image. This is normal. 3.
C H A P T E R 5 D O L P H I N 7 2 0 0 H A N D H E L D C O M P U T E R W I T H I M A G E - C A P T U R E Lighting Conditions Dolphin Image-Capture terminal is equipped with an internal lighting source to allow users to take images in dim light conditions. It is suggested that you turn on the unit’s electroluminescent backlight when taking images in extreme low light conditions to help with aiming.
C H A P T E R 5 D O L P H I N 7 2 0 0 H A N D H E L D C O M P U T E R W I T H I M A G E - C A P T U R E 4. ICD client (ICD.EXE) This program runs on the Dolphin terminal and works in conjunction with the ICD server and ICD application. The ICD client allows you to take images, select the file type in which to save images read bar codes and transmit data to the host.
C H A P T E R 5 D O L P H I N 7 2 0 0 H A N D H E L D C O M P U T E R W I T H I M A G E - C A P T U R E HHP Dolphin Image Capture Server Note:: The image shown above was captured using the Dolphin Image-Capture handheld computer. This application is designed to work with the F2 – IMAGE CAPTURE option of the Dolphin Image-Capture client demonstration program. The Image Capture Server software must be running on your PC before taking any images.
C H A P T E R 5 D O L P H I N 7 2 0 0 H A N D H E L D C O M P U T E R W I T H I M A G E - C A P T U R E Print Select this option to print the current image. Exit Select this option to exit the program. Settings Menu The Communication option on the Settings menu allows you to configure the HomeBase for communications and select the COM port on your computer. To transfer images taken with Dolphin Image-Capture terminal, the HomeBase must be configured at 57600 baud rate.
C H A P T E R 5 D O L P H I N 7 2 0 0 H A N D H E L D C O M P U T E R W I T H I M A G E - C A P T U R E 4. Follow the directions in the dialog box and then click OK. 5. The HomeBase configuration process will begin. When finished, click OK and the Communications Settings dialog box will close. About When you click the About option on the menu, the following box will appear to show the version number of your software.
C H A P T E R 5 D O L P H I N 7 2 0 0 H A N D H E L D C O M P U T E R W I T H I M A G E - C A P T U R E Buttons View Images Select this button to open the Dolphin IC Saved Image Viewer program to view saved images. Save Image Select this button to save an image to the Saved Image Viewer. Print Select this button to print an image. You do not have to save an image to print it. Exit Select this button to exit the program. Save image before exiting the program.
C H A P T E R 5 D O L P H I N 7 2 0 0 H A N D H E L D C O M P U T E R W I T H I M A G E - C A P T U R E Dolphin Image Capture Viewer HHP Dolphin Image Capture Server and HHP Dolphin Image Capture Viewer When you select the View Images button, the Image Capture Viewer program opens. The program allows you to view images saved in the HHP Dolphin Image Capture Server Application. Navigate the scroll bar to find the image you want to view. Select the Print button to print the image.
C H A P T E R 5 D O L P H I N 7 2 0 0 H A N D H E L D C O M P U T E R W I T H I M A G E - C A P T U R E Dolphin Image Capture Application Barcode information read by Dolphin Image-Capture handheld computer Image taken by Dolphin ImageCapture HHP Dolphin Image-Capture Application The HHP Dolphin Image-Capture Application Demonstration works with the F4 Package Deliver option of the Dolphin client software.
C H A P T E R 5 D O L P H I N 7 2 0 0 H A N D H E L D C O M P U T E R W I T H I M A G E - C A P T U R E Print Select this option to print the image shown in the program window. Exit Select this option to exit the program. Dolphin Image-Capture Client Demonstration Software The Dolphin Image-Capture terminal is shipped loaded with client demonstration software. If the demonstration program has been removed from your terminal, follow these steps to install: 1.
C H A P T E R 5 D O L P H I N 7 2 0 0 H A N D H E L D C O M P U T E R W I T H I M A G E - C A P T U R E Main Menu Image Capture Demo Program Main Menu F1 AIMING DEMO This demo allows the user to practice aiming only, with the Dolphin with Image-Capture terminal. Press F1 and follow the directions on the screen. This option does not store images on the terminal’s disk.
C H A P T E R 5 D O L P H I N 7 2 0 0 H A N D H E L D C O M P U T E R W I T H I M A G E - C A P T U R E F2 Image Capture Demo Menu F1 BW /Crop Select this option to take images that are cropped and contain only black and white information. The image acquired is basically what you see on the terminal screen. Using this option yields images with the smallest file sizes. The pixel size of the image when cropped is 242 x 150 pixels.
C H A P T E R 5 D O L P H I N 7 2 0 0 H A N D H E L D C O M P U T E R W I T H I M A G E - C A P T U R E Capturing Images After you have selected the compression and cropping option and opened the Dolphin Image Capture server program on your PC, follow these screen prompts to capture an image. 1. Scan Image Screen Press the ON/SCAN key, aim and release it to take an image.
C H A P T E R 5 D O L P H I N 7 2 0 0 H A N D H E L D C O M P U T E R W I T H I M A G E - C A P T U R E HomeBase Screen 4. The file transfer status screen will appear on the Dolphin terminal after you place it in the HomeBase. File Transfer Status Screen 5. After the transfer is complete, Dolphin Image-Capture terminal is ready to take another image. Note: Be sure that the Dolphin Image Capture Server program is running on your PC before taking any images.
C H A P T E R 5 D O L P H I N 7 2 0 0 H A N D H E L D C O M P U T E R W I T H I M A G E - C A P T U R E F3 SCAN LABELS Press ON/SCAN Button to scan label. This option only demonstrates how the terminal scans bar codes. F3 Scan Labels Menu F4 PACKAGE DELIVER This menu option opens a package delivery demonstration application. The demonstration shows how the Dolphin IC computer’s image capture and barcode scanning functions are well-suited for delivery confirmation applications.
C H A P T E R 5 D O L P H I N 7 2 0 0 H A N D H E L D C O M P U T E R W I T H I M A G E - C A P T U R E Press ENTER and the terminal will beep to indicate that you have successfully entered the tracking number. 2. The screen shown below will appear. Press and hold the ON/SCAN key to take an image or signature. Release the ON/SCAN key when the desired image is displayed on the Dolphin terminal’s screen.
C H A P T E R 5 D O L P H I N 7 2 0 0 H A N D H E L D C O M P U T E R W I T H I M A G E - C A P T U R E 4. When the image is saved, the terminal beeps and returns to the Package Deliver demo screen shown below and is ready for the next tracking number. F4 Package Delivery Demonstration Menu 5. Place the Dolphin with Image-Capture terminal into the HomeBase to transfer the captured signature and barcode information to your PC via the Host Download Software Program.
Chapter 6 Dolphin 7200 2D Terminal 222567-22 81
C H A P T E R 6 D O L P H I N 7 2 0 0 2 D H A N D H E L D C O M P U T E R About the Dolphin 7200 2D Hand Held Computer The Dolphin™ 7200 2D handheld computer features the IMAGETEAM ™ 4250 Image Engine, a low power, high-resolution digital image engine for omni-directional and auto-discrimination reading and decoding of linear barcodes, stacked linear (PDF417) and 2D matrix codes. The image engine functions like a digital camera and also provides OCR (Optical Character Recognition) functionality.
C H A P T E R 6 D O L P H I N 7 2 0 0 2 D H A N D H E L D C O M P U T E R Reading Barcodes The omni-directional scanning capabilities of the Dolphin 7200 2D terminal greatly simplify operation and training and increase productivity. To read a bar code: 1. Press the ON/SCAN button to project the scanner’s bright red aiming beam 2. Center the aiming beam over the barcode.
C H A P T E R 6 D O L P H I N 7 2 0 0 2 D H A N D H E L D C O M P U T E R Capturing Images The image-capture process is a split-second operation for experienced users. By following the basic guidelines, new users can easily develop their own technique and, with practice, quickly learn to adapt it to different circumstances. The basic steps for acquiring images using the Dolphin 7200 2D terminal are: 1.
C H A P T E R 6 D O L P H I N 7 2 0 0 2 D H A N D H E L D C O M P U T E R Dolphin 7200 2D Demo Software The Dolphin 7200 2D terminal demonstration software program allows you to show how the terminal omni-directionally decodes all popular linear and 2D barcodes and OCR as well as its image capture capabilities. The software consists of two components – one that runs on the host computer and one that runs on the Dolphin terminal.
C H A P T E R 6 D O L P H I N 7 2 0 0 2 D H A N D H E L D C O M P U T E R Main Menu Dolphin 2D Imaging Demo Program Main Menu F1 AIMING DEMO This demo allows the user to practice aiming only, with the Dolphin 7200 2D terminal. Press F1 and follow the directions on the screen. This option does not store images on the terminal’s disk.
C H A P T E R 6 D O L P H I N 7 2 0 0 2 D H A N D H E L D C O M P U T E R F2 Image Capture Demo Menu F1 BW /Crop Select this option to take images that are cropped and contain only black and white information. The image acquired is basically what you see on the terminal screen. Using this option yields images with the smallest file sizes. The pixel size of the image when cropped is 242 x 150 pixels. Note: Cropping is the process of removing some percentage of the border of the image.
C H A P T E R 6 D O L P H I N 7 2 0 0 2 D H A N D H E L D C O M P U T E R 1. Scan Image Screen Press the ON/SCAN key, aim and release it to take an image. After you scan the image, the terminal will beep, and the image taken will appear on the screen. If the image is acceptable, press the ENTER key to save the image and proceed to the next step. If the image is not satisfactory, press the ON/SCAN key to take a new image. Repeat as necessary to acquire the desired image and proceed to the next step.
C H A P T E R 4. 6 D O L P H I N 7 2 0 0 2 D H A N D H E L D C O M P U T E R The file transfer status screen will appear on the Dolphin 7200 2D terminal after you place it in the HomeBase. File Transfer Status Screen 5. After the transfer is complete, the Dolphin 7200 2D terminal is ready to take another image. Note: Be sure that the Dolphin Image Capture Server program is running on your PC before taking any images.
C H A P T E R 6 D O L P H I N 7 2 0 0 2 D H A N D H E L D C O M P U T E R F3 Scan Labels Menu F4 PACKAGE DELIVERY This menu option opens a package delivery demonstration application. The demonstration shows how the Dolphin 7200 2D computer’s image capture and barcode scanning functions are well-suited for delivery confirmation applications. These dual functions link the signature with the barcode information for real proof of delivery.
C H A P T E R 6 D O L P H I N 7 2 0 0 2 D H A N D H E L D C O M P U T E R Scan Screen 3.
C H A P T E R 6 D O L P H I N 7 2 0 0 2 D H A N D H E L D C O M P U T E R 4. When the image is saved, the terminal beeps and returns to the Package Deliver demo screen shown below and is ready for the next tracking number. F4 Package Delivery Demonstration Menu 5. When you are ready to transfer the captured signature and bar code information to your PC via the Host Download Software Program, press F1 and place the Dolphin 7200 2D terminal into the HomeBase.
Chapter 7 Using the Dolphin 7200 HomeBase Summarizes the features of the Dolphin 7200 HomeBase and explains how to use it.
C H A P T E R 7 U S I N G T H E D O L P H I N 7 2 0 0 H O M E B A S E Hub of the System As the hub of your Dolphin system, the Dolphin 7200 HomeBase performs three important functions – battery management, communications and storage. Battery Management The Dolphin 7200 HomeBase uses a charging method that senses when the battery pack is fully charged and then drops to a trickle charge to keep the battery pack at full capacity.
C H A P T E R 7 U S I N G T H E D O L P H I N 7 2 0 0 H O M E B A S E Dolphin 7200 HomeBase Parts and Functions Dolphin Terminal Well Main Serial Port Charging Main Batt LED Multi Serial Port N O T E The Charging Main Batt LED does not indicate the battery status of the Dolphin terminal.
C H A P T E R 7 U S I N G T H E D O L P H I N 7 2 0 0 H O M E B A S E Charging Aux Batt LED Description OFF Battery pack not properly inserted into the auxiliary battery well, or the HomeBase has no power Red Battery discharging Blinking red LED Charge cycle initializing Blinking orange LED Battery charging at the maximum rate Solid green LED Trickle charging; battery pack is ready for use Figure 10 Battery Charging States Back Panel Aux Battery Well Service Aux Batt Switch Power Suppl
C H A P T E R 7 U S I N G T H E D O L P H I N 7 2 0 0 H O M E B A S E Use these switches to select the network and communications modes for your Dolphin. See Chapter 8 for more on the configuration switch settings. Configuration switches Press and hold this button for four seconds to service the battery in the auxiliary battery well. For maximum battery life, the battery should be serviced, or calibrated once a month.
C H A P T E R 7 U S I N G T H E D O L P H I N 7 2 0 0 H O M E B A S E Charging Batteries In The Dolphin 7200 HomeBase CAUTION: Use only the 3.6V battery packs provided by Hand Held Products. The use of any other battery pack in the Dolphin Terminal will void your warranty and may result in damage to the Dolphin Terminal or battery. N O T E For maximum battery life, Hand Held Products recommends that you deepcycle (service) the battery twice before initial use and then, once a month thereafter.
C H A P T E R 7 U S I N G T H E D O L P H I N 7 2 0 0 H O M E B A S E Laser Engine Window Auxiliary Battery Well Charging MAIN BATT LED Charging AUX BATT LED Figure 14 Inserting the Dolphin terminal into the HomeBase Charging an Additional NiMH Battery Pack 1. Insert an NiMH battery pack with the battery contacts pointing upward into the Dolphin HomeBase auxiliary battery well.
C H A P T E R 7 U S I N G T H E D O L P H I N 7 2 0 0 H O M E B A S E The CHARGING AUXBATT LED is red while the battery is discharging and changes to blinking red when the charging cycle begins and orange when charging at the maximum rate. The battery is ready to use when the light turns green. See Figure 10 for more on the LED status.
C H A P T E R 7 U S I N G T H E D O L P H I N 7 2 0 0 H O M E B A S E wiring of your cable depends on whether the other device is set up as a DCE (Data Communications Equipment) or DTE (Data Terminal Equipment) device. The HomeBase RS-232 Port is configured as a DCE device. To communicate with a DTE device such as a computer, use a standard (or straight-through) RS-232 cable.
C H A P T E R 7 U S I N G T H E D O L P H I N 7 2 0 0 H O M E B A S E Setting the Baud Rate You may use the HomeBase Configuration utility program to select the baud rate. The program can also be used to change the host system’s COM port and will run a diagnostic check for optimal communications. After changing the baud rate, you must power the HomeBase off and then on again. The program is one of the utility programs that come with the Dolphin OS and Development System.
C H A P T E R N O T E The configuration switches are checked at power up. Changes in the switch settings will not be recognized until power is turned off and then back on. 7 U S I N G T H E D O L P H I N 7 2 0 0 H O M E B A S E Configuring a Single Dolphin 7200 HomeBase To prepare a single Dolphin HomeBase for communications, you must enter the Command Mode to configure the version number and select the baud rate. Version Number To configure the version number for the Dolphin HomeBase: 1.
C H A P T E R 7 U S I N G T H E D O L P H I N 7 2 0 0 H O M E B A S E ASCII Value of “n” Selected Baud Rate ASCII Value of “n” Selected Baud Rate 0 1 2 3 5 38400 38400 1200 2400 9600 6 7 8 9 19200 38400 57600 115200 Figure 18 Baud Rate per Value of n Creating a Dolphin 7200 HomeBase Network This information applies only to the Dolphin 7200 HomeBase. The Dolphin 7200 Compact HomeBase is not networkable.
C H A P T E R 7 U S I N G T H E D O L P H I N 7 2 0 0 H O M E B A S E HHPCIn n is the number representing the first unit in the network For example, the string HHPCI0 would instruct the network to set up ID numbers for all the units in the network beginning at zero (0). N O T E The configuration switches are checked at power up. Changes in the switch settings will not be recognized until power is turned off and back on. 2.
C H A P T E R 7 U S I N G T H E D O L P H I N 7 2 0 0 H O M E B A S E Switch Setting Function 2 FIXED BPS (DOWN) Baud rate fixed at 57600 2 PROGRAM (UP) Baud rate can be programmed Figure 19 Configuration Switch Settings for a HomeBase Network When Switch 2 is in the ‘PROGRAM’ position, the baud rate can be changed using the following procedure or by using the HomeBase Configuration Utility.
C H A P T E R 7 U S I N G T H E D O L P H I N 7 2 0 0 H O M E B A S E When data transfer begins, the COMM LED on the Dolphin HomeBase will blink red and green. A unit remains selected until another unit in the network is selected. For example, the string HHPS3 would select the unit with ID number 3 for communications. That unit would then send back an 3. A selected unit in the Dolphin HomeBase network will assert the DSR signal of the HomeBase when a Dolphin terminal is present.
C H A P T E R 7 U S I N G T H E D O L P H I N 7 2 0 0 H O M E B A S E Communicating with the Dolphin Terminal To communicate with the Dolphin and any other devices connected to the HomeBase: 1. Insert the Dolphin into the terminal well of the HomeBase. If the Dolphin is in sleep mode, it will awaken into active state. 2. The CHARGING MAINBATT LED on the HomeBase will turn on.
Chapter 8 Using the Dolphin 7200 Compact HomeBase Summarizes the features of the Dolphin 7200 Compact HomeBase and explains how to use it.
C H A P T E R 8 U S I N G T H E D O L P H I N 7 2 0 0 C O M P A C T H O M E B A S E Hub of the System As the hub of your Dolphin system, the Dolphin 7200 Compact HomeBase performs three important functions – battery management, communications and storage. Battery Management The Dolphin 7200 Compact HomeBase uses a charging method that senses when the battery pack is fully charged and then drops to a trickle charge to keep the battery pack at full capacity.
C H A P T E R 8 U S I N G T H E D O L P H I N 7 2 0 0 C O M P A C T H O M E B A S E Dolphin 7200 Compact HomeBase Parts and Functions Front Panel COMM LED DOCK LED Figure 16 Front View of HomeBase The Compact HomeBase’s front panel has one slot: You put the Dolphin in this well to communicate with a host device and to charge the Dolphin’s batteries. Dolphin Terminal Well LEDs There are two LEDs on the front panel of the HomeBase 1.
C H A P T E R 8 U S I N G T H E D O L P H I N 7 2 0 0 C O M P A C T H O M E B A S E Back Panel Power Supply Connector RS-232 Connector Figure 17 HomeBase Back Panel There is a power supply connector and an RS232 connector: Use this connector to attach a power supply to the HomeBase. The power supply provides 12V DC input for communications and battery charging. Power supply connector RS-232 Communications Port RS-232 device.
C H A P T E R 8 U S I N G T H E D O L P H I N 7 2 0 0 C O M P A C T H O M E B A S E Baud Rate Switch 1 Switch 2 Switch 3 115200 0 0 0 57600 1 0 0 19200 0 1 0 9600 1 1 0 38400 0 0 1 4800 1 0 1 2400 0 1 1 Note: The HomeBase Configuration program cannot be used to select the baud rate on the Compact HomeBase.
C H A P T E R 4. 8 U S I N G T H E D O L P H I N 7 2 0 0 C O M P A C T H O M E B A S E Once the Dolphin terminal is properly seated, the Dock LED on the HomeBase will be solid GREEN. Figure 20 Dolphin Seated in HomeBase Figure 19 Inserting the Dolphin terminal into the HomeBase Deep-Cycling Batteries For maximum battery life, Hand Held Products recommends that you deep- cycle (service) the battery twice before initial use and then, once a month thereafter.
C H A P T E R 8 U S I N G T H E D O L P H I N 7 2 0 0 C O M P A C T H O M E B A S E Mounting the Dolphin 7200 Compact HomeBase The Dolphin 7200 Compact HomeBase may be desk or wall-mounted for convenience and storage. Desk Mounting: The Compact HomeBase has a DIN rail (7.5 X 35 mm) slot on the bottom to allow for secure desk attachment of the unit if desired (see figure 21). Figure 21 Wall Mounting: The Compact HomeBase also has two DIN rail (7.
C H A P T E R 8 U S I N G T H E D O L P H I N 7 2 0 0 C O M P A C T H O M E B A S E When using right-angle style RS232 connector cable, the DIN rails may be mounted directly to the wall. When using standard RS232 connector cables, it is recommended that the rails be mounted to the wall using a 25mm (1 in.) spacer to allow for appropriate strain relief of the cables (see figure 23).
C H A P T E R 8 U S I N G T H E D O L P H I N 7 2 0 0 C O M P A C T H O M E B A S E Setting Up For Communications The Dolphin terminal and Dolphin Compact HomeBase support RS-232 communications through the RS-232 Main Communications Port on the back of the Dolphin 7200 Compact HomeBase. The HomeBase translates the RS-232 signals from the host computer into infrared signals to communicate with the Dolphin Terminal.
C H A P T E R 8 U S I N G T H E D O L P H I N 7 2 0 0 C O M P A C T H O M E B A S E You can make your own cables by following the pin configuration in the chart below. To do so, you must determine if your host RS-232 device is 9-pin or 25-pin, and whether it is configured as a DCE or DTE device.
C H A P T E R 8 U S I N G T H E D O L P H I N 7 2 0 0 C O M P A C T H O M E B A S E Communicating with the Dolphin Terminal To communicate with the Dolphin and any other devices connected to the Compact HomeBase: 1. Insert the Dolphin into the terminal well of the HomeBase. If the Dolphin is in sleep mode, it will awaken into active state. 2. The CHARGING MAINBATT LED on the HomeBase will turn on.
Chapter 9 Learning About the Dolphin OS and Development System Software Explains how to use and manage the software accompanying the Dolphin 7200 terminal.
C H A P T E R 9 D O L P H I N O S A N D D E V E L O P M E N T S Y S T E M Dolphin OS and Development System Important Notice: Before installing the Dolphin OS and Development System it is important that you remove all previous installations. To remove the previous installations, delete the c:\dolphin directory and all files contained within. You should also delete the Dolphin Group or Folder.
C H A P T E R 9 D O L P H I N O S A N D D E V E L O P M E N T S Y S T E M Directory Contents c:\dolphin\ Default installation directory, containing HHP Help and Read Me First Files. C:\dolphin\bootldr Backup of Dolphin Boot Loader (BURN.EXE and BOOTLDR.BIN) c:\dolphin\devtools Dolphin Development Libraries, Samples and API Help file.
C H A P T E R 9 D O L P H I N O S A N D D E V E L O P M E N T S Y S T E M Help File, Document and Utility Icons The Dolphin OS and Development System set up program will set up a Dolphin group or folder and install the following Help, Document and Utility icons. The Read Me First Icon provides important information not available at the time the manual was printed. The Contacting HHP Icon provides information on contacting HHP by Phone, Fax, Email, WWW and BBS.
C H A P T E R 9 D O L P H I N O S A N D D E V E L O P M E N T S Y S T E M Dolphin HHP Demo Program A simple demonstration program is included with the Dolphin OS and Development System that shows how the Dolphin terminal works. The Dolphin OS and Development system setup program installs the demonstration programs in the c:\dolphin\hhpdemo directory on your PC. The HHP demo has also been pre-installed on your Dolphin terminal.
C H A P T E R 9 D O L P H I N O S A N D D E V E L O P M E N T S Y S T E M F1 – Scan Demo Press F1 to load the Scan program. Documented source code for the Scan demo program is included on the Dolphin OS and Development System disk. HHP SCAN TEST Press F1 for Setup, Esc to quit. Label: Type: HHP Scan Demo Screen F2 – Help Menu Press F2 to access the Help Menu. The Help Menu contains information about the Dolphin terminal, Specifications and contacting Hand Held Products.
C H A P T E R 9 D O L P H I N O S A N D D E V E L O P M E N T S Y S T E M F3 –HHP DEMO Press F3 to load the HHP Inventory Control sample program. This application uses a lookup table to validate item numbers and display part descriptions. The data entered is written to a file, and can be transferred via Xmodem to a computer.
C H A P T E R 9 D O L P H I N O S A N D D E V E L O P M E N T S Y S T E M F4- Scan Set-up F4 – Utility Menu Press F4 to load the Utility Menu. The Utilities Menu has four options as described below: HHP Utility menu F1 - COM Menu F2 - System Menu F3 - DOS Prompt F4 - RF Menu ESC to Main HHP Utility Menu F1 –COM Menu Press F1 to Send File from the Dolphin terminal to a host system (PC) via the Ymodem protocol at 57600 baud rate.
C H A P T E R 9 D O L P H I N O S A N D D E V E L O P M E N T S Y S T E M Scanning A Barcode The Dolphin Terminal comes with demonstration software that allows you to scan barcodes immediately. A sample barcode is illustrated below for you to use for practice. Hold the Dolphin terminal approximately 2 inches away from the sample barcode. Press the ON/SCAN key to begin scanning. Move the Dolphin terminal back and forward until the unit gets a good read.
C H A P T E R 9 D O L P H I N O S A N D D E V E L O P M E N T S Y S T E M Dolphin Utilities N O T E See the Development API electronic Help file (dolphapi.hlp) for additional information regarding the Dolphin Development Libraries, samples and compiling instructions. A number of utilities are provided with your Dolphin terminal. The Utility programs are installed in the c:\dolphin\utils directory on your computer. BMP2LCD.EXE BMP2LCD.
C H A P T E R 9 D O L P H I N O S A N D D E V E L O P M E N T S Y S T E M DCOMM.EXE DCOMM.EXE is a Windows communication utility. It supports drag-and-drop file transfer using both Ymodem and Xmodem.
C H A P T E R 9 D O L P H I N O S A N D D E V E L O P M E N T S Y S T E M • Upgrade the terminal Boot Loader • Upgrade the terminal ROM Image (BIOS, A Drive Image) • Reinstall/Upgrade the HHP Demo HBCFG.EXE HBCFG.EXE is a Windows utility that allows the user to change the baud rate setting for the Dolphin HomeBase. HBCFG.
C H A P T E R 9 D O L P H I N O S A N D D E V E L O P M E N T S Y S T E M Note: Dip Switch 2 located on the back of the HomeBase must be set in the Up (PROGRAM) position for the baud rate to be programmed. The HomeBase power must be cycled (turned off and on) for the new dip switch settings to be recognized. LOADER.EXE LOADER.EXE is a DOS Xmodem utility used to load or reload the Dolphin terminal’s ROM Image. LOADER.
C H A P T E R 9 D O L P H I N O S A N D D E V E L O P M E N T S Y S T E M YX.EXE YX.EXE is a DOS command line Ymodem communication tool for the Dolphin terminal or a PC. YX.EXE supports the following options: N O T E When using YX on the Dolphin 7200 terminal, only COM1 is available.
C H A P T E R 9 D O L P H I N O S A N D D E V E L O P M E N T S Y S T E M The following Utilities are included in the Dolphin ROM image and are automatically loaded when the terminal boots. They are NOT included on the Dolphin OS and Development System Disk. Utility Description EVS.EXE Enhanced Video System (EVS) is a TSR that traps standard video BIOS (INT 10H) calls, and overlays hardware-specific support for the Dolphin’s LCD.
C H A P T E R 9 D O L P H I N O S A N D D E V E L O P M E N T S Y S T E M Sample Applications A number of sample programs with source code have been provided with your Dolphin terminal. The sample programs are installed in the c:\dolphin\devtools\samples directory on your desktop computer. Application Description GRAPH Draws various patterns on the Dolphin’s LCD display. KBSTATUS Displays keystrokes. If the keystroke is non-printable, the hex value of the keystroke is displayed.
C H A P T E R 9 D O L P H I N O S A N D D E V E L O P M E N T S Y S T E M Compiling the Sample Programs Note: See the Development API Help file (DAPI.HLP) for complete information regarding the Dolphin Development Libraries, Samples and Compiling instructions. Microsoft In order for an application to use Dolphin’s unique features, you must add a Dolphin library to the application’s project. There are four libraries located in c:\dolphin\lib\msvc named dolphinx.
C H A P T E R 9 D O L P H I N O S A N D D E V E L O P M E N T S Y S T E M Transferring Files to or from Dolphin Transferring files between your Dolphin terminal and a desktop PC is easy with the YX.EXE utility or the Dolphin File Transfer program. Using the YX.EXE Utility N O T E When using YX on the Dolphin 7200 terminal, only COM1 is available. The YX.EXE utility, installed in the directory c:\dolphin\utils, performs RS-232 file transfers using Ymodem batch protocol. In addition, YX.
C H A P T E R 9 D O L P H I N O S A N D D E V E L O P M E N T S Y S T E M Sending a File to the Dolphin 1. Open the Dolphin File Transfer Program Configuration dialog box. Check to make sure the baud rate is set at 57600. This is the default for YX.EXE. Close the Configuration dialog box and exit the Dolphin File Transfer program. To change the baud rate, see the section on “Sending Files at a Higher Rate” on the next page. 2. Open Windows Explorer.
C H A P T E R 9 D O L P H I N O S A N D D E V E L O P M E N T S Y S T E M • To send at 38400 baud rate, enter at the DOS prompt instead of . • To send at 57600 baud rate, enter at the DOS prompt. Using the Dolphin File Transfer Program and YX in Menu Mode You can also use YX in menu mode to send and receive files from the Dolphin to your PC and vice versa with the Dolphin File Transfer program and YX.EXE on the PC.
C H A P T E R 9 D O L P H I N O S A N D D E V E L O P M E N T S Y S T E M Sending Files From the Dolphin To Your PC 1. Double-click on the Dolphin File Transfer shortcut to open the program. 2. Open the Configuration dialog box. Check to make sure the baud rate is set at 57600. 3. Enter at the Dolphin terminal’s DOS prompt. 4. Press and the menu below will appear on your Dolphin terminal’s screen: 5. Click on the Receive File button. 6.
C H A P T E R 9 D O L P H I N O S A N D D E V E L O P M E N T 141 S Y S T E M
C H A P T E R 9 D O L P H I N O S A N D D E V E L O P M E N T S Y S T E M Dolphin ROM Image and Boot Loader Upgrading the Dolphin ROM Image Important Notice: Before installing the Dolphin OS and Development System, you must remove all previous installations. To do this, delete the C:\DOLPHIN directory and all files contained within as well as the Dolphin Group or Folder. Only install the most recent release of the Dolphin ROM IMAGE and Boot Loader.
C H A P T E R 9 D O L P H I N O S A N D D E V E L O P M E N T S Y S T E M SYS Utilities X.XX 1) 9600 2) 19200 3) 38400 4) 57600 Baud: 9600 5. Press 1 to download. Upgrading the Dolphin Boot Loader W A R N I N G Only install the most recent release of the Dolphin ROM IMAGE and Boot Loader. DO NOT load an old version of the ROM IMAGE or Bootloader. The Dolphin may become unstable or inoperable requiring you to return the unit to HHP for repair.
Chapter 10 Troubleshooting and Warranty Information Dolphin 7200 Terminal Describes troubleshooting tips, solutions for problems you may encounter with the Dolphin 7200 terminal or HomeBase and warranty information.
C H A P T E R 1 0 T R O U B L E S H O O T I N G A N D W A R R A N T Y I N F O R M A T I O N F O R D O L P H I N 7 2 0 0 T E R M I N A L Just In Case The Dolphin 7200 terminal and Dolphin HomeBase are both designed to provide years of trouble-free use. Both products are covered by a one-year limited warranty. This chapter includes troubleshooting tips, warranty information, describes how to obtain technical support.
C H A P T E R 1 0 T R O U B L E S H O O T I N G A N D W A R R A N T Y I N F O R M A T I O N F O R D O L P H I N 7 2 0 0 T E R M I N A L If You Have This Problem/Symptom The Dolphin terminal will not scan a bar code. Try This: The bar code may be out of spec. Try reading some of the bar code examples in Appendix C, or locate a bar code sample that you know can be read by another Dolphin terminal. Is the exit window dirty? Clean it with a soft dry cloth.
C H A P T E R 1 0 T R O U B L E S H O O T I N G A N D W A R R A N T Y I N F O R M A T I O N F O R D O L P H I N 7 2 0 0 T E R M I N A L If You Have This Problem/Symptom The ‘CHARGING AUXBATT’ LED constantly changes from RED to ORANGE to GREEN. The ‘CHARGING MAIN BATT’ LED is on, but the Dolphin terminal will not communicate. Try This: The NiMH battery pack may need to be replaced. Insert a new battery pack into the Dolphin HomeBase’s auxiliary battery well. Check the cable connections to other devices.
C H A P T E R 1 0 T R O U B L E S H O O T I N G A N D W A R R A N T Y I N F O R M A T I O N F O R D O L P H I N 7 2 0 0 T E R M I N A L Troubleshooting with Dolphin 7200 with Image-Capture If You Have This Problem/Symptom Image not readable or too dark Try This: Move to an area with more light to take image. Black & White Image: Grayscale Image: Image not readable, distorted Hold Dolphin with Image-Capture terminal at 90 degree angle.
C H A P T E R 1 0 T R O U B L E S H O O T I N G A N D W A R R A N T Y I N F O R M A T I O N F O R D O L P H I N 7 2 0 0 T E R M I N A L If You Have This Problem/Symptom Image not readable, cut off Try This: You are holding terminal too close to subject. Hold the terminal at a 90 degree angle and move it further away from the subject. Black and White Image: Grayscale Image: Image not readable, dirty lens Wipe lens with clean, lint free cloth.
C H A P T E R 1 0 T R O U B L E S H O O T I N G A N D W A R R A N T Y I N F O R M A T I O N F O R D O L P H I N 7 2 0 0 T E R M I N A L If You Have This Problem/Symptom Image not readable; too small. Try This: You are holding the terminal too far away from the subject. Hold the terminal at a 90 degree angle and move it closer to the subject. Black and White Image: Grayscale Image: Image not readable due to reflection Adjust the angle at which you are holding the Dolphin terminal to avoid a reflection.
C H A P T E R 1 0 T R O U B L E S H O O T I N G A N D W A R R A N T Y I N F O R M A T I O N F O R D O L P H I N 7 2 0 0 T E R M I N A L Resetting The Dolphin Terminal Under normal circumstances, you should not need to reset the Dolphin terminal. However, if required, you can reset the terminal with one of the following methods: 1. Perform the “Three Key Reset.” The Dolphin terminal can be reset by pressing and releasing the “SHIFT”, “ON/SCAN” and “BKSP” keys.
C H A P T E R 1 0 T R O U B L E S H O O T I N G A N D W A R R A N T Y I N F O R M A T I O N F O R D O L P H I N 7 2 0 0 T E R M I N A L Warranty Information Who Is Covered By The Warranty The Dolphin 7200 terminals and HomeBases offered by Hand Held Products, Inc. (HHP) are covered –by at least a one-year limited warranty. (See table below for the configuration of Dolphin 7200 you have purchased) Hand Held Products, Inc. extends this warranty only to the first end-user of the product.
C H A P T E R 1 0 T R O U B L E S H O O T I N G A N D W A R R A N T Y I N F O R M A T I O N F O R D O L P H I N 7 2 0 0 T E R M I N A L What’s Not Covered By The Warranty N O T E You must have an RMA number to receive service on your product at the repair facility for North and South, Asia and the Pacific Rim.
C H A P T E R 1 0 T R O U B L E S H O O T I N G A N D W A R R A N T Y I N F O R M A T I O N F O R D O L P H I N 7 2 0 0 T E R M I N A L When calling for service at any of our repair facilities, please be prepared to give the following information: • Product’s type and serial number • Brief description of problem • Dated Proof-of-Purchase Place the product in its original packaging with a copy of your original invoice and ship the product prepaid to the appropriate address below: North and South America, A
C H A P T E R 1 0 T R O U B L E S H O O T I N G A N D W A R R A N T Y I N F O R M A T I O N F O R D O L P H I N 7 2 0 0 T E R M I N A L After repair or replacement of the equipment, Hand Held Products will ship the product, at our cost, to your location. Non-warranty repairs will be returned, at the customer’s expense, unless otherwise requested. Units currently under a service agreement will be shipped per the service agreement.
Polycarbonate ABS Blend, Splash-resistant, one-piece module Length: 6.85 in. (17 cm) Width: 2.63 in. (7 cm) Depth at handle: 1.62 in. (4 cm) Depth at front: 1.83 in. (5 cm) Patented shape onehanded operation; fits either hand comfortably Dimensions Ergonomics Dolphin 7200 Case Material Terminal Specifications Product 156 Same Same Same Length: 6.85 in. (17 cm) Width: 2.63 in. (7 cm) Depth at handle: 1.62 in. (4 cm) Depth at front: 2.25 in. (5 cm) Length: 7.1 in. Width: 2.63 in.
A D O L P H I N T E R M I N A L Dolphin 7200 7 2 0 0 Communication Interface 157 Same Same Optical IRDA optical, max 115kbs Same Same as Dolphin 7200 Same as Dolphin 7200 Alphanumeric keypad— 36 keys; Numeric keyboard-20 keys with shifted alpha keys; Terminal emulation keypad overlays for IBM 3270, IBM 5250 & DEC VT220 Alphanumeric keypad—36 keys; Numeric keyboard-20 keys with shifted alpha keys Keypad 14 oz (397 gm) Dolphin 7200 with iButton Reader Same 14.1 oz.
A D O L P H I N T E R M I N A L Dolphin 7200 7 2 0 0 Power Management Backup Primary Power Specifications Audio Indicators Visual Indicators Low-battery detection & automatic shut-off with battery voltage levels. Length: 2.2 in. (5.6 cm) Width: 1.8 in. (4.6 cm) Depth: .0.8 ( 2 cm) Internal NiHM Back-up battery retains memory & clock for up to 30 minutes Rechargeable 3.6V 3 cell battery pack @ 1,500 mAh Internal application software controllable speaker, emits sound level of 80 dB at 10 cm.
A D O L P H I N Memory CPU T E R M I N A L Dolphin 7200 7 2 0 0 2 MB RAM with 2 MB non-volatile FLASH memory expandable to 4, 6, or 10 MB AMD ELAN SC310 386SX microprocessor Processing Specifications Product A P P E N D I X No expansion FLASH with radio.
A D O L P H I N T E R M I N A L Dolphin 7200 7 2 0 0 GS-DOS architecture programmable with standard x86 development tools;, Microsoft C/C++ libraries provided for nonPC standard functions (scan engine support, communication & power management) Application software controllable time/date stamping Accurate, crystal-controlled real time clock/calendar Same Storage Temperature Operates in up to 95% non-condensing humidity Same Operates at –20° for a short time with little loss of LCD quality -20 to
A D O L P H I N T E R M I N A L Dolphin 7200 7 2 0 0 ---- ---- Frequency Output Power 100mW 2.4 to 2.4835 GHz Integrated WLIF/ OpenAIR ---- Radio Same WLIF Fire Retardant Rating Same Same 161 ---- ---- ---- ---- 2.4 to 2.4835 GHz 30mW ---- Same Same Same Dolphin 7200 with iButton Reader ---- Same Same Same Dolphin 7200 with Image-Capture Integrated Cisco 802.11b 802.11b Dolphin 7200 RF S P E C I F I C A T I O N S 2.
A T E R M I N A L ---- ---- Modulation Typical Range <500 ft (150 m ) in offices, <1000 ft (300 m) in open spaces 4FSK (BFSK in back off mode) 1.6 Mbps per channel in highspeed mode; 800 Kbps in back-off mode ---- ---- ---- ---- ---- DBPSK at 1 Mbps; DQPSK at 2Mbps; CCK at 5.5 and 11 Mbps 1500 ft (460 m) open environme nt; 300 ft (90 m) office 162 ---- Dolphin 7200 with iButton Reader ---- Dolphin 7200 with Image-Capture 1, 2, 5.5 and 11 Mbps 802.
A T E R M I N A L ---- Channels ODI supports major network operating systems ---- ---- ---- Drivers Media Access Protocol Software Standard TCP/IP Stack Optimized CSMA/CA WLIF Network Information 15 independent Frequency Hopping SpreadSpectrum ---- ---- Same 163 ---- ---- ---- ---- Dolphin 7200 with Image-Capture Same NDIS2, NDIS3, NDIS4, NDIS5 ODI, and Packet 802.11b 3 nonoverlapping Direct Sequence Spread Spectrum 802.
A D O L P H I N T E R M I N A L Dolphin 7200 7 2 0 0 Bar code symbol types Symbol SE1200LR, scans <15 ft (4.
A D O L P H I N T E R M I N A L CMOS Camera ---- Dolphin 7200 Product Digital Camera ---- Dolphin 7200 7 2 0 0 Communication Speed iButton Reader Product A P P E N D I X ---- Dolphin 7200 RF ---- Dolphin 7200 RF S P E C I F I C A T I O N S Operates in range of light from outdoors to total darkness Operates in range of light from outdoors to total darkness 165 256 level gray scale image 256 level gray scale image CMOS Sensor: 640 x 480 Pixel Dolphin 7200 2D Dolphin 7200 2D 2 to 9
A D O L P H I N Image Engine Options 4250 Image Engine Product A P P E N D I X T E R M I N A L ---- Dolphin 7200 7 2 0 0 ---- Dolphin 7200 RF S P E C I F I C A T I O N S 166 ---- Dolphin 7200 with Image-Capture Dolphin 7200 with iButton Reader 1D linear codes: Code 3 of 9, Interleaved 2 of 5, Code 11, IATA 2 of 5, MSI, UPC A, UPC EO, UPC EI, EAN/EAN13, Codabar, Code 128, Code 93 2D codes: PDF417, microPDF, Maxicode, Datamatrix, Aztec, QR Code, Code 49 Standard: scans 2 to 9 in.
A D O L P H I N Image Engine Options continued 4250 Image Engine Product A P P E N D I X T E R M I N A L ----- Dolphin 7200 7 2 0 0 ---- Dolphin 7200 RF S P E C I F I C A T I O N S 167 ---- Dolphin 7200 with Image-Capture ---- Dolphin 7200 with iButton Reader Composite codes: RSS-14, CODABLOCK, AZTEC MESA OCR codes (Optical Character Recognition): OCR A and OCR B Postal Codes: Postnet and most international 4 state codes, PLANET CODE, BPO 4 STATE, CANADIAN 4 STATE, DUTCH POSTAL, AUSTRALIAN
Appendix B Bar Code Samples With the HHP Demo program, the Dolphin terminal is programmed to read these codes. Practice scanning each of the bar codes, and notice the LCD window after you scan each code.
Appendix C GS-DOS Commands The Dolphin terminal ships with General Software DOS (GS-DOS). GS-DOS is compatible with Microsoft DOS (MS-DOS) and is optimized to run in a very small amount of memory.
A P P E N D I X C G S - D O S C O M M A N D S HELP The HELP command displays a list of the commands that are supported by the command interpreter. Syntax: HELP BREAK The BREAK command changes or displays how GS DOS handles break-ins by the user with ^C and CTL-BRK key sequences. If BREAK is ON, then GS DOS will break out of a running program or batch file when the ^C or CTL-BRK keys are pressed. If BREAK is OFF, then GS DOS will not break out, but will instead pass the keys pressed to the program.
A P P E N D I X C G S - D O S C O M M A N D S CTTY The CTTY command changes the default console device Syntax: CTTY device Note: This command is not supported the Dolphin Terminal. DATE The DATE command displays the current date (month, day, date, and year) on the screen. If a user specifies a new date on the command line, then DATE will change the date to the one specified. This command updates the battery-maintained clock so that the new date will be remembered across power-downs.
A P P E N D I X C G S - D O S C O M M A N D S ECHO The ECHO command has two functions; namely, control of the ECHO flag, and displaying messages in batch files. ECHO mode controls the command processor's echoing of commands in batch files. If ECHO mode is on, then commands read from batch files are automatically echoed to the screen before they are executed. If ECHO mode is off, then commands are not echoed as they are executed.
A P P E N D I X C G S - D O S C O M M A N D S MD (MKDIR) The MD command creates a subdirectory in the root directory or a subdirectory. By using the MKDIR command, a tree-structured file systems can be created. If a drive is specified, then the directory is created on the specified drive. Otherwise, it is created on the default drive. Syntax: MD [drive:]path PATH The PATH command displays or changes the current search path that is used by the command processor, COMMAND.
A P P E N D I X C G S - D O S C O M M A N D S RD (RMDIR) The RD command removes a subdirectory from a root directory or of a subdirectory. This command can only be used to delete directories, and cannot be used to delete files, even if they are inside the directory to be removed. Conversely, the DEL command cannot delete directories; only the files they contain. If a drive is specified, then the directory on the specified drive is removed. Otherwise, the default drive is assumed.
A P P E N D I X C G S - D O S C O M M A N D S SET The SET command displays the entire environment space (one variable per line), or changes the assignment of one variable in the environment space. If no operands are specified, then the SET command simply displays all of the environment variables in the environment space. If a variable name and an equal sign is given, but no string is specified, then the variable name is removed from the environment space.
A P P E N D I X C G S - D O S C O M M A N D S SYNC The SYNC command provides a synchronization checkpoint feature that enables a batch file to flush the file system's buffers to disk before doing something that might otherwise cause a disorderly shutdown Syntax: SYNC TIME The TIME command displays or changes the system time. If no parameter is specified, then the current system time is displayed, and the user is queried for the new system time.
A P P E N D I X C G S - D O S C O M M A N D S The VERIFY command changes or displays how GS DOS handles I/O to disk files and directory structures. If VERIFY is ON, then Embedded DOS-ROM verifies immediately that disk I/O is completed successfully before telling the user that it was. This is accomplished by writing data directly to disk, without temporarily storing it in a file system or disk driver cache.
Appendix D Declarations of Conformity Declaration of Conformity EC declaration of conformity for the following: 89/336/EEC EMC Directive 73/23/EEC Low Voltage Directive as amended by 93/68/EEC 1. Product Identification Product name Line of business Model/type Version Additional information : Dolphin 1 Terminal and Homebase : Auto ID : N/A : N/A : This Product was tested with the following: Dolphin 1 Terminal Bar Code Scanner Dolphin 1 Homebase 2.
A P P E N D I X D D E C L A R A T I O N S O F C O N F O R M I T Y Declaration of Conformity We, Hand Held Products, a Welch Allyn Affiliate of 4619 Jordan Road, PO Box 187, Skaneateles Falls, NY 13153-0187, USA declare under our sole responsibility that the product Dolphin® 7200 RF to which this declaration relates, is in conformity with the following standards and/or other normative documents.
A P P E N D I X D D E C L A R A T I O N S O F C O N F O R M I T Y Declaration of Conformity EC declaration of conformity for the following: 89/336/EEC EMC Directive 73/23/EEC Low Voltage Directive as amended by 93/68/EEC 1. Test Report Name/Number : Telefication : ITE Emissions : Electromagnetic Immunity for Res./ Comm,/Lt. Ind. (as listed above): : SGS : LVD Compliance 98302120 98302120 U0212 2.