6672-T STOP! ¡PARADA! Call Us First! DO NOT RETURN TO STORE. For immediate help with assembly or product information call our toll-free number: 1-888-827-9056 or email: customerservice@backyardproductsllc.com Our staff is ready to provide assistance.
(This page intentionally left blank.) (Esta página está intencionado en blanco.
16672-T 05/07/2012 Heritage / Signature Series Customer Service (Servico al cliente) 1-888-827-9056 1000 Ternes Drive Monroe, MI 48162 Includes 10’x12’ (305x366 cm), 10’x16’ (305x488 cm) Building Instructions 10’ Wide Saltbox Techo a dos aguas 10’ Tools required (Herramientas necesarias) Hammer (martillo) Phillips Screwdriver (Desarmador cruz) Level (Nivel) Ladder (escalera) Pencil (lápiz) Tape Measure (Cinta métrica) Utility Knife (Navaja) Paint Tools (Herramientas para pintar) Caulk Gun (pistola para
TRIM MOLDURA GABLE HASTIAL ROOF TECHCO WALLS MURO 10’ X 12’ (305 x 366 cm) PARTS LIST 3/8”x15-7/8”x72” (.9x40x183cm) 3/8”x48”x72” (.9x122x183cm) A x7 B VK 3/8”x23-7/8”x72” (.9x61x183cm) x2 2x6x92-1/2” (235cm) x2 E x2 x2 F x2 x1 H 3/8”x2-15/16x81-1/4x35-7/8” (.9x7.6x206x92cm) 3/8”x1-3/4x42-3/4x35-7/8” (.9x4.
10’ X 12’ (305 x 366 cm) PARTS LIST Actual Size FERRETERÍA HARDWARE 10’ X 12’ (305 x 366 cm) LISTA DE PIEZAS x2 x2 1” (2.5cm) x2 1-1/4” (3cm) x2 Lumber Sizes 3” (7.6 cm) x 301 2” (5.0 cm) x 747 2” (5.0 cm) x 238 1-1/2” (3.8 cm) x 212 3” (7.6 cm) x 20 2” (5 cm) x 12 1-5/8” (4.1 cm) x 60 1” (2.5 cm) x 2 1” (2.5 cm) x 10 3/4” (19 mm) x 43 Dimensiones de la madera Note Nominal Size (Dimensión nominal) = 1x4 = 2x4 = 2x6 Actual Size (Dimensiones verdaderas) 3/4” x 3-1/2” (1.9 x 8.
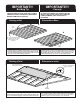
IMPORTANT!!! IMPORTANTE!!! Building Tip Consejo CON EL FIN DE OBTENER EL PRODUCTO ACABADO DE MEJOR ASPECTO RECOMENDAMOS QUE INSPECCIONE, CLASIFIQUE Y ORGANICE LOS MATERIALES ANTES DE EMPEZAR A MONTAR SU EDIFICIO FOR THE BEST LOOKING FINISHED PRODUCT WE RECOMMEND THAT YOU INSPECT, SORT AND LAY OUT MATERIALS PRIOR TO BEGINNING ASSEMBLY OF YOUR BUILDING HELPFUL MATERIAL NOTICE AVISO ÚTIL SOBRE LOS MATERIALES A B C Wood is a natural product that has inherent blemishes.
FOUNDATION OPTIONS OPCIONES PARA LA CIMENTACIÓ N (No incluidas) (Not supplied with kit) YOU MUST ASSEMBLE YOUR BUILDING ON A WOOD FLOOR OR CONCRETE SLAB. SITE PREPARATION • Site must be properly leveled. • Site should have natural drainage and no standing water HAY QUE CONSTRUIR EL EDIFICIO SOBRE UN BASE DE MADERA O DE CONCRETO. A) Purchase our optional Floor Kit or build your own wood floor. A) Compre nuestro equipo opcional para el suelo o construya su propio suelo de madera.
Before proceeding, determine desired door location and build door wall first. 10’ x 16’ (244x488 cm) 10’ X 12’ (244x366 cm) STOP STOP Antes de continuar determine la posición de la puerta y construya el muro con la puerta primero. BUILD WALL NUMBERS SPECIFIED CONSTRUYA LOS NÚMEROS DE LOS MUROS ESPECIFICADOS. WALL NUMBER EQUALS PAGE NUMBER EL NUMERO DEL MURO CORRESPONDE AL NUMERO DE LA PAGINA.
IMPORTANT!!! IMPORTANTE!!! Building Tip Consejo YOUR BUILDING CAN BE CONFIGURED IN A VARIETY OF WAYS. BEFORE ERECTING WALLS, REFER TO PAGE 5 TO ENSURE YOU BUILT THE RIGHT WALLS FOR YOUR BUILDING. ES PRECISO ALINEAR LOS PANELES DE LOS MUROS Y DEL TECHO ANTES DE CLAVARLOS COMPLETAMENTE PARA ASEGURAR LA ESCUADRA. Erecting the Walls Construyendo los Muros Make sure all walls are built as shown below. BUILD DOOR WALL FIRST. Asegure que se construyan los muros como en los dibujos abajo.
IMPORTANT!!! IMPORTANTE!!! Building Tip Consejo ES PRECISO ALINEAR LOS PANELES DE LOS MUROS Y DEL TECHO ANTES DE CLAVARLOS COMPLETAMENTE PARA ASEGURAR LA ESCUADRA.
3”(7.6 cm) WALL #9 MURO #9 x 28 Top UL x2 (Parte Superior) UM x6 RL x2 71" (180 cm) 24" (61 cm) 24" (61 cm) 24" (61 cm) 24" (61 cm) 24" (61 cm) 24" (61 cm) 20-1/2" (52 cm) 116-1/2" (296 cm) 24" (61 cm) 24" (61 cm) 20-1/2" (52 cm) End View Vista terminal 24" (61 cm) 2”(5 cm) WALL #9 See Page 8 for Building Tip!!! Top 92-1/2" (235 cm) MURO #9 x 124 Flush Nivelado 120" (305 cm) C ¡Ver la página 8 para un consejo! A (Parte Superior) A 3-1/2" (8.
3”(7.6 cm) WALL #10 MURO #10 x 28 SP x2 Top UM x6 Parte Superior UL x2 64" (163 cm) 16" (41 cm) 71" (180 cm) 20-1/2" (52 cm) 140-1/2" (357 cm) 16" (41 cm) 24" (61 cm) 24" (61 cm) 20-1/2" (52 cm) 16" (41 cm) 64" (163 cm) 16" (41 cm) End View Vista terminal 92-1/2" (235 cm) 48" (122 cm) 2”(5 cm) WALL #10 MURO #10 x 124 ¡Ver la página 8 para un consejo!!! See Page 8 For Building Tip!!! Flush Nivelado Top C x2 144" (366 cm) Parte Superior 3-1/2" (8.
3”(7.6 cm) WALL #11 MURO #11 x 28 SP x2 UM x6 Top Parte Superior UL x2 64" (163 cm) 24" (61 cm) 71" (180 cm) 24" (61 cm) 12-1/2" (32 cm) 140-1/2" (357 cm) 16" (40,6 cm) 16" (41 cm) 24" (61 cm) 64" (163 cm) 24" (61 cm) 12-1/2" (32 cm) End View Vista terminal 140-1/2" (357 cm) 2”(5 cm) WALL #11 MURO #11 x 124 ¡Ver la página 8 para un consejo!!! See Page 8 For Building Tip!!! C Flush Nivelado Top B C 144" (366 cm) Parte Superior 3-1/2" (8.
3”(7.6 cm) WALL #12 MURO #12 x 28 Top UM x6 Parte Superior UL x2 64" (163 cm) SP x2 12-1/2" (32 cm) 71" (180 cm) 140-1/2" (357 cm) 24" (61 cm) 24" (61 cm) 16" (41 cm) 16" (41 cm) 24" (61 cm) 24" (61 cm) 64" (163 cm) 12-1/2" (32 cm) End View Vista terminal 140-1/2" (357 cm) 2”(5 cm) WALL #12 MURO #12 x 124 ¡Ver la página 8 para un consejo!!! See Page 8 For Building Tip!!! Flush Nivelado Top B 144" (366 cm) Parte Superior 3-1/2" (8.
3”(7.6 cm) WALL #13 MURO #13 x 32 Top UM x7 Parte Superior UL x2 SP x2 20-1/2" (52 cm) 24" (61 cm) 24" (61 cm) 24" (61 cm) 71" (180 cm) 24" (61 cm) 140-1/2" (357 cm) 24" (61 cm) 24" (61 cm) 24" (61 cm) 24" (61 cm) 24" (61 cm) 20-1/2" (52 cm) 24" (61 cm) End View Vista terminal 48" (122 cm) 92-1/2" (235 cm) 2”(5 cm) WALL #13 See Page 8 For Building Tip!!! Some configurations will utilize 2 “C” panels here Algunas configuraciones utilizarán 2 paneles “C” aqui.
3”(7.
3”(7.
3”(7.6 cm) WALL #16 MURO #16 x 42 Top Parte Superior UM x8 UL x2 64" (163 cm) 12-1/2" (32 cm) 71" (180 cm) 24" (61 cm) 24" (61 cm) End View Vista terminal 24" (61 cm) 24" (61 cm) 24" (61 cm) 16" (41 cm) 24" (61 cm) 188-1/2" (479 cm) 24" (61 cm) 24" (61 cm) 16" (41 cm) 64" (163 cm) 12-1/2" (32 cm) 188-1/2" (479 cm) 2”(5 cm) WALL #16 MURO #16 x 188 ¡Ver la página 8 para un consejo!!! See Page 8 For Building Tip!!! Top Parte Superior Flush Nivelado B 192" (488 cm) 3-1/2" (8.
3”(7.
3”(7.6 cm) ERECTING WALLS x 10 (10’x12’) (305 x 366 cm) x 14 (10’x16’) (305 x 488 cm) 2”(5 cm) x 13 (10’x12’) (305 x 366 cm) x 17 (10’x16’) (305 x 488 cm) CONSTRUYENDO LOS MUROS ¡Ver la página 7 para un consejo! See Page 7 for Building Tip!!! Level Wall and Brace, Do not sink nails completely. Nivele la pared y refuérzala. No hinque los clavos completamente. ERECT SOLID WALLS FIRST CONSTRUYA LOS MUROS SÓLIDOS PRIMERO See Page 6 for wall # 3" (7.6 cm) Ver la página 6 para # muro. 3" (7.
3”(7.6 cm) ERECTING WALLS x 17 (10’x12’) (305 x 366 cm) x 21 (10’x16’) (305 x 488 cm) 2”(5 cm) x 18 (10’x12’) (305 x 366 cm) x 22 (10’x16’) (305 x 488 cm) See Page 7 for Building Tip!!! CONSTRUYENDO LOS MUROS ¡Ver la página 7 para un consejo! See Page 6 for wall # Ver la página 6 para # muro 2" (5 cm) 12" (30 cm) 2" (5 cm) 12" (30 cm) Remove Quite Level Wall and Nail Nivele la pared y clave 3" (7.6 cm) ERECTING WALLS 3” (7.
3”(7.
1-1/2”(3.
1-1/2”(3.8 cm) ROOF 2”(5 cm) x 24 TECHO x8 Middle Rafter Assembly (See sizes below for quantity) Conjunto de vigas centrales (Ver las dimensiones abajo para la cantidad) Flush Nivelado Glue Pegamento 2" (5 cm) Nails/Clavos Q QK Q x2 QJ WO Glue Pegamento 133-1/4" (339 cm) 10’x12’ (305 x 366 cm) 1-1/2”(3.8 cm) - 96 2”(5 cm) - 32 9-1/4” (24cm) x5 10’x16’ (305 x 488 cm) 1-1/2”(3.
ROOF TECHO 3”(7.6 cm) x36 x 40 Attaching Rafters (See below for dimensions) Fijando las vigas (Ver abajo para las dimensiones) 10’x12’ (305 x 366 cm) Shown / Indicado 100" (254 cm) End Rafters have one gusset to the inside Las vigas terminales tienen una placa de unión 24” (61cm) 24” (61cm) 24” (61cm) 24” (61cm) 144” (366cm) 10’x16’ (305 x 488 cm) 100" (254 cm) 24” (61cm) 24” (61cm) 3”(7.
2”(5 cm) ROOF TECHO x 40 x112 See Page 8 for Building Tip!!! ¡Ver la página 8 para un consejo! 10’x12’ (305 x 366 cm) Shown / Indicado Back E F H L Front F E G M 10’x16’ (305 x 488 cm) x160 Back E F H F H L Front E F M M 24 F G
1-1/2” (3.8 cm) ROOF TECHO x 40 x 76 Gable Panels Paneles del techo a dos aguas 1-3/4” (4.4cm) 7“ (17.5cm) RR 1-1/2“ (3.8cm) 1-3/4” (4.
2”(5 cm) TRIM MOLDURA x 40 x 21 N N O 2”(5 cm) TRIM MOLDURA x 40 x 66 ZCR ZDL T ZC ZCL ZDR YY T ZC YY 26
TRIM 2”(5 cm) MOLDURA x 28 10’x12’ (305 x 366 cm) Shown / Indicado ZP x2 ZP x2 x 40 10’x16’ (305 x 488 cm) ZT x2 27 WP x2 WP x2
1-5/8”(4.1 cm) DOOR PUERTA x8 ZO Top 3/8” (.9cm) Parte 7/16” (1.1cm) Superior 3/8” (.9cm) ZO V W 7/16” (1.1cm) DOOR 3/4” (19 mm) x 11 PUERTA Place a center mark for door location. Ponga un señal en el centro para la puerta. Cut out bottom plate at door opening Leave treated sill on concrete slab if desired. Corte la placa inferior en la abertura de la puerta. Deje la solera tratada en la losa de concreto si quiere. P Install Metal Threshold after cutting bottom plate.
DOOR 3” (7.6 cm) x 6 2” (5 cm) x 8 1” (2.5 cm) x 12 A B C PUERTA Attach with 3” (7.6 cm) Screws first, check doors to open properly and nail Fije con tornillos de 3" (7.6 cm) primero, compruebe que las puertas abren bien y clave. Inside Building Interior del edificio C x6 A A B Remove after doors are screwed B Quite después de fijar la puerta con tornillos. A B B A 2”(5 cm) TRIM MOLDURA x 48 Do not sink nails completely. No hinque los clavos completamente.
DOOR PUERTA Yx8 ZWR x 2 ZWL x 2 Diamond Plain Contemporary Octagon DOOR Traditional X Outer Diamond Double X Lower Octagon 3/4”(1,9 cm) x 32 Inner Diamond Countryside PUERTA ZWR ZWL ZWR 30 ZWL
DOOR 1”(2.
1”(2.
DOOR PUERTA x 28 1/2”(1.2cm) 1-3/4” (4.4cm) 35-3/4” (91cm) If installing optional 3 point lock refer to the next 2 pages. If not, skip to page 40. Si instalando opcional 3 cerradura del punto se refiere a las próximas 2 páginas. Si no, sáltese para paginar 40.
OPTIONAL 3 POINT LOCKING MECHANISM OPCIONAL See next page for mounting location of brackets and plates Vea próxima página para montar paréntesis 34
OPTIONAL 3 POINT LOCKING MECHANISM 1. Locate exact plate position and mark guide hole 2. Drill a 3/8” hole, 2-1/2” deep going into the header 2a. Drill a 3/8” hole through the plywood floor at the bottom 3. Fasten plate with the screws and washers provided OPCIONAL 1. Localice la posición exacta de plato y hoyo de guía de marca 2. Taladre un 3/8” hoyo, entrar profundo el hoyo de encabezamiento Plate Plato 2a. Taladre un 3/8” hoyo por el piso de contrachapado en el fondo 3.
3”(7.5 cm) TRIM MOLDURA x 40 x4 Pre-Drill 1/8” hole into corbel. Z x2 pre-taladre (3,2 mm) agujero en corbel. One at each end, centered on trim Uno en cada extremo del edificio, centrado en moldura HOOK AND EYE AND BARREL BOLT GANCHOS Y TORNILLOS-BARRIL Seleccione la posición para el corchete Select Desired location for your Hook and Eye. Inside of Door/ Interior de la puerta x2 x2 NOTE: Install hook and eye into trim or stud. NOTA: Instale el gancho y los ojos en moldura o stud.
PAINT AND CAULK PINTURA Y MASILLADO (Not Included) (No Incluidos) Use Acrylic Latex Caulk that is paintable. Caulk at all horizontal and vertical seams, between the Trim and Walls, and all around the Door Trim. Use un masillado acrílico de latex que se puede pintar. Masille todas las junturas horizontales y verticales, entre la moldura y los muros, y alrededor de la moldura de la puerta. Use a high quality exterior acrylic latex paint.
SHINGLES TEJAS (Not Included) (NoxIncluidas) 40 Building Size Shingles Needed Dimensiones del edificio Tejas Necesarias 10’ x 12’ (305 x 366 cm) 10’ x 16’ (305 x 488 cm) 5 Bundles 5 bultos 7 Bundles 7 bultos 1" (2.5 cm) 1/2" (1.3 cm) Sealing Strip 1" (2.
SHINGLES TEJAS (Not Included) (Nox 40 Incluidas) Ridge Cap tapa de cumbrera Cut Shingles into 3 Corte las tejas en tres partes pieces 5-1/8" (13 cm) Apply pieces to ridge as shown Fije las piezas a la cumbrera como en el dibujo 5-7/8" (15 cm) NAIL INSPECTION NAIL INSPECTION INSPECCIÓN DE CLAVOS REQUIRED MAINTENANCE x 40 REQUIRED MAINTENANCE MANTENIMENTO NECESARIO Check for protruding nails, pound any protruding nails into the wood or cut them off flush.
Limited Conditional Warranty WARRANTY Your Storage Building, Sunlight Building, Playhouse or Cedar Gazebo is warranted for the following period from date of installation: • • • Value Line - 10 year material; 2 year labor. Signature Series / Playhouse / Sunlight Building / Vinyl Sided / Cedar Gazebo / Pergola - 10 year material; 5 year labor. Garage-sized - 10 year material; 10 year labor.
Garantía limitada condicional GARANTÍA El cobertizo de almacenamiento, el invernadero, la casita de niños o el kiosco de cedro tienen garantía por los siguientes períodos, a partir de la fecha de instalación: • • • Línea Value - 10 años por los materiales; 2 años por la mano de obra Serie Signature / casita de niños / invernadero / revestimiento de vinilo / kiosco de cedro / pérgola - 10 años por los materiales; 5 años por la mano de obra Tamaño garaje - 10 años por los materiales; 10 años por la mano de