
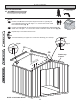
Warranty
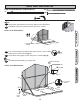

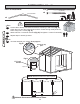
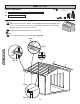

GABLE 10' x 8' GABLE 10' x 12'
GABLE 10' x 16'
40
3
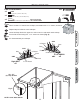
Nail down the bottom plate using two 3" nails
between the wall studs.
Screw through the backwall trim into the top
plate (Fig. E), and angled to hit oor frame at
bottom (Fig. F) using 3" screws.
Repeat process to secure the left sidewall.
1
2
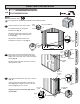
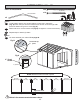
BEGIN
2" (5 cm)
3" (7,6 cm)
3" (7,6 cm)
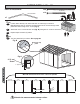
SIDE WALLS INSTALLATION
Be sure the measurement between the
panel edge and the trim is the same
along the entire length. Then secure
with one 2" nail in the upper corner
(Fig. C).
Nail along the panel edge into the trim
using 2" nails spaced 6" apart.
Nail along bottom of panel using 2"
nails 6" apart. Angle nail to hit oor
frame (Fig. D).
Stand right sidewall on oor.
It is important to secure the sidewall in the following order:
Additional fasteners needed for 10' x 12' kit or 10' x 16' kit. Same instructions apply.
D
OO
R
D
OOR
x2
Center sidewall on oor front to
back.
Rest the top of the sidewall so
the sof t panel overlaps the
backwall panel 3/8" (Fig. A).
Nail the lower sidewall corner to
the backwall trim with one
2" nail (Fig. B).
x30
x4
x39
x8
x48
x12
10x8' 10x12'
10x16'
6"
(15 cm)
6"
(15 cm)
CENTER
2" (5 cm)
Nail
Fig. B
Trim
Fig. D
Fig. E
3" (7,6 cm)
Screw
2x3"
3" (7,6 cm)
Nail
Panel
Same
Measurement
Fig. C
Trim
2" (5 cm)
Nail
DOOR
3" (7,6 cm)
Screw
3/8" (0,9 cm)
OVERLAP
Fig. A
Trim
Panel
SofÀ t
Panel
Fig. F
3" (7,6 cm)
Screw