
Warranty
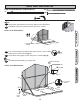

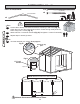
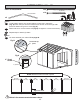

GABLE 10' x 8' GABLE 10' x 12'
GABLE 10' x 16'
42
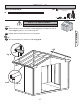
1-1/4" (3 cm)
Flush to top
of panel.
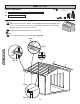
NOTE: 10'x8' Gable Shown
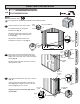
GABLE TRIM
PARTS REQUIRED:
2 x 3 x 54-5/16" (5 x 7,6 x 138 cm)
x4
CD
Flush
CD
CD
x24
D
OO
R
FINISH
4
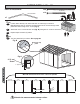
Position one CD ush to front panel edge and center on right edge of
groove (Fig. A). Attach trim with eight 1-1/4" screws from inside. Install
two screws at seam (Fig. B).
Position second CD ush to panel edge and ush to CD already attached (Fig. A).
Attach trim with eight 1-1/4" screws from inside. Install two screws at seam (Fig. B).
Repeat steps 1-2 to attach the back trim.
You have attached your upper trim. Continue to attaching your endcaps.
2
3
BEGIN
¸
1
Fig. A
Fig. B
8" (20,3 cm)
Approximately