
User Manual


Table Of Contents
- Table of Contents
- Using the Manual
- Contents of Kit
- Other Items Needed (not included in the kit)
- Additional Required Equipment
- Additional Required Tools and Adhesives
- Optional Hangar 9 1/3 Scale Hardware Package
- Servo Selection
- Before Starting Assembly
- Warning
- Warranty Information
- Section 1 - Aileron Servo Installation
- Section 2 - Aileron Control Horn Installation
- Section 3 - Hinging and Sealing the Control Surfaces
- Section 4 - Sealing the Hinge Gaps
- Section 5 - Aileron Linkage Installation
- Section 6 - Wing Tube Installation
- Section 7 - Rudder and Elevator Servo Installation
- Section 8 - Elevator Linkage Installation
- Section 9 - Rudder Linkage Installation
- Section 10 - Landing Gear Installation
- Section 11 - Wheel Pant Installation
- Section 12 - Tail Wheel Installation
- Section 13 - Receiver, Battery and Fuel Tank Installation
- Section 14 - Mounting the Engine and Cowl
- Section 15 - Hatch Assembly
- Section 16 - Balancing the Model
- Section 17 - Radio Setup
- Section 18 - Control Throws
- Preflight at the Field
- Setup and Flying
- Extra 330S - 3D at its Best
- 2003 Official AMA National Model Aircraft Safety Code
10
Section 3 – Hinging and Sealing the
Control Surfaces
Required Parts
• Wing panel (right and left)
• Aileron (left and right)
Required Tools and Adhesives
• 30-minute epoxy • Syringe
• Sandpaper (coarse) • Toothpicks
• Robart hingepoints
Properly hinging the control surfaces on giant-scale
models is vitally important! Poorly installed hinges
affect the model’s precision and control response and
can also be dangerous. Each and every hinge needs
to be securely bonded in place in both the flying
surface and the control surface. The hinge pivot
points need to be exactly parallel to each other and
precisely located on the center of the hinge line. We
regularly use Robart Super Hinge Points in all giant-
scale aircraft. They are easy to install, very strong,
and offer smooth friction-free control. The
Hangar 9
®
Extra 330S control surfaces are predrilled
to use Robart’s Super Hinge Points.
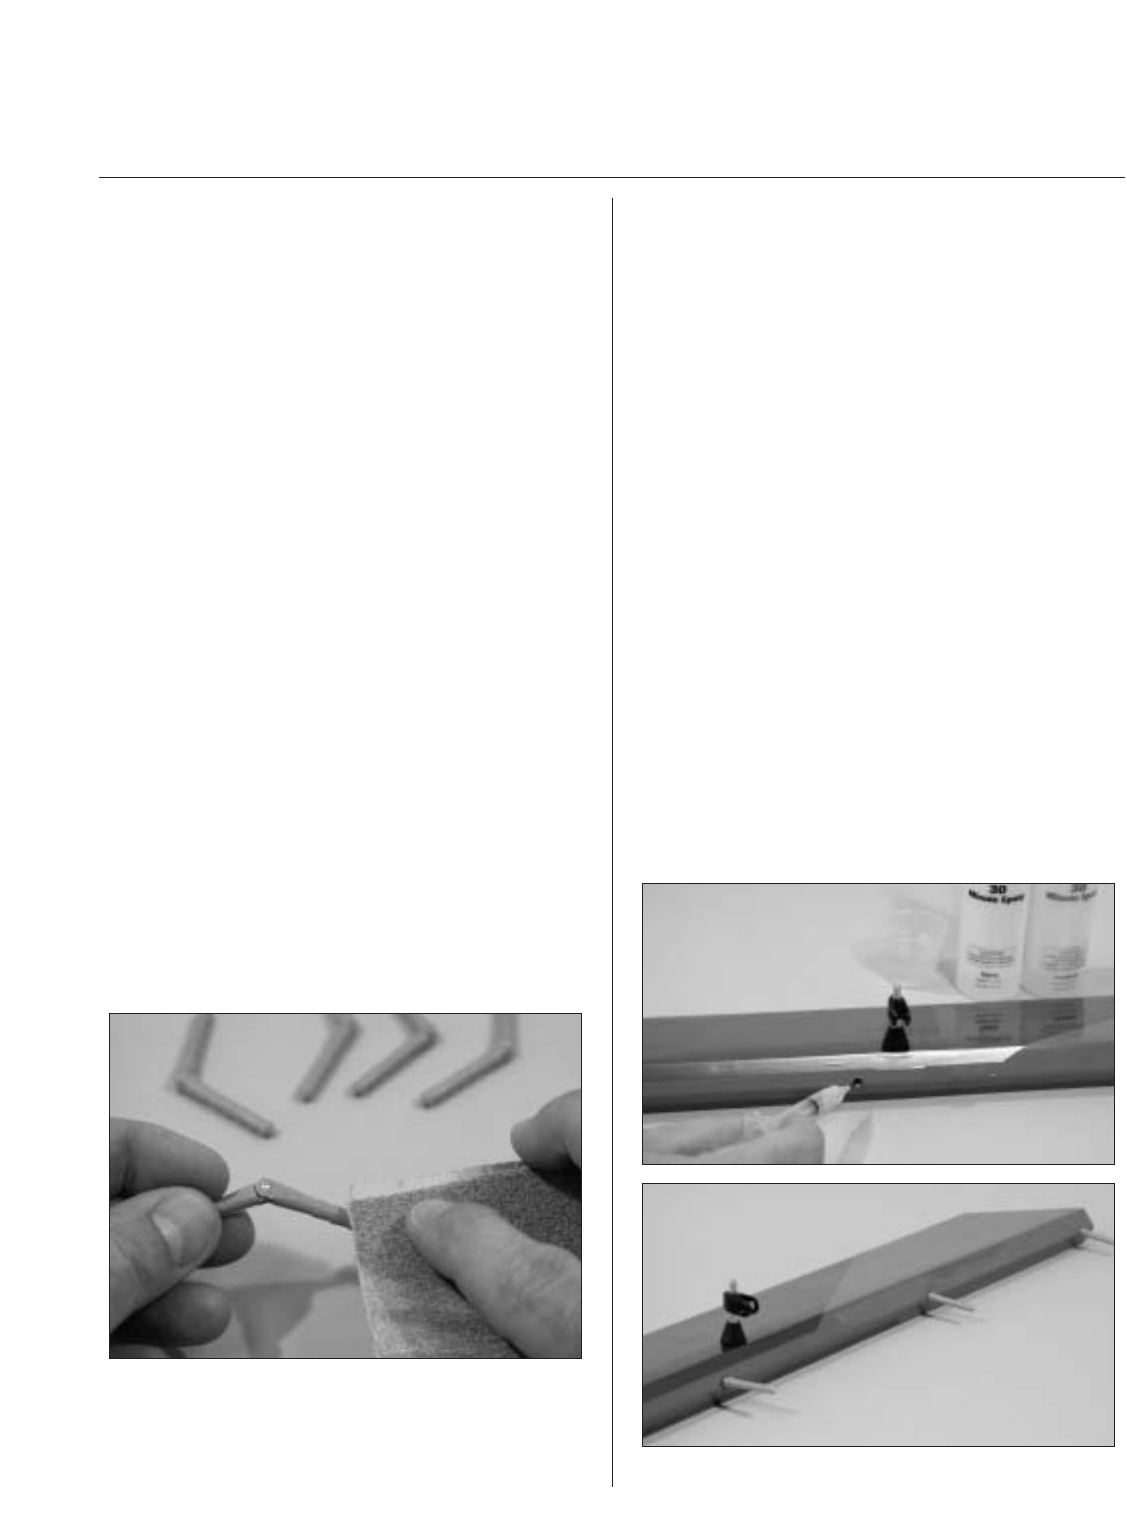
Step 1
Sand each end of the hinge point hinge using
coarse sandpaper. This will improve the bond of
the epoxy to the hinge.
Step 2
Mix 1 ounce of 30-minute epoxy. Using a glue
syringe or toothpick, place a sufficient amount of
30-minute epoxy into one of the hinge pockets in the
aileron leading edge. Install one of the hinge points
until the hinge pin center is flush with the leading
edge of the aileron. Some epoxy should ooze out of
the pocket as the hinge is installed. If not, remove the
hinge and apply more epoxy. After gluing a few
hinges, you’ll get the hang of just how much epoxy is
needed. Wipe away any excess epoxy with rubbing
alcohol. Recheck that the center of the hinge pin is
flush and parallel with the leading edge. Continue
installing hinges in the leading edge of the aileron.
The control surfaces (ailerons) will be installed after
the epoxy is fully cured.
Note: Be sure that the hinge pivot pins are
parallel and flush to the aileron leading edge.
It’s important to frequently mix a fresh batch
of 30-minute epoxy in order to achieve good
glue joint penetration. If you notice the epoxy
becoming thicker, then mix a new batch!