
User's Manual


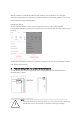


6.2 Press the device button for 5 seconds to enter the Wi-Fi configuration state (fast blinking
in EZ mode or slow blinking in AP mode).
6.3 Input the Wi-Fi SSID and password of the Wi-Fi network that the device is going to work
with, then waiting around 30 seconds for the Wi-Fi configuration finished until a device is
successfully added;
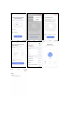
6.4 Change the device name and share it within APP account as you want.
7. 6.5 Click the device just added to launch the device state UI to check the state, battery
level, record history and the APP notification setting.
Note:
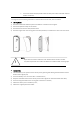
*Make sure the device and APP work in same Wi-Fi configuration mode, both in EZ mode or
in AP mode. Refer to Section 3 product description LED indicator part to check which state
the device is working with.
*In some case that the EZ mode is not working Wi-Fi network, AP mode is the only option.
EZ mode: make sure your APP is internet available and device and APP both work in EZ
mode. Then input the Wi-Fi network password to finish the device adding. If you want to
change the Wi-Fi network, please check the “Change network” in APP;