
User Guide

21
20
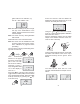
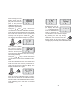
Press ALT and CAL until four dashes are
displayed on the upper display and “# fn” are
shown in the lower part of the LCD.
Using the and keys select the number
from 0 to 7 where the appropriate calibration
data have been stored.
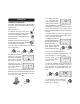
Add the appropriate reagent into the blank
sample cuvet. Shake and allow a few sec-
onds for color to develop.
Insert the reacted sample into the cuvet holder
and make sure that the notch on the cap is
positioned securely into the groove. Press
READ.
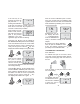
The meter will first show “SIP” for a few
seconds and afterwards the sample concen-
tration:
gether with the “Ab” indicator, e.g.:
533 Ab = 533 milliabs. units
Note: Absorbance readings may have a nega-
tive sign if the transmittance of the
“ZERO” sample is less then that of the
reacted sample.
Note: For better accuracy wash glassware
with HCl 6N.
Measurements in user-customized mode
Note: The meter must be calibrated for this
purpose. Follow the two-point custom-
ized calibration on page 26 before
proceeding.
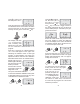
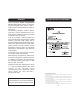
Turn the meter on and by momentarily press-
ing both ALT and CAL.
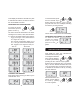
The LCD will show four
dashes on the upper
and “d 00” on the lower
part of the LCD with
the second “0” flashing:
Using the , and
keys change the lower
row of the display to
show “d 11”:
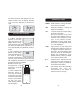
Press the key. This key is also used as a
toggle between
USER
(USR) and
FACTORY
(FCT) programmed functions. Select the USER
mode (if necessary by pressing the key
more than once):
+