
User Guide

23
22
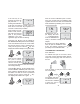
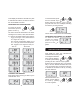
The display will blink
“-Lt-” for several sec-
onds, indicating that the
LED is being adjusted
for the turbidimetric channel.
Afterwards, a sequence of numbers between
-511 to 512 will appear on the upper part of
the LCD indicating different levels of LED light
intensity.
In approximately one minute, the adjustment
will be made and the calibration data stored
in the non-volatile memory.
The display will show four
dashes again indicating
the end of the span cali-
bration procedure.
Press the ALT and CAL
keys together again to
leave the diagnostic mode.
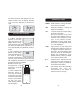
Two-point customized calibration
To enter the turbidity calibration mode, the
meter should be in “turbidity” mode.
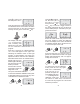
Use the and keys
to set the lower level of
the LCD to “tr”.
To enter the calibration mode, press and hold
the ALT and CAL keys together for at least
three seconds. The upper display will start
flashing “CAL” for approximately three sec-
onds.
To confirm entry into the calibration
mode, press the CAL key again
while “CAL” is blinking.
+
+
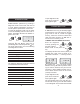
CALIBRATION
TURBIDITY CALIBRATION
The meter should be properly calibrated with
a standard prepared as described in USEPA
method 180.1.
Span calibration
To calibrate the span of the meter,
fill the cuvet with the primary turbid-
ity formazine standard of 50 NTU.
Inspect and clean thoroughly the sur-
face of the vial.
Shake the standard vigorously for a
few seconds and wait a few minutes
for the bubbles to disappear.
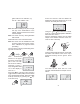
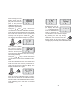
Turn the meter on and press both ALT and
CAL momentarily.
The LCD will show four
dashes on the upper
and “d 00” on the lower
part of the LCD with
the second “0” blinking.
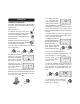
Using the , and
keys change the lower
row of the display to
show “d 21”.
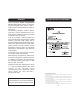
Insert the previously prepared 50 NTU stan-
dard into the cuvet holder and make sure that
the notch on the cap is positioned securely
into the groove. Press .
+