
User Guide

29
28
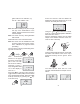
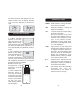
Subsequently, the up-
per display will show
“----”, indicating that the
meter is calibrated and
ready to measure the
concentration of an unknown sample.
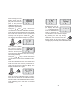
By pressing the CAL key during
calibration, user can leave the cali-
bration mode at any time without
changing the previously stored calibration data.
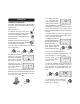
After entering the cali-
bration mode, the dis-
play will show the first
point of the previous
calibration with the most
significant digit blinking.
Using the , and keys, choose the
concentration of the first calibration standard.
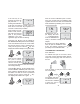
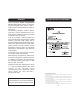
Insert the known standard into the cuvet holder
and make sure that the notch is positioned
securely into the groove. Press the key.
The display will indicate sample in progress.
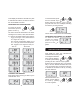
After the first calibra-
tion point is memo-
rized, the LCD will indi-
cate the second point
of the previous calibration with the most sig-
nificant digit blinking.
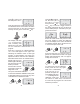
Using the , , keys, choose the known
concentration of the second calibration stan-
dard.
Insert the standard into the cuvet holder and
make sure that the notch is positioned se-
curely into the groove. Press the key. The
display will blink “SIP” again.
After the second calibration point is memo-
rized, the unit will store the calibration data,
time and date in the EEPROM while intermit-
tently indicating “CAL” and “Stor” for several
seconds.