
User Guide


10
CALIBRATION
If repeated measurements differ more than an acceptable value, check if the meter
calibration status by measuring a standard solution.
Anyway, it is recommended to perform a monthly calibration of the meter, or more
frequently for greatest accuracy.
To check the date of last calibration, press and hold the DATE/ key down for few
seconds.
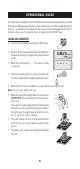
CALIBRATION PROCEDURE
• Turn the meter on and wait for the
display to show “----”.
• Press the CAL key once, the “CAL”
message will blink on the display for
about 6 seconds, then the calibration
mode stops.
• While the “CAL” message is still blinking, press CAL again. The instrument is
now in the calibration mode and a “CL” will appear on the lower part of the
display.
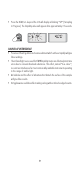
The date of calibration can be edited
now by simply pressing the DATE/
key. To scroll to the correct number press
the READ/ key.
The first blinking parameter is the month, on the left hand of the display
(MM.DD).
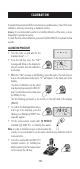
• To confirm the displayed data values
and to go to the next step, press the
CAL key once. A blinking “ZERO” mes-
sage will appear.
• Fill the measurement cuvette with HI 93703-0
standard (@ ZERO FTU, or turbidity-free water).
Note: In order to minimize any error introduced by the
cuvette, it is recommended to use the same cuvette during calibration and for
measurements.
• Insert the cuvette with the ZERO FTU
standard solution (or turbidity-free
dilution water) into the measurement
cell and press the CAL key.