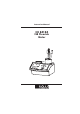
Instruction Manual HI 84184 ISE Fluoride Meter w w w. h a n n a i n s t .
Dear Customer, Thank you for choosing a Hanna product. This manual will provide you with the necessary information for the correct use of the instrument. Please read it carefully before using the meter. If you need additional technical information, do not hesitate to e-mail us at tech@hannainst.com. directives. This instrument is in compliance with TABLE OF CONTENTS PRELIMINARY EXAMINATION.................................................................................................
PRELIMINARY EXAMINATION Please examine this product carefully. Make sure that the instrument is not damaged. If any damage occured during shipment, please notify your Dealer. Each HI 84184 instrument is supplied complete with: • Reagents set for 20 tests • One 1000 µL automatic pipette • Four plastic tips for the 1000 µL automatic pipette • Two 50 mL beakers • Two 20 mL beakers • HI 61010 Fluoride half cell • HI 5315 Reference half cell • HI 7662-T Temperature probe • Stir bar (2 pcs.
SPECIFICATIONS Range Resolution Accuracy Sample volume Temperature Compensation Electrodes Temperature Probe LOG feature Stirring speed Environment Power supply Dimensions Weight 0.0 to 5.0 mg/L (ppm) F0.1 mg/L (ppm) F±5% of reading (see note) 50 mL Automatic from 0 to 80 °C HI 61010 Fluoride half cell HI 5315 Reference half cell HI 7662-T (included) 50 samples 500 rpm 0 to 50 °C (32 to 122 °F); max 95% RH non-condensing 220V/50Hz; 10VA 208 x 214 x 163 mm (8.2 x 8.4 x 6.4") (with beaker) 2200 g (77.6 oz.
FUNCTIONAL DESCRIPTION INSTRUMENT DESCRIPTION FRONT PANEL 1) 2) 3) 4) Graphic LCD Functional keys Keypad Electrode holder REAR PANEL 5) 6) 7) 8) 9) Fluoride half cell Reference half cell Temperature probe Electrode holder Reference socket 10) 11) 12) 13) 14) 5 Temperature probe socket BNC electrode connector Power switch Fuse Power cable connector
KEYPAD DESCRIPTION 1) ESC - to leave the current screen and to return either to the previous screen or to the main screen. In the setup parameter modifying mode by pressing ESC the value is not modified. - to modify a parameter value, to scroll the information from the instrument’s setup 2) 3) HELP - to access/leave the instrument’s contextual help 4) - to modify a parameter value, to scroll the information from the instrument’s setup 5) Functional Keys START UP • Place the instrument on a flat table.
Icons from the stirrer and reading status area When the input reading is unstable. When the stirrer is on. Temperature warning (only if the “Temperature compensation” is disabled). The warning symbol will be displayed if the temperature difference between the temperature of the sample confirmed at the first step and the subsequent readings is greater than 3 °C. Measure screens Main screen display Press Setup to acces the instrument’s setup. Press RCL to view logged data.
Sample reading confirm screen (only if this feature is enabled in setup) Press CFM to memorize the reading. Wrong input error screen This screen is displayed if the current reading is out of ±2000mV range. Wrong standard error screen This screen is displayed if step 2 and 3 of the current reading is out of ±2000mV range or if the difference between the stable readings from the current and the previous step is too small (±3mV) or, if in auto confirm mode, the standard addition is not detected.
Setup screens While in the Setup menu it is possible to modify the instrument parameters. By pressing the / keys it is possible to move between the Setup options. Each menu option displays the current option. Press HELP to view the contextual help. Stability criteria Options: Accurate, Medium, Fast. Press the corresponding functional key to select the desired option. Select Accurate for accurate measurements; long duration. Select Medium for normal measurements.
Backlight Options: On-Off, 1 to 8 levels. Press Modify to access the backlight modify screen. Press / or / in order to increase/decrease the display’s backlight intensity. Press Accept to confirm the value or ESC to return to the Setup menu without saving. Contrast Options: 0 to 20. Press Modify to access the contrast value modify screen. Press / or / in order to increase/decrease the display’s contrast. Press Accept to confirm the value or ESC to return to Setup menu without saving.
Press / or in order to select the desired format. Press Accept to confirm the desired date format or ESC to return to the Setup menu without saving. Language Options: Up to four available languages. This option is used to change the instrument’s display language. Press the corresponding functional key in order to select the new option. If the new selected language cannot be loaded, the previously selected language will be kept. The HELP information is not available if no language file can be loaded.
Recall screens Displays the list of all the memorised results. This list includes the record’s number, the concentration value, the concentration unit and the date. Press / to toggle between the stored records. Press More to view a complete set of data corresponding to the selected record. To return to the previous screen press ESC. Press / to toggle between complete record information screens. Press Delete to erase the currently selected record from the instrument’s memory.
TIPS FOR AN ACCURATE MEASUREMENT The instructions listed bellow should be carefully followed during analysis to ensure best accuracy. • Rinse the electrode pair with distilled or deionised water between samples, and blot dry with a lab wipe or other soft disponible absorbent toweling. • Select the adequate stability criteria. • Analyse the wine sample at room temperature.
• Use the 1000 µL automatic pipette to add exactly 1 mL of HI 84184-1 Standard when the meter asks for it. If the instrument is not in auto confirm mode, press READ to start next measurement step. • Wait until the reading is stable, CFM key displayed, if the “Reading confirm” option is selected, and then press CFM. If the “Reading confirm” option is disabled the instrument automatically memorizes the reading when this is stable and waits to add standard.
FUSE REPLACEMENT To change the fuse follow next steps: • Disconnect the power cord from the rear panel of the instrument. • Pull out the fuse holder located near the power cord connector. • Replace the fuse with a similar one. • Push the fuse holder with the fuse in the appropriate place. ELECTRODE CONDITIONING & MAINTENANCE PREPARATION PROCEDURE Preparation of fluoride electrode: • Remove the protective cap from the HI 61010 fluoride sensor’s tip. • Screw the fluoride cell into the electrode body.
• Reassemble reference electrode by gently pushing the inner assembly into the outer body, sliding spring down cable, and screwing cap into place. • Remove fill hole cover and o-ring or fill hole spout. • Using the dropper pipette provided, add a few drops of HI 7075 filling solution to the reference electrode, wetting the o-ring and rinsing out the fill solution chamber. • Holding the body of the electrode depress the black cap with your thumb. This permits the fill solution to drain out of the body.
• The difference between the two recorded mV values gives the slope of the electrode. An acceptable value for this slope is 56 ± 4mV. • Press ESC to leave the reading check mode. PERIODIC MAINTENANCE Inspect the electrode and the cable. The cable used for connection to the instrument must be intact and there must be no points of broken insulation on the cable, or cracks on the electrode stem or bulb. Connectors must be perfectly clean and dry. If any scratches or cracks are present, replace the electrode.
ACCESSORIES REAGENTS HI 7075 HI 84184-20 HI 84184-0 HI 84184-1 HI 84184-2 Electrode filling solution Reagent set TISAB W/5 for Flouride electrode (5×100 mL) Standard 1 for Fluoride electrode (500 mL) Standard 2 for Fluoride electrode (500 mL) OTHER ACCESSORIES HI 731316 Stir bar (5 pcs.) HI 731341 Automatic pipette 1000 µL HI 731351 Tips for 1000 µL automatic pipette (25 pcs.) HI 731355P Capilary pipette (20 pcs.) HI 740036P 50 mL plastic beaker (10 pcs.) HI 740037P 20 mL plastic beaker (10 pcs.
WARRANTY HI 84184 is warranted for two years against defects in workmanship and materials when used for its intended purpose and maintained according to the instructions. This warranty is limited to repair or replacement free of charge. Damage due to accident, misuse, tampering or lack of prescribed maintenance is not covered. If service is required, contact your dealer. If under warranty, report the model number, date of purchase, serial number and the nature of the failure.
SALES AND TECHNICAL SERVICE CONTACTS Australia: Tel. (03) 9769.0666 • Fax (03) 9769.0699 China: Tel. (10) 88570068 • Fax (10) 88570060 Egypt: Tel. & Fax (02) 2758.683 Germany: Tel. (07851) 9129-0 • Fax (07851) 9129-99 Greece: Tel. (210) 823.5192 • Fax (210) 884.0210 Indonesia: Tel. (210) 4584.2941 • Fax (210) 4584.2942 Japan: Tel. (03) 3258.9565 • Fax (03) 3258.9567 Korea: Tel. (02) 2278.5147 • Fax (02) 2264.1729 Malaysia: Tel. (603) 5638.9940 • Fax (603) 5638.9829 Singapore: Tel. 6296.