Regulatory Information ................................................................ 3 Description of Warning Symbols .................................................. 3 Safety Notices ............................................................................. 4 Preface ....................................................................................... 6 Warranty and Service .................................................................. 6 1. Getting Started ....................................
Table of Contents English 4. Troubleshooting ..................................................................... 30 5. Support Timing ...................................................................... 31 6. Specifications ........................................................................ 32 7. Dissembling the stand base .................................................... 33 8. Using the Cable Organizer .....................................................
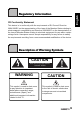
English Regulatory Information CE Conformity Statement This device is in conformity with the requirements of EU Council Directive 2004/108/EC on the approximation of the laws of the Member States relating to electromagnetic compatibility and Directive 2006/95/EC on the harmonization of the laws of Member States relating to electrical equipment for use within certain voltage limits.
English Safety Notices Installation Safety Notes Location Avoid allowing the TV to get prolonged exposure to sunlight or other strong sources of heat. Leave sufficient distance between the TV and the wall to provide enough space for the emission of heat. WARNING To reduce the risk of fire or electric shock, do not expose this apparatus to rain or moisture. Apparatus shall not be exposed to dripping or splashing and no objects filled with liquids, such as vases, shall be placed on the apparatus.
English Notes: • • The LCD TV is for entertainment use only and visual display tasks are excluded. This device uses a VGA connector to connect to a PC. To reduce the influence of main frequency on the source signal, use a VGA monitor cable with ferrite shield. Personal Safety 1. To avoid overloading the power supply, never plug too many electrical devices into an outlet, power strip, or extension cable. 2. Dangerous high-voltage electric power components are located inside the TV.
English Preface Thank you for purchasing a Hannspree Liquid Crystal Display Television (LCD TV). Your new TV will allow you to enjoy superior audio and video while enriching your lifestyle with advanced technology. Please carefully read this manual in its entirety before setting up, using or operating your TV. To ensure the safe and correct installation and operations of the TV, it is important that the safety and operation instructions in this manual are followed.
English Copyright © Copyright 2010 Hannspree, Inc. All rights reserved. This manual is protected by copyright and distributed under licenses restricting its use, copying and distribution. No part of this manual may be reproduced in any form by any means without the prior written authorization of Hannspree. The TV described in this manual may include copyrighted software of Hannspree (or other third parties).
1 English 1.1 Getting Started Package Contents Make sure the following components are included in the box. Please contact Hannspree Customer Service immediately if anything is missing or damaged. • TV • User’s manual • Quick start guide • Warranty card • Power cord • Remote control and batteries • TV cleaning cloth • Stand screws x 4 (for 27.5”/31.5”/42”) According to WEEE regulation, this TV can’t be handled as normal trash in Europe when it is out of usage.
Introducing the TV You can watch SECAM/ PAL/ DVB-T broadcast, cable, or digital television channels, and easily connect a VCR, STB or DVD player to the SCART, HDTV (Component), AV (Composite), and HDMI input ports (location of these ports depends on model). You can also use the TV as a monitor for your PC by connecting it through the VGA port.
English 1.4 Control Panel Description Button Power Function Press to turn the TV on or off. Input source INPUT Press to select the proper input source. Menu MENU Press to turn the on-screen display (OSD) menu on / off. Program select PS Press to increase the program number or move upward to the previous item on the OSD menu. Program select PT Press to decrease the program number or move downward to the next item on the OSD menu.
Connector Component Inputs (Video) PC Audio Input Function Connect to earphones or external speakers with built-in amplifier. Earphone Output Component/ CVBS Inputs (Audio) English Description Connect to an external device, such as a VCR, STB, or a DVD player. L -AUDIO- R Y PR PB AUDIO IN Connect to an external device, such as a VCR, STB, or a DVD player. Connect to a PC’s line / audio port.
English Description Connector CI SLOT CI HDMI 1 Input HDMI 1 HDMI 2 Input HDMI 2 HDMI 3 Input HDMI 3 SPDIF SPDIF Power Connector Function Connect to a CI device. Connect a HDMI equipment or an HDMIDVI adapter cable to devices such as a DVD player or set-top box. Connect a HDMI equipment or an HDMIDVI adapter cable to devices such as a DVD player or set-top box. Connect a HDMI equipment or an HDMIDVI adapter cable to devices such as a DVD player or set-top box.
Icon Last Function Use to select a program directly. Press 0-9 to enter the program numbers (press 1 and 0 for program 10). Keypad Pro.List English Description Pro.LIST LAST Press to display the programs contained. Press to return to the last channel selected. 1. Press to display current channel/program information. Information INFO Menu MENU OK OK 2.
English Description Icon Press to change the multi sound selection of the TV channel. Dual sound Select program Function P /P Red, Green, Yellow, Blue Press PS to increase the program number. Press PT to decrease the program number. Press the colored buttons to perform specific tasks in the OSD menu or teletext mode. Press to display a table of the available teletext subjects.
English Description Icon Picture Mode PIC Press continuously to toggle through all the picture setting: Vivid, Soft, User, Standard. FAV. Press to open favorite list menu and press / to select channels. Press OK to go to the selected channel. Favorite channel Freeze FREEZE Sleep timer SLEEP Aspect ratio ASPECT Function Press to pause a video frame on-screen. (Programmable in the TV source only) Press repeatedly to set the sleep timer (15, 30, 45, 60, 90 or 120 minutes).
English 1.7 1 Inserting the Remote Control Batteries Open the battery compartment cover at the back of the remote control (A). (A) 2 Insert the batteries paying attention to the polarity markings inside the battery compartment (B). (B) 3 Replace the battery compartment cover (C).
English CAUTION • If the remote control is not used for a long period, remove the batteries and store them properly. • Handle damaged or leaking batteries carefully, and wash hands with soap if they come in contact with leaked chemical fluids. • If your remote control has two batteries, do not mix new and old batteries, or the life of the new batteries will be shortened. Chemical fluids may leak from the old batteries. • Danger of explosion if battery is incorrectly replaced.
2 Power Connection 1 Connect the power cord to the AC IN input jack on the rear of the TV. 2 Insert the plug at the other end of the power cord into a power outlet. 2.2 Rear Connections See the illustration and table below for device connection instructions. CI SLOT Speaker system 9 CI-based devices L AUDIO R Camcorder PC 27.5”/31.5”/42” only 2 1 HDMI IN Camcorder VCR/VCD/DVD STB SCART PC IN AUDIO IN SERVICE PC 8 VIDEO DVD player VGA SCART 1 7 HDMI 1 Blu-ray Disc player 27.
Connector 1 VGA English No. Notes / Instructions • The VGA and audio cables are optional. AUDIO In 2 HDMI 1 HDMI 2 HDMI 3 3 Component Video Inputs • The HDMI cable is optional. • When the HDMI to HDMI cable is connected, connecting the audio cable is not necessary. However it’s necessary to do so if a HDMI to DVI cable is connected. • The video and audio cables are optional.
English 2.3 Using the TV 2.3.1 1 Press Turning the TV On and Off on the control panel or remote control. The power LED indicator on the TV changes from red to green, indicating that the TV is on. 2 Press again. The power LED changes from green to red, indicating that the TV is off. 2.3.2 Switching Source Signals Press INPUT on the control panel or remote control to select the incoming source signal. 2.3.
Adjusting On-Screen Display (OSD) Settings The On-Screen Display (OSD) menu system provides a quick and simple method to adjust the TV settings. The OSD menu can be accessed conveniently through the buttons on the remote control. Before going into details of each OSD option, you may get acquainted with the placement of the OSD system:. Picture Sound MAIN MENUS: TV Displays a list of menus.
English 3.1 OSD Setting Menus Follow the instructions indicated on the down side of the OSD Function Menu. Press / arrow keys to scroll through the menus, VOL PS/PTon the control panel or + on the control panel or the arrow key to select an item, or MENU to exit the OSD menu. The following menus can be set by different adjustment methods. 3.2 1 Adjusting Picture Settings Press MENU to enter the OSD Main Menu screen. The Picture menu is then displayed.
Phase, Clock, and Resolution settings for PC mode. Picture Sound Features Brightness 100 Contrast 50 Colour Temperature Cool Advanced Video Parental OK Enter Select Menu Exit Note: The options available on the OSD may vary depending on the input signal source. 3.3 Adjusting Sound Settings 1 Press MENU to enter the OSD Main Menu screen. 2 3 Press 4 Press 5 Press / to adjust the scales or options settings. 6 7 Picture to select the Sound menu.
English • The SPDIF Delay can be adjusted by pressing / to move the scales from 0 to 250. • The AVL can be set to On or Off. • The Type can be set to Normal, Hard of Hearing, or Audio Description. • To adjust the Audio Description, select Audio Description in the Type setting first. Press / to adjust the scales from 0 to 100. Note: The options available on the OSD may vary depending on the input signal source. 3.4 Adjusting TV Settings 1 Press INPUT and select TV as the signal type.
English • Select Channel Scan to activate the automatic TV channel search. Picture Sound TV Features Parental OK Picture Channel Scan Update Scan Single RF Scan Sound Enter Select Status:Scanning... Analog Channels: 0 Digital Channels: 0 TV Analog Manual Scan Channel Skip Channel Sort Channel Edit Decoder Analog Ch Fine Tune Features 0% Parental Menu Back Menu Cancel • Select Update Scan to automatically add channels to the existing channel list.
English • Select the Channel Sort to change the order of the channel list. • The Channel Edit allows you to adjust the detailed items, including Channel Number, Channel Name, Frequency, Colour System, and Sound System for each channel.
1 2 3 English 3.5 Adjusting Features Settings Press MENU to enter the OSD Main Menu screen. Press Press to select the Features menu. to enter the Features menu. Picture Sound TV Features Parental 4 5 6 7 Press Press / settings. / to select an item. to change the options OK Menu Language Picture Format Time UK Stereo Subitile Teletext Language Common Interface Reset Default Enter Select Menu Exit Press MENU to return to the Features menu entry. Press MENU to exit the OSD menu.
English • The Picture Format selections include Auto, Normal, Zoom1, Zoom2, Full, Subtitle, Native, and Wide. Please see below for details. Auto Normal Zoom1 Zoom2 Full Subtitle Native Wide Note: The options available on the OSD may vary depending on the input signal source.
1 2 English 3.6 Adjusting Parental Settings Press INPUT and select TV as the signal type. Picture Press MENU to enter the OSD Main Menu screen. Sound 3 4 5 6 Press Parental 7 Press 8 9 Press MENU to return to the Parental menu entry. Press to select the Parental menu. Channel Block Parental Guidance Input Block TV Set Password Clear All Features to enter the Parental menu. Type the password. The default is 0000. Press / / OK Enter Select Menu Back to select an item.
4 English Troubleshooting Situation Solution • • Connect the power cord properly. Check if the power LED is on or not. No picture and sound. • • • • Press on the control panel or remote control. Press Input to cycle through connected video sources. Press PS or PT to switch to other TV programs. Make sure all cables are connected properly. No picture, or poor picture, sound is OK. • • Check the antenna and cable connections. Adjust the brightness in the Picture OSD menu. Picture is not in color.
Support Timing PC Mode Support Timing SJ19DMAB SJ22DMAB SJ25DMAB SJ28DMBB SJ32DMBB SJ42DMBB Mode Resolution Horizontal Freq. (KHz) Vertical Freq. (Hz) Pixel Clock (MHz) 1 640 x 480 2 640 x 480 31.469 59.94 25.175 V V 37.861 72.809 31.5 V V 3 640 x 480 37.5 75 31.5 V V 4 720 x 400 31.469 70.087 28.322 V V 5 800 x 600 35.156 56.25 36 V V 6 800 x 600 37.879 60.317 40 V V 7 800 x 600 48.077 72.188 50 V V 8 800 x 600 46.875 75 49.
6 English Specifications Model No.
1 2 3 4 Dissembling the stand base Disconnect all the cables and cords from the TV to prevent breakage. Carefully place the TV face down on a soft and flat surface (blanket, foam, cloth, etc) to prevent any damage to the TV. Remove the screws so that the stand base can be removed. Gently remove the stand base. 18.5”/21.6”/24.6” 27.5”/31.
8 English Using the Cable Organizer Route the cables through the cable clamp as shown: 34