EN Installation / User Instructions / Warranty FR Instructions de montage / Mode d'emploi / Garantie ES Instrucciones de montaje / Manejo / Garantía Showerpipe Citterio M 34640xx1
English Technical Information Recommended water pressure Max. water pressure Recommended hot water temp. Max. hot water temp Flow rate - showerhead Flow rate - handshower 30 - 60 PSI 145 PSI 120° - 140° F* 176°F* 2.5 GPM max. 2.5 GPM max. *Please know and follow all applicable local plumbing codes when setting the temperature on the water heater. Installation Considerations • For best results, Hansgrohe recommends that this unit be installed by a licensed, professional plumber.
Français Données techniques Pression d’eau recommandée 30 - 60 PSI Pression d’eau maximum 145 PSI Température recommandée 120° - 140° F* d'eau chaude 176°F* Température maximum d'eau chaude Capacité nominale - pomme de douche 2.5 GPM Capacité nominale - douchette 2.5 GPM * Vous devez connaître et respecter tous les codes de plomberie locaux applicables pour le réglage de la température du chauffe-eau.
Español Datos tecnicos Presión recomendada en servicio Presión en servicio max. Temperatura recomendada del agua caliente Temperatura del agua caliente max. Caudal máximo - ducha cabezal Caudal máximo - teleducha 30 - 60 PSI 145 PSI 120° - 140° F* 176°F* 2.5 GPM 2.5 GPM *Debe conocer y cumplir todos los códigos locales aplicables para ajustar la temperatura del calentador de agua.
Tools Required / Outiles Utiles / Herramientas Útiles 30 mm ¼" / 6 mm 5
Installation Suggestions / Suggestions d'installation / Sugerencias para la instalación 2⅜" 9⅛" 2⅜" 3⅛" 30 ° 3 0° 3 0° 3 0° 46¾" 40¼" 46⅝" 4⅝" 2⅜" 12" 6 79¹³⁄₁₆" 6" 2⅝" 6" ⅛" 5⅞" G½ 1½" ⅞" 43⁵⁄₁₆" 79⁹⁄₁₆" min.
Rough in / Pièce intérieure / Piezas interiores ³⁄₁₆" English Français Español Install ½" NPT female fittings, recessed ³⁄₁₆" behind the surface of the finished wall, for the hot and cold water supplies. Installez deux raccords femelles filetés NPT de ½ po NPT, encastré à ³⁄₁₆ po à l’intérieur de la surface du plafond fini. Instale dos conexiónes hembras NPT de ½", embutidan ³⁄₁₆" detrás de la superficie de la pared acabada. The fittings should be 5⅞" apart on center.
Installation / Installation / Instalación 1 2 2 min. 1⁵⁄₁₆" max. 1⁷⁄₁₆" 1 English Français Español Wrap the inlet threads on the s-unions with teflon tape. Enveloppez les filets des raccords unions en S avec du ruban Téflon. Envuelva las roscas de las juntas tipo s con cinta de Teflon. Screw the s-unions into the female fittings. Vissez les raccords unions en S dans les raccords femelles. Enrosque las juntas tipo s en las conexiones hembra.
3 4 English Make sure that the unions are level. Seal the wall around the s-unions with waterproof sealant. Failure to seal the wall can lead to water damage. Install the escutcheons. Français Español S’assurez que les unions sont niveau. Aségurese de que los adaptadores son planos. Scellez le mur autour des raccords à l’aide d’un agent d’étanchéité. Selle la pared alrededor des juntas con un sellador impermeable. Si le mur n’est pas scellé, l’eau pourrait éventuellement causer des dommages.
5 6 30 mm 1 2 English Position the valve over the s-unions. Secure the valve to the unions by rotating the nuts clockwise. Install the support on the shower arm. Lubricate the o-rings on the shower arm. Install the shower arm on the riser. 10 Français Español Placez le mélangeur sur les raccords en S. Coloque el mezclador sobre las juntas tipo s. Raccordez les brides aux raccords en les tournant dans le sens des aiguilles d’une montre.
7 8 2 2 1 1 English Français Español Lubricate the o-rings on the valve. Lubrifiez les joints du robinet. Lubrique las juntas de la válvula. Install the riser on the valve. Installez la colonne montante sur le robinet. Instale la tubería de subida en la válvula. Assurez-vous que la colonne montante est au niveau. Asegúrese de que la tubería de subida quede nivelada. Marquez la position du trou de vissage. Marque la posición del orificio para el tornillo. Make sure that the riser is level.
9 English 10 Français Español Remove the riser assembly. Retirez la colonne montante. Retire la tubería de subida. Remove the mounting piece. Retirez la bride. Retire la brida.
11 12 2" 6m m/ English ¼" Français Español Protect the valve. Protegez le robinet. Proteja la válvula. Drill the screw holes. Percez les trous de vissage. Perfore el orificio para el tornillo.
13 14a 6m m/ English Install the anchors. Seal the wall around the anchors with waterproof sealant. Failure to seal the wall may result in water damage. Install the mounting piece. ¼" Français Español Installez les chevilles. Instale los pernos de anclaje. Scellez le mur autour de la cheville à l’aide d’un agent d’étanchéité. Selle la pared alrededor del perno de anclaje con un sellador impermeable. Si le mur n’est pas scellé, l’eau pourrait éventuellement causer des dommages.
or / o / ou 14b 3 95239xx0 2 1 3 mm English If the valve is mounted on tile, but the top support is not, install tile spacer 95239xx0 behind the top support. Install the riser on the valve. Make sure that the riser is level. Push the shower arm assembly over the mounting piece. Tighten the screw using a 3 mm Allen wrench. Do not over-tighten the screw. Installation / Installation / Instalación Français Español Si nécessaire, installez le disque compensateurs 95239xx0.
8" English Position the handshower holder escutcheon against the wall at the desired mounting position. Mark the positions of the screw holes. 16 ₆" ¹⁵⁄₁ ₆" ¹⁵⁄₁ Français Español Placez le support sur ’emplacement souhaité. Coloque el soporte en el lugar deseado. Marquez les positions des trous de vissage. Marque las posiciones de los orificios para tornillos.
18 2" 1 6m m/ ¼" 2 3 English Drill the holes. Do not drill into water lines. Install the anchors. Seal the wall around the anchors using waterproof sealant. Failure to seal the wall may lead to water damage. Install the escutcheon. Français Español Percez les trous à l’aide d’une mèche de ¼ po. Perfore los orificios con una broca de ¼". Ne pas entraînez dans les tuyaux d’eau. Installez les chevilles. Scellez le mur autour des chevilles à l’aide d’un agent d’étanchéité.
19 20 1 18 2 5 mm English Install the handshower holder. Do not over-tighten the handshower holder. Install the shower head. Tighten the safety screw. Do not over-tighten the safety screw. 18 2 mm Français Español Installez le support douchette. Instale el soporte de ducha. Ne serrez pas trop le support. No apriete en exceso el soporte. Installez la pomme de douche. Instale la ducha. Serrez la vis de sûreté. Apriete el tornillo de seguridad. Ne serrez pas trop la vis.
21 2 1 English Place the hose washer the short end of the handshower hose. Connect this end to the valve. Place the screen washer in the long end of the handshower hose. Connect this end to the handshower. Rest the handshower in the holder. Installation / Installation / Instalación Français Español Placez la rondelle en caoutchouc noir dans l’une des extrémités du tuyau. Fixez cette extrémité au robinet. Coloque la arandela de goma negra en un extremo de la manguera.
Set the high temperature limit stop / Réglage de la butée limite d’eau chaude / Ajuste el tope de límite de alta temperatura 2 1 2 1 ** 3 mm 3 **Follow all applicable local plumbing codes when setting the high temperature limit stop. To prevent scald injury, the maximum output temperature of the shower valve must be no higher than 120°F. In Massachusetts, the maximum output temperature can be no higher than 112°F.
Justify the handle / Réglez la poignée / Ajuste la manija 1 2 3 4 21
Replacement Parts / Pièces détachées / Repuestos 96179000 98995xx0 95239xx0 95688000 95692xx0 98134000 16x2.5 92020000 96743xx0 39740xx1 97530000 97716xx0 28514xx1 97705xx0 40916000 94246000 39525xx0 98287xx0 28276xx3 94140001 96922000 98131000 (15x2.5) 96737000 96467xx0 98137000 (17x1.5) 96157xx0 98283000 98289000 98288xx0 96044000 98058000 98913000 (26x1.5) 22 98290000 98290000 98214000 (12x2) 98289000 98390000 98913000 (26x1.
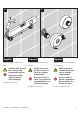
User Instructions / Instructions de service / Manejo on / ouvert / abierto off / fermé / cerrado 2. 1.
Cleaning / Nettoyage / Limpieza 1 2 3 4 Scale remover / Détartrant commercial / Desincrustante comercial 5 > 1 min.
Cleaning / Nettoyage / Limpieza 1 2 > 1 min 3 1 2 25
Maintenance / Entretien / Mantenimiento 1 2 2 1 3 mm 30 mm 3 3 10 mm 4 4 3 1 2 26
5 6 10 mm 30 mm Do not over-tighten 7 Ne serrez pas trop 4 No apriete en exceso 3 mm 3 5 2 1 27
Cleaning Recommendation for Hansgrohe Products Modern bathroom faucets, kitchen faucets and shower products are made from different materials to comply with the needs of the market with regard to design and functionality. To avoid damage to the product, it is necessary to take proper care of it. For best results: • Prevent the buildup of mineral scale and /or soap residue by cleaning your Hansgrohe product(s) when needed. • • Select a cleaning agent specifically intended for the type of product.
Ne pulvérisez pas les nettoyants directement sur le produit car des gouttes pourraient entrer dans les ouvertures et les fentes et causer des dommages. Lorsque vous utilisez des nettoyants par pulvérisation, pulvérisez le nettoyant sur un chiffon ou une éponge douce. Important • Les residus de produits pour le corps comme les savons liquides, shampooings, gels de douche, teintures pour cheveux, parfums, apres-rasage et vernis a ongles peuvent causer des deteriorations.
Limited Consumer Warranty This product has been manufactured and tested to the highest quality standards by Hansgrohe, Inc. (“Hansgrohe”). This warranty is limited to Hansgrohe products that are purchased by a consumer in the United States or Canada after March 1, 1996, and installed in either the United States or in Canada. WHO IS COVERED BY THE WARRANTY This warranty extends to the original purchaser only. This warranty is non-transferable.
HANSGROHE SHALL NOT BE LIABLE TO PURCHASER OR ANY OTHER PERSON FOR ANY INCIDENTAL,SPECIAL OR CONSEQUENTIAL DAMAGES,ARISING OUT OF BREACH OF THIS WARRANTY OR ANY IMPLIED WARRANTY (INCLUDING BUT NOT LIMITED TO ANY IMPLIED WARRANTY OF MERCHANTABILITY). Some States do not allow the exclusion or limitation of incidental or consequential damages, so the above limitation or exclusion may not apply to you.
www.hansgrohe-usa.com US - Installation Instructions • Part No. 90202121 • Revised 04/2016 Hansgrohe, Inc. • 1490 Bluegrass Lakes Parkway • Alpharetta, GA 30004 Tel.