5 Printed on the recyclable paper www.hansolel.co.kr Printed in Korea Part No.
INFORMATION TO USER : This equipment has been tested and found to comply with the limits of a Class B digital device, pursuant to Part 15 of the FCC Rules. These limits are designed to provide reasonable protection against harmful interference in a residential installation.This equipment generates, uses and can radiate radio frequency energy and,if not installed and used in accordance with the instructions, may cause harmful interference to radio communications.
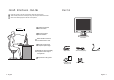
Good Posture Guide Parts Place the monitor to face the user and then adjust the monitor angle. Take a break (for about 10 minutes) at every hour during the work with monitor. Refer to the following figure to take the correct posture. about 50cm Look down the monitor below the horizon. Adjust the monitor to prevent reflection. LCD Monitor Relax shoulders and arms, and sit back on the chair. Adjust the monitor stand to acquire required angle.
Connection to Signal Source Basic Connection Port for AC power cable Port for Audio cable from audio source. Port for Head Phone or External Speaker Port for signal cable from signal source. < Power source connection > The range of control Angle How to Adjust the Stand Forward 4 < Signal cable connection> General For Macintosh Default Adapter for Macintosh (Optional) Refer to the table on the rear side of the optional Macintosh adapter and adjust DIP switch by the resolution. 1. Use 220 V or 110 V.
Installing Monitor Driver Run (Click) "Install" at Floppy Diskette driver and select the model name to set the optimum display in Window 95, 98 or 2000, XP. Use the Driver provided. Automatic Installation 1. Insert the Diskette to the Floppy Diskette driver. 2. Double-click "Install.exe". 3. Select the model and click "OK" button. 4. Select inf file, and then click "OK" button. 5. Click "Exit" button to close the installation. Click 'Advanced..'. Click 'Monitor'. Click 'Display a list of all...'.
Name and Function of Front Front panel Functions Power button Power button is located in the lower center of the Front Bezel. You can push the button to turn on/off the power. Power Indicating LED Dark : Power off Green : Normal mode Green blinking : DPMS mode or Check Signal Cable mode. On Screen Display (OSD) Function Button OSD buttons on the front of bezel perform the following functions.
Power Management Feature The monitor is equipped with a power saving circuit that confirms to the world-standard Display Power Manager Signalling (DPMS) mode of Video Electronics Standard Association (VESA). The power management feature requires that the video card of the computer should support DPMS function. Status LED Sign Power Consumption Normal mode Green ON Normal Power DPMS mode Green Blinking 1 W or Below Adjusting OSD Brightness / Contrast MENU SELECT 1.
Image Phase SELECT MENU 1. Press the MENU button to access main menu. 2. Use to move Image ICON. 3. Press SELECT button into the submenu. SELECT to move Phase ICON. 1. Press 2. Use SELECT button to select it. 3. Use to correct fine trembling or Video noise. Horizontal Position Clock SELECT 1. Use to move H-Position ICON. 2. Press SELECT button to select it. to adjust display left or right. 3. Use According to the characteristic of video card, control range can be changed. SELECT to move Clock ICON.
Preset Color OSD H-Position MENU SELECT 1. Use to select the Mode 1, and Mode 2. 2. Press the Menu button to return previous state. Mode 1 : Reddish white Mode 2 : Bluish white User Color 1. Use to move User color ICON. 2. Press SELECT button to select it. 3. Use to increase or decrease each color. 1. Use to move OSD V-Position ICON. 2. Press SELECT button to select it. 3. Use to adjust OSD upward or downward. OSD Time OSD SELECT 1. Press MENU button to access main menu. 2. Use to move OSD ICON. 3.
Special MENU SELECT 1. Press the MENU button to access main menu. to move Special ICON. 2. Use 3. Press SELECT button into the submenu. Auto-Config Information MENU SELECT 1. Use to move the Information ICON. 2. Press SELECT button to select it. You can know display information Accoding to the characteristic of video card, display information can be incorrect Language Sound Auto-Config (Option) MENU SELECT 1. Use to move Language ICON. 2. Press SELECT button to select it. to select language. 3.
Specification Standard Signal Table Horizontal Frequency (KHz) Vertical Frequency (Hz) Clock Frequency (MHz) (720 X 400) 31.469 70.087 28.322 Type Amorphous active matrix super TFT LCD VGA (640 X 480) 31.469 59.940 25.175 Screen Size 38.1cm (Diagonal) VGA (640 X 480) 37.500 75.000 31.500 Maximum Resolution 1024 X 768 @ 75 Hz SVGA (800 X 600) 37.900 60.320 40.000 Pixel Range 0.297 mm X 0.297 mm SVGA (800 X 600) 46.875 75.000 49.500 XGA (1024 X 768) 16.7M Color 60.004 65.
Troubleshooting Power LED is dark. No picture. Check the power connection. (Refer to page 4) Color is irregular. Adjust COLOR at User Mode in OSD Color Menu. OSD, "check cable." is displayed on the screen. Check the computer power is on. Double images or 'ghosts'. Check the resolution and frequency of computer and video card, and set up again in reference to the current monitor mode and standard signal mode table. Message, "No cable." is displayed on the screen.
Warning To prevent damage or loss, please read this warning carefully. When connecting/disconnecting the plug, pull out the plug itself, and never pull the cord to prevent fire caused by short. To prevent electric shock, do not connect/disconnect the plug with wet hand. If you see smoke or smell something burning, stop using the unit, switch off the power, pull out the plug, and then contact your local service station. To prevent fire, do not connect a large number of equipments in a single line.