
User's Manual


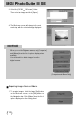
Table Of Contents
- Instructions
- Contents
- Getting to know your camera
- About the icons
- Caution
- An FCC warning
- This digital camera can be used for
- Manufacturer's contents
- Identification of features
- Front & Top
- Back & Bottom
- Side/ 5-function button
- Mode switch
- Lamp
- Connecting to a Power Source
- Using the AC power adapter (3.3V 2.0A)
- Using the batteries
- Removing the battery
- Using the Digimax battery pack ( Optional : SBP-3603, 3.3V)
- Precautions on Using the Memory Stick Duo
- Inserting the memory card
- Removing the memory card
- LCD monitor indicator
- Starting the recording mode
- Things to watch out for when taking pictures
- Using the camera buttons to adjust the camera
- POWER button
- SHUTTER button
- WIDE / TELE button
- Voice memo( )/ UP button
- Macro( ) / Down button (Focusing)
- Fixed focus
- FLASH( ) / LEFT button
- Self-timer( ) / Right( ) button
- MENU/ OK button
- +/- button
- LCD button
- Using the LCD monitor to adjust the camera
- How to use the menu
- Mode
- Size
- Quality
- Metering
- Effect
- Sharpness
- Starting play mode
- LCD monitor indicator
- Using the camera buttons to adjust the camera
- Thumbnail( ) / Enlargement( ) button
- Voice( ) memo / Up button
- Play & Pause( )/ Down button
- LEFT / RIGHT/ MENU/ OK button
- LCD button
- Delete( ) button
- Setting up the play back function using the LCD monitor
- Deleting all images
- Protecting images
- Starting the slide show
- Resize
- Rotating an image
- DPOF : PRINT ORDER
- DPOF : STANDARD
- DPOF : INDEX
- DPOF : PRINT SIZE
- DPOF : CANCEL
- PictBridge
- PictBridge: Picture Selection
- PictBridge: Print Setting
- PictBridge: Picture Printing
- PictBridge : DPOF AUTO PRINT
- PictBridge : RESET
- Setup menu
- File name
- Auto power off
- Language
- Formatting a memory card
- Setting up the Date/ Time/ Date type
- Imprinting the recording date
- Function lamp
- Sound
- LCD brightness
- Selecting Video out type
- Quick view
- Connecting an External Device (USB)
- Initialization(RESET ALL)
- Setting up the MYCAM menu
- Avatar
- Start up image
- Start up sound
- Shutter sound
- List of camera functions
- Starting PC mode
- Important notes
- Warning indicator
- Before contacting a service center
- Specifications
- Software Notes
- About the software
- Setting up the application software
- Removing the USB Driver for Windows 98SE
- Removable Disk
- Removing the removable disk
- Setting up the USB Driver for MAC
- Using the USB Driver for MAC
- Digimax Viewer 2.1
- MGI PhotoSuite III SE
- Get
- Prepare
- Compose
- Organize
- Share
- FAQ

101
Setting up the application software
If you have installed the camera driver, [Found
New Hardware Wizard] may not open.
On a Windows 98 or 98 SE system, the Found
New Hardware Wizard dialog box opens and a
window asking you to select a driver file may
appear. In this case, select the
[C:\WINDOWS\INF\OTHER] folder.
If you can’t find the [INF\OTHER] folder, check the
[Show all files] button in [Window's Explorer
View Folder option View].
When connecting the camera to your PC, it is
recommended that you use an AC power
adapter.
Before connecting the camera to the PC, You should first install the camera driver.
After installing the camera driver, you have to restart your PC.
If you connect the camera to the PC before installing the camera driver, the [Found
New Hardware Wizard] will open.
In this case, cancel the [Found New Hardware Wizard] and disconnect the camera.
Install the camera driver and connect the camera to the PC again.
Should the computer not find the camera driver after installation, please try one or more
of the following measures.
1. Delete the camera driver (p.124), and re-install the driver.
2. Refer to FAQ (p.146) to check for a possible solution to the problem.
3. If your PC’s central processing unit is VIA chip (This is shown in the USB Host
Controller), download the patch file from the Samsung Camera web page.
(http://www.samsungcamera.com)
INFORMATION