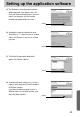
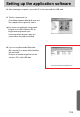
Setting up the application software 23. The Software License Agreement window will be displayed. If you agree to this, click [Yes], the window will then move to the next step. If you disagree, click [No] and the installation program will be canceled. [Click!] 24. A destination selection window will open. Click [Next >]. To copy to the files to another folder, click [Browse...] and choose a folder you want. [Click!] 25. The [Select Components] window will appear. Click [Next >] button. [Click!] 26.
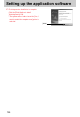
Setting up the application software 27. PhotoImpression Installation is complete. Click the [Finish] button to install VideoImperssion 2.0. * The system will not reboot even the [Yes, I want to restart the computer now] option is selected.
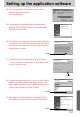
Setting up the application software 28. The VideoImpression 2.0 installation window will be displayed as shown alongside. Click the [OK] button. 29. [VideoImpression InstallShield Wizard] window will be displayed. Click the [Next >] button and a window will be displayed for the next step. 30. The Software License Agreement window will be displayed. If you agree to this, click [Yes], the window will then move to the next step. If you disagree, click [No] and the installation program will be canceled.
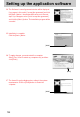
Setting up the application software 34. The Software License Agreement window will be displayed. If you agree to this, select [I accept the agreement] and click the [Next >] button , the window will then move to the next step. If you disagree, select [I don’t accept the agreement] and click the [Next >] button. The installation program will be canceled. 35. Installation is complete. Click the [Next >] button. [Click!] 36. To apply changes, you must restart the computer.
Setting up the application software 38. After restarting the computer, connect the PC to the camera with the USB cable. 39. Turn the camera power on. [Found New Hardware Wizard] will open and the computer will recognize the camera. If you have ever installed an image viewer program or your OS is Windows XP, an image viewer program will open. If the image viewer program opens, the camera driver was setup successfully. 40.
Setting up the application software INFORMATION If you have installed the camera driver, [Found New Hardware Wizard] may not open. On a Windows 98 or 98 SE system, the Found New Hardware Wizard dialog box opens and a window asking you to select a driver file may appear. In this case, specify "USB Driver" in the CD supplied. (for Windows 98 and 98 SE). When connecting the camera to your PC, it is recommended that you use an AC power adapter.
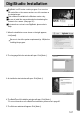
DigiStudio Installation guide System Requirements for DigiStudio DigiStudio requires the following minimum system configuration for smooth 3D performance. If your system does not meet the requirements, you will receive error messages and the installation will not continue.
DigiStudio Installation guide Cautions on the Graphic Card (VGA) The DigiStudio software will not install on a PO with a graphic card that does not support 3D acceleration and that has less than 8 MB video RAM. If the graphic card error screen appears while using DigiStudio, please go through the following steps: Step 1 : Go to My Computer Control Panel and color palette settings. Step 2 : Set the color palette to High Color (16 bit) or True Color (32 bit).
DigiStudio Installation DigiStudio is a 3D avatar creation program. You can store 3D avatar files on the camera and use one of the avatars as the startup image. This software is available in the Windows version only. Be sure to install the camera driver before transferring the avatars to the camera. (See page 95.) For instructions on how to use DigiStudio, please refer to Help. 1. When the installation screen shown on the right appears, click [Install]. Be sure to check the system requirements (p.
DigiStudio Installation 6. The Software License Agreement window will appear, asking you to agree to the licensing. Use the button on the bottom left to select the language of your choice, and then click [Agree] to accept the license agreement. The installation will proceed to the next stage. If you do not agree to the license agreement, click [Disagree]. The installation will be canceled. If the language of your choice is not listed, please select [English]. 7.
DigiStudio Installation 13. The [Connection Speed] window will open. Click [Next]. To choose another transfer rate, click and select the desired transfer rate. 14. The Browser Plug-in window will open. Click [Next]. 15. The File Type Association window will open. Click [Finish]. If you want to associate other file formats with QuickTime, put a checkmark (V) besides the file formats you want. 16. The Finished window will open. Click [Close].
Starting PC mode If you connect the USB cable to a USB port on your PC and then turn on the power, the camera will automatically switch to "computer connection mode". In this mode, you can download stored images to your PC through the USB cable. The LCD monitor is always turned off in PC mode. The camera status lamp will blink when the files are transferring via the USB connection. Connecting the camera to a PC 1. Turn the PC power on. 2. Turn the camera power on. 3.
Starting PC Mode Downloading stored images You can download the still images stored on the camera to your PC's hard disk and print them or use a photo editing software to edit them. 1. Connect the camera to your PC with the USB cable. 2. On your computer's desktop display, select [My computer] and double click [Removable Disk DCIM 100SSCAM]. The image files will then be displayed. 3. Select an image and press the right mouse button. 4. A pop-up menu will open. Click [Cut] or [Copy] menu.
Starting PC Mode 6. Press the right mouse button and a pop-up menu will open. Click [Paste]. 7. An image file is transferred from the camera to your PC. - By using [Digimax Viewer], you can see the stored images in the memory directly on the PC monitor and you can copy or move the image files.
Removing the USB Driver for Windows 98SE To remove the USB driver, refer to the process shown below. 1. Trace [Start Settings] and click [Control Panel]. 2. Double-click [Add/Remove programs]. 3. The [Add/Remove Programs Properties] window will open. Click [Digimax V50] and click the [Add/Remove] button. [Click !] 4. Uninstallation is complete. Click the [Finish] button and the window will disappear.
Removable Disk To use this camera as a Removable Disk, install (p.101) the USB Driver. 1. Before turning the camera power on, connect the camera to the PC with the USB cable. 2. Click [Removable Disk] under [My computer] or [Windows Explorer]. 3. Image files stored in the Removable Disk (DCIM PC. 100SSCAM) can be transferred to the INFORMATION Important information whilst using the Removable Disk The [Removable Disk] indicator will not show when the camera power is off or the USB cable is removed.
Removing the removable disk Windows 98SE 1. Check whether the camera and PC are transferring a file. If the auto focus lamp blinks, you have to wait until the lamp illuminates. 2. Unplug the USB cable. Windows 2000/ME/XP (The illustrations may be different from the real display in accordance with the Windows O/S.) 1. Check whether the camera and PC are transferring a file. If the auto focus lamp blinks, you have to wait until the lamp illuminates. 2.
Removing the removable disk 6. A [Unplug or Eject Hardware] window will open. Click the [Close] button and the removable disk will be removed safely. 7. Unplug the USB cable. [Click!] Setting up the USB Driver for MAC 1. A USB Driver for MAC is not included with the software CD as MAC OS supports the camera driver. 2. Check the MAC OS. You can check the MAC OS version during MAC OS start-up. This camera is compatible with MAC OS 9.0 ~ 10.2. 3.
Digimax Viewer 2.1 This software is only compatible with Windows. 1. To open Digimax Viewer, click the [Start Programs Samsung Digimax Viewer 2.1 Digimax Viewer 2.1 ] and Digimax Viewer 2.1 will then open. 2. If the [Auto Launch] option is selected, this program will be executed automatically with recognizing the camera. 3. You can easily use the Digimax viewer 2.1 program as it offers a FILE menu and TOOL bar.And, you can use the pop up menu. Click an image and press the right mouse button.
Using PhotoImpression With PhotoImpression, you can edit or store still images that you downloaded from the camera. This software is only available in Windows version. To start the program, click [Start Programs ArcSoft PhotoImpression PhotoImpression]. The following screen will appear. [ Help Button ] [ Command Button ] [ Tool Bar ] You can use PhotoImpression to perform the following tasks.
Using PhotoImpression Tool Bar Button Description Button Description Resize Layer Rotate Layer Flip Layer Horizontally Rotate All Layers Undo Redo Copy Paste Delete Layer Close Picture INFORMATION For detailed instructions on how to use PhotoImpression, please refer to the program's Help.
Using VideoImpression VideoImpression is a program which can edit or save downloaded movie clips from a camera. This software is only compatible with Windows. To operate this program, click the [ Start Programs ArcSoft VideoImpression 2 VideoImpression 2] and you can see screens below. [ Menu Bar ] [ Player ] [ Storyboard ] Functions below can be performed with VideoImpression Menu Bar. Choose movie clip, still image or audio files that construct final movie clip or slide show.
Using VideoImpression - File Manage Add : Add still images, movie clips or audio files to Album window. Arrange : Arrange files from Album window according to name, types, size and date. Video Capture : You can capture screens that you want to from a Video tool connected a computer. Get images : You can get images that you want to from an Image tool connected a computer. You can control luminosity and contrast of movie clips and still images in Storyboard.
Using VideoImpression Add effects or apply produced themes when you connect component parts of Storyboard. Add animation text to movie clip and still image used to make movie clip. It is only applicable to movie clip project. * Move T-bar and choose the beginning and ending point of text. Record Audio on the program and add it to movie clip. : Record Audio on a movie clip : Replay recorded Audio. : Stop replaying or recording. : Set up Audio.
Using VideoImpression All parts of storyboard get united and make movie clips or slide show. You can save movie clip with various ways and send it through e-mail to your friends. Way to make MPEG-4 movie clip for SAMSUNG U-CA3/4 1. Click [Produce] and then select [disk]. 2. Select [Samsung U-CA3/4] from [Video Type]. After setting up Quick Time, select Samsung U-CA3/4. 3. If you want to replay produced file on a camera, name the file SMMCxxxx.(xxxx means number from 0001 to 9999) 4.
FAQ Please check the following if the USB connection malfunctions. [Case 1] The camera power is off. Turn the camera power on. We recommend using an AC power adapter in PC mode. [Case 2] USB Driver is not installed correctly. Install the USB Driver correctly. Refer to page 101. [Case 3] The USB cable is not connected or you are using a cable with an incorrect specification. Use a USB cable with the correct specification. [Case 4] The camera is not recognized by your PC.
FAQ Win XP : Trace [Start Control Panel Performance and Maintenance System Hardware Device Manager Universal Serial Bus controllers]. There must be USB Host Controller and USB root hub under [Universal Serial Bus controllers]. In addition, double-click on the USB Universal Host Controller and the USB Root Hub to check if the Device Status states "This device is working properly".
SAMSUNG TECHWIN CO., LTD. OPTICS & DIGITAL IMAGING DIVISION 145-3, SANGDAEWON 1-DONG, JUNGWONGU,SUNGNAM-CITY, KYUNGKI-DO, KOREA 462-121 TEL : (82) 31-740-8086,8088, 8090, 8092, 8099 FAX : (82) 31-740-8398, 8111 SAMSUNG OPTO-ELECTRONICS AMERICA, INC. HEADQUARTERS 40 SEAVIEW DRIVE, SECAUCUS, NJ07094, U.S.A. TEL : (1) 201-902-0347 FAX : (1) 201-902-9342 WESTERN REGIONAL OFFICE 18600 BROADWICK ST., RANCHO DOMINGUEZ, CA 90220, U.S.A.