
User's Manual

101
Setting up the application software
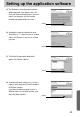
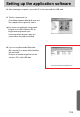
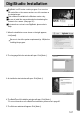
28. The VideoImpression 2.0 installation window will be
displayed as shown alongside.
Click the [OK] button.
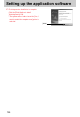
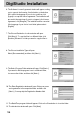
29. [VideoImpression InstallShield Wizard] window will be
displayed. Click the [Next >] button and a window will be
displayed for the next step.
30. The Software License Agreement window will be displayed.
If you agree to this, click [Yes], the window will then move to
the next step. If you disagree, click [No] and the installation
program will be canceled.
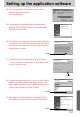
31. A destination selection window will open. Click [Next >].
To copy to the files to another folder, click [Browse...] and
choose a folder you want.
32. A window will open, asking you to choose a folder to which
program icons will be added. Click [Next >] button. If you
want to add the program icons to a different folder, choose
another folder, and then click [Next >] button.
[Click!]
[Click!]
[Click!]
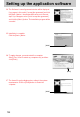
33. VideoImperssion 2.0 Installation is completed. Click the
[Finish] button and DirectX 9.0 installation will be started.
[Click!]