W ir e le ss 8 0 2 .
Ch a p t e r 1 : I n t r o d u ct i o n … … … … … … … … … … … … … … . … … … … . 3 1 . 1 Pr o d u c t Fe a t u r e s ………………………………………………………. ………………. 3 1 . 2 Pa c k a g e Co n t e n t s ………………………………………………………………………. 3 1 . 3 I n d i c a t o r D e s c r i p t i o n …………………………………………………………………. 3 CH A P T ER 2 : Q u i ck I n s t a l l a t i o n Gu i d e … … … … … … … … … … … … . 4 2 . 1 D r i v e r I n s t a l l a t i o n ………………………………………………………………………. 4 2 .
Ch a pt e r 1 . I n t r odu ct ion Thank you for purchasing t he wireless 802.11b/ g/ n/ a/ ac USB adapt er! This adapt er is m ini size design and you are able t o plug it int o t he USB port . Except ing com m on wireless st andards 802.11b/ g/ n, t his wireless adapt er is also 802.11ac com pat ible dat a t ransfer rat e is 150/ 433Mbps, and t hat ’s t hree t im es fast er t han 802.11g wireless net work! 1 .1 Pr odu ct Fe a t u r e s ◆ Com plies wit h I EEE 802.11ac , I EEE 802.11a,I EEE 802.
This chapt er is t o assist you how t o use t he included CD- ROM which com prises t he Driver and t he Client Ut ilit y I nt erface. 2 .1 D r ive r I n st a lla t ion Please follow t he following inst ruct ions t o inst all your new wireless USB Adapt er: 2 .1 .1 I nsert t he USB wireless net work card int o an em pt y USB 2.0 port of your com put er when com put er is swit ched on. Never use force t o insert t he card, if you feel it ’s st uck, flip t he card over and t ry again. 2 .1 .
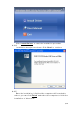
Click ‘I n st a ll D r ive r ’ t o st art t he inst allat ion procedure 2 .1 .4 I nst allat ion descript ions shown. Click ‘N e x t ’ t o cont inue 2 .1 .5 Once t he inst allat ion is finished t he com put er will be asked t o reboot . you can click ‘Finish’ and reboot t he com put er t o finish t he inst allat ion of driver files.
2 .1 .6 A new icon will appear near t he clock of syst em t ray: Left- click t he icon will launch wireless net work configurat ion ut ilit y, and you can right- click t he icon t o show t he quick m enu of configurat ion ut ilit y. This icon also uses different color t o show t he st at us of wireless connect ion: Wireless connect ion is est ablished, good signal recept ion. Wireless connect ion is est ablished, weak signal recept ion. Connect ion is not est ablished yet .
2 .2 Con n e ct t o W ir e le ss Acce ss Poin t To use wireless net work, you have t o connect t o a wireless access point first . You can eit her use Client ut ilit y ( com es wit h net work card driver) , or Windows Zero Config ut ilit y ( com es wit h Windows operat ing syst em ) . 2 .2 .1 Usin g Clie n t Ut ilit y Please follow t he following inst ruct ions t o use Client configurat ion ut ilit y t o connect t o wireless access point . 1.
I f t he wireless access point you wish t o connect does not appear here, you can click ‘Re fr e sh ’ but t on t o scan for wireless access point s again; if t he wireless access point you’re looking for st ill not appear, t ry t o m ove t he com put er closer. When t he access point you’re looking for is on t he list , left- click it and t hen double click it or click ‘Add t o Pr ofile ’. 4. I f a password ( a.k.a.
All opt ions in t his page will be filled aut om at ically according t o t he access point you wish t o add t o profile. How ever, you can st ill m odify any of t hem t o m eet your requirem ent . Profile nam e Net work Nam e ( SSI D) This is a com put er- t o- com put er ( ad hoc) net work Channel Net work Aut hent icat ion You can give a nam e t o t his profile, so you can rem em ber it s purpose easily. I t can be any phrase t o help you rem em ber. The SSI D ( Service Set I Dent ifier, i.e.
Dat a encrypt ion ASCI I / PASSPHRASE Key index Net work key / Confirm net work key EAP TYPE / Tunnel / Provision Mode Usernam e / I dent it y / Dom ain / Password Cert ificat e PAC Select t he dat a encrypt ion t ype from drop- down m enu. This set t ing m ust be ident ical wit h t he set t ing of wireless access point you wit h t o connect . When t he encrypt ion t ype is ‘WEP’, it ’s required t o input a set of ‘passphrase’ t o connect t o wireless access point .
N OTE: I f you connect ed t o an access point but t he connect ion has been dropped soon, please check securit y set t ings and re- check password spelling. 2 .2 .2 Usin g W in dow s Ze r o Con figu r a t ion Windows XP and Vist a has a built- in wireless net work configurat ion ut ilit y, called as ‘W in dow s Ze r o Con figu r a t ion’ ( WZC) . You can also use WZC t o configure your wireless net work param et er: 1. Right- click Client configurat ion ut ilit y icon, and click ‘Ope n Con fig Ut ilit y’.
2. 3. Check ‘W in dow s Ze r o Con fig’ box. A m essage indicat ing t hat you’ve been swit ched t o Windows Zero. N OTE: To ret urn t o use Client ut ilit y, uncheck ‘Windows Zero Config’ box. 4. Click ‘St a r t ’ but t on ( should be locat ed at t he bot t om - left corner of windows deskt op) , click ‘Cont r ol Pa ne l’, t hen click ‘N e t w or k a n d I n t e r n e t Con n e ct ion s’ in Cont rol Panel.
5. Double click ‘N e t w or k Con n e ct ion s’. 6.
num ber as suffix if you have m ore t han one wireless net work card, please m ake sure you right- click t he Wireless LAN 802.11ac USB Net work Adapt er) , t hen select ‘Vie w Ava ila ble W ir e le ss N e t w or k s’. 7. All wireless access point s in proxim it y will be displayed here. I f t he access point you want t o use is not displayed here, please t ry t o m ove your com put er closer t o t he access point , or you can click ‘Refresh net work list ’ t o rescan access point s.
set t ing on t he access point . I f t he access point you select ed does not use encrypt ion, you’ll not be prom pt ed for securit y key or passphrase. 9. I f you can see ‘Con n e ct e d’ m essage, t he connect ion bet ween your com put er and wireless access point is successfully est ablished. CH APTER 3 : Clie n t Ut ilit y 3 .
I f you need t o connect t o different wireless access point s at different t im e, like of access point of your hom e, office, cybercafe, or public wireless service, you can st ore t he connect ion param et ers ( encrypt ion, passphrase, securit y et c, et c.) as a profile for every access point , so you don’t have t o input t hese param et ers every t im e when you want t o connect t o a specific wireless access point .
You’ll be prom pt ed t o input connect ion param et ers for t he wireless access point you wish t o connect : Required param et ers are: 17 / 36
Profile nam e Net work Nam e ( SSI D) This is a com put er- t o- com put er ( ad hoc) net work Channel Net work Aut hent icat ion Dat a encrypt ion ASCI I / PASSPHRASE Key index Net work key / Confirm net work key EAP TYPE / Tunnel / Provision Mode You can give a nam e t o t his profile, so you can rem em ber it s purpose easily. I t can be any phrase t o help you rem em ber. The SSI D ( Service Set I Dent ifier, i.e. access point ’s nam e) .
Usernam e / I dent it y / Dom ain / Password Cert ificat e PAC set t ing m ust be ident ical wit h your 802.1x aut hent icat ion server. Please input 802.1x relat ed aut hent icat ion inform at ion here. I f cert ificat ion is required t o aut hent icat e wit h 802.1x aut hent icat ion server, please select a local cert ificat e from dropdown list . Check t his box and PAC ( Privilege Access Cert ificat e) will be aut om at ically select ed.
3 .1 .4 M a k e a copy of e x ist in g pr ofile I f you need t o m ake a copy of a specific profile, you can use t his funct ion. This funct ion is very convenient when you need t o build a new profile which param et ers are sim ilar t o any exist ing profile. To do t his, select an exist ing profile, t hen click ‘D u plica t e ’ but t on.
You’ll be prom pt ed t o input a profile nam e, please use an ident ical nam e t hat does not exist in profile list . 3 .1 .5 Se t a s de fa u lt pr ofile I f you wish t o use a specific profile as default connect ion, you can select a profile in t he list , and click ‘Se t D e fa u lt ’. Select ed profile will becom e default select ion and Client configurat ion ut ilit y will at t em pt t o connect t o select ed access point . 3 .
All general inform at ion like signal st rengt h and link qualit y will be displayed here. These inform at ion are very useful when you encount er som e problem on connect ing t o access point . I f you wish t o get a new I P address from DHCP server, you can click ‘Re N e w I P’ but t on. 3 .2 .
3 .2 .3 V ie w N e t w or k St a t ist ics To view t he st at ist ical dat a of wireless net work card, click ‘St a t ist ics’ m enu, and t he st at ist ics of wireless connect ion will be displayed: All connect ion- relat ed st at ist ics is displayed here. You can click ‘Re se t ’ but t on, t o reset t he st at ist ics of all it em s back t o 0. 3 .
The descript ions of t hese funct ion are list ed as follow: Show Tray I con Radio Off Disable Adapt er Windows Zero Config Check t his box t o show an icon on syst em t ray. Uncheck t his box t o hide it . Swit ch wireless radio off. Wireless net work funct ionalit ies are disabled. Disable wireless net work adapt er. All funct ionalit ies of configrat ion m enu will disappear. To resum e, unckeck ‘Disable Adapt er ’. Use Windows Zero Configurat ion t o m anage wireless connect ions. See sect ion 2.2.
and Push- But t on. Please follow t he following inst ruct ions t o set up WPS: 1. 2. 3. Right- click Client configurat ion ut ilit y icon, and click ‘Ope n Con fig Ut ilit y’. Click ‘W i- Fi Pr ot e ct Se t u p’ m enu. You can use PI N code or Push- But t on configurat ion, and WPS- com pat ible wireless access point m ust use t he sam e t ype of WPS. For inst ruct ions on set up each t ype of WPS, see next 2 chapt ers for det ailed inst ruct ions.
3 .4 .1 PI N Code To use PI N Code, please click ‘Pin I n put Con fig ( PI N ) ’ but t on: You’ll be prom pt ed t o select an access point you wish t o connect . I f you know it s SSI D, click ‘Ye s’, ot herwise click ‘N o’.
I f you select ‘Ye s’, a list of all WPS- com pat ible AP nearby will be displayed; you can click ‘Re fr e sh ’ t o rescan, t hen select an AP and click ‘Se le ct ’ but t on. I f you select ‘N o’, wireless net work card will prom pt you t o ent er 8- digit PI N code int o your AP, wit hout select ing an AP in advance. Aft er you select ‘Ye s’ or ‘N o’ in previous st ep, net work card will at t em pt t o connect t o WPS- com pat ible AP, and an 8- digit num ber will appear.
WPS- com pat ible AP using Push- But t on config, please use PI N Code inst ead. Aft er you click “ Pu sh Bu t t on Con fig( PBC) ”, a m essage box will appear: Please act ivat e Push- But t on funct ion on wireless access point now, and wireless net work card will est ablish secure connect ion wit h access point wit hin one m inut e.
4 .1 Sw it ch t o AP M ode a n d St a t ion M ode The operat ing m ode of t he wireless card is ‘St at ion Mode’ ( becom ing a client of ot her wireless access point s) by default . 1. Please follow t he following inst ruct ions t o swit ch t o AP m ode: Right- click Client configurat ion ut ilit y icon, and click ‘Ope n Con fig Ut ilit y’. 2 . Select ‘M ode ’, and t hen select ‘Acce ss Poin t ’. I t requires few seconds t o swit ch t o AP m ode, please be pat ient .
Client m ode icon : Soft ware AP icon: 4 .1 .1 Con figur e SSI D a n d Ch a n n e l To configure soft ware AP, click ‘Config’ but t on: The ‘W ir e le ss N e t w or k Pr ope r t ie s’ is displayed.
Please not e t hat Ad- Hoc m ode is not available when net work card is in AP m ode. The descript ion of m aj or set up it em s are list ed below: Net work Nam e ( SSI D) Channel Please input t he SSI D ( t he nam e used t o ident ify t his wireless access point ) here. Up t o 32 num erical charact ers can be accept ed here, except ing space. Please select t he wireless channel you wish t o use, from 1 t o 13.
The descript ion of set up it em s about wireless securit y are list ed below: Net work Aut hent icat ion Dat a Encrypt ion ASCI I / PASSPHRASE Key I ndex Net work key / Confirm net work key Select net work aut hent icat ion m ode from dropdown m enu. Select dat a encrypt ion m et hod from dropdown m enu. I f t he encrypt ion m et hod is WEP, check eit her ‘ASCI I ’ or ‘PASSPHRASE’ box and input it in t he box as WEP passphrase. Select WEP key index ( 1- 4) .
I f you want t o set up advanced set t ings of soft ware access point , select ‘Adva n ce d’ m enu. I f you don’t know t he m eaning and affect s of t hese set t ings, keep t hem unt ouched. The descript ion of all set up it em s are list ed below: Beacon I nt erval Please input wireless beacon t im e int erval here. DTI M Period Set Default s Please input DTI M ( Delivery Traffic I ndicat ion Message) here. Select wireless fram e pream ble m ode ( long or short ) from dropdown m enu.
Click ‘Re se t ’ t o reset t he value of every it em back t o ‘0’. 4 .4 I n t e r n e t Con n e ct ion Sh a r in g ( I CS) I n t his page, you can assign a net work card on your com put er as t he pat h for all wireless client s t o get connect ed t o I nt ernet . I f you have only one net work card ( except t his soft ware access point ) , you don’t have t o select net work card here; if you have m ore t han one net work card, select t he one you wish t o be used as I nt ernet gat eway.
Click ‘Apply’ t o save changes ( ‘Apply’ is grayed out when no changes are m ade in t his page) . CH APTER 5 : Tr ou ble sh oot in g I f you encount er any problem when you’re using t his wireless net work card, don’t panic! Before you call your dealer of purchase for help, please check t his t roubleshoot ing t able, t he solut ion of your problem could be very sim ple, and you can solve t he problem by yourself ! Sce n a r io Solu t ion I can’t find any 1 .
The net work is slow / having problem when t ransferring large files 4 . The access point you wish t o connect only allows net work cards wit h specific MAC address t o est ablish connect ion. Please go t o ‘St a t u s’ m enu and writ e t he value of ‘M AC Addr e ss’ down, t hen present t his value t o t he owner of access point so he / she can add t he MAC address of your net work card t o his / her access point ’s list . 1 . Move closer t o t he place where access point is locat ed. 2 .
This device complies with Part 15 of the FCC Rules. Operation is subject to the following two conditions: (1) this device may not cause harmful interference, and (2) this device must accept any interference received, including interference that may cause undesired operation. Changes or modifications not expressly approved by the party responsible for compliance could void the user's authority to operate the equipment.
Warnings: This device complies with Industry Canada’s licence-exempt RSSs Operation is subject to the following two conditions: (1) This device may not cause interference and (2) this device must accept any interference, including interference that may cause undesired operation of the device. Le présent appareil est conforme aux CNR d'Industrie Canada applicables aux appareils radio exempts de licence.