
Product manual


Page 8 For technical questions, please call 1-888-866-5797. Item 60653
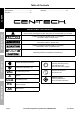
SAFETY OPERATION MAINTENANCESPECIFICATIONS
Charging Battery Installed in Vehicle
A SPARK NEAR BATTERY MAY CAUSE BATTERY EXPLOSION.
TO REDUCE RISK OF A SPARK NEAR BATTERY FOLLOW THESE INSTRUCTIONS EXACTLY.
TO PREVENT SERIOUS INJURY:
Wear ANSI-approved splash-resistant safety goggles and heavy-duty rubber work gloves
whenever connecting, disconnecting, or working near battery.
Battery acid can cause permanent blindness.
1. Position AC and DC cables to reduce risk of
damage by hood, door, or moving engine part.
2. Stay clear of fan blades, belts, pulleys, and
other parts that can cause injury to persons.
3. Check polarity of battery posts. POSITIVE
(POS, P, +) battery post usually has larger
diameter than NEGATIVE (NEG, N,–) post.
4. Determine which post of battery is grounded
(connected) to the chassis. If negative post is
grounded to chassis (as in most vehicles), see 5.
If positive post is grounded to the chassis, see 6.
5. For negative-grounded vehicle, connect
POSITIVE (RED) clip from battery charger to
POSITIVE (POS, P, +) ungrounded post of battery.
Connect NEGATIVE (BLACK) clip to vehicle
chassis or engine block away from battery.
Do not connect clip to carburetor, fuel lines, or
sheet-metal body parts. Connect to a heavy
gauge metal part of the frame or engine block.
NOTICE: If the Reverse Connection indicator lights,
the cables are connected improperly.
Immediately disconnect the cables and connect
them properly to prevent damage to the battery.
6. For positive-grounded vehicle, connect
NEGATIVE (BLACK) clip from battery charger
to NEGATIVE (NEG, N, –) ungrounded post of
battery. Connect POSITIVE (RED) clip to vehicle
chassis or engine block away from battery.
Do not connect clip to carburetor, fuel lines, or
sheet-metal body parts. Connect to a heavy
gauge metal part of the frame or engine block.
Note: If the charger cycles between maximum charge
level and a lower charge level when first connected,
then the battery may be fully charged or nearly fully
charged. Further charging may not be needed.
If charging is attempted, charge at a lower rate and
carefully monitor charge level to avoid battery damage.
7. Set Battery Type switch according to battery type:
• Set to Regular for flooded and
maintenance-free batteries.
• Set to AGM for Absorbed Glass Mat batteries.
WARNING! TO PREVENT EXPLOSION:
DO NOT USE WITH GEL BATTERIES.
8. Set Setting switch to desired charge amperage.
9. After switches are set, plug in charger.
10. Monitor the charging process.
The Charge Complete indicator will light up
and blink when the battery is fully charged.
11. When disconnecting charger, disconnect AC cord,
remove clip from vehicle chassis, and then
remove clip from battery terminal.
12. After use clean, then store the charger
indoors out of children’s reach.