2V Lithium Cordless Drill Model 68126 Set up and Operating Instructions Visit our website at: http://www.harborfreight.com Read this material before using this product. Failure to do so can result in serious injury. Save this manual. Copyright© 2010 by Harbor Freight Tools®. All rights reserved. No portion of this manual or any artwork contained herein may be reproduced in any shape or form without the express written consent of Harbor Freight Tools.
NOTICE is used to address practices not related to personal injury. Save This Manual Keep this manual for the safety warnings and precautions, assembly, operating, inspection, maintenance and cleaning procedures. Write the product’s serial number in the back of the manual near the assembly diagram (or month and year of purchase if product has no number). Keep this manual and the receipt in a safe and dry place for future reference.
operating a power tool. Do not use a power tool while you are tired or under the influence of drugs, alcohol or medication. A moment of inattention while operating power tools may result in serious personal injury. b. Use personal protective equipment. Always wear eye protection. Safety equipment such as dust mask, nonskid safety shoes, hard hat, or hearing protection used for appropriate conditions will reduce personal injuries. c. Prevent unintentional starting.
g. Use the power tool, accessories and tool bits etc. in accordance with these instructions, taking into account the working conditions and the work to be performed. Use of the power tool for operations different from those intended could result in a hazardous situation. 5. 1. Hold power tools by insulated gripping surfaces when performing an operation where the cutting tool may contact hidden wiring or its own cord.
Do not place the charger on a flammable surface. Do not obstruct any vents on the charger. Especially avoid placing the charger on carpets and rugs; they are not only flammable, but they also obstruct vents under the charger. Place the charger on a stable, solid, nonflammable surface (such as a stable metal workbench or concrete floor) at least 1 foot away from all flammable objects, such as drapes or walls. Keep a fire extinguisher and a smoke detector in the area.
blood circulation to the hand, past hand injuries, nervous system disorders, diabetes, or Raynaud’s Disease should not use this tool. If you feel any symptoms related to vibration (such as tingling, numbness, and white or blue fingers), seek medical advice as soon as possible. Lithium Battery Safety Warnings Lithium batteries store a large amount of energy and will vent fire or explode if mistreated: 1. 2. Keep Battery Pack dry. Do not do any of the following to the battery pack: a. Open, b. Drop, c.
Grounding To prevent electric shock and death from incorrect grounding wire connection: Check with a qualified electrician if you are in doubt as to whether the outlet is properly grounded. Do not modify the power cord plug provided with the tool. Never remove the grounding prong from the plug. Do not use the tool if the power cord or plug is damaged. If damaged, have it repaired by a service facility before use. If the plug will not fit the outlet, have a proper outlet installed by a qualified electrician.
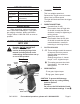
Specifications Charger Input Controls 1. 120V~ / 60Hz 0-350 RPM (1st gear) 0-1300 RPM (2nd gear) 12V, 1300mAh Lithium-Ion (ITEM 68059) Motor Speed Battery Chuck Capacity This is a variable speed tool. Squeeze the Trigger more to increase speed, less to reduce speed. The light will illuminate when the trigger is pressed. 3/8" (10mm) 2. Unpacking : (away from front of drill) Press switch from the left side of the drill to make the drill turn counterclockwise, usually for loosening or removing screws.
Operating Instructions Battery Pack Read the entire Important Safety Information section at the beginning of this manual including all text under subheadings therein before set up or use of this product. Green Light Charging the Battery Pack Red Light The Battery Pack (ITEM 68059) needs to be charged before first use. Recharge the Battery after every use. 1. Remove the Battery Pack by pressing on the striped side tabs and sliding it out.
Tool Set Up To prevent serious injury from accidental operation: Release the Trigger and remove the Battery Pack before adjusting tool or installing accessories. Bit Installation: 1. CAUTION! Let bit cool before touching, changing or adjusting it. Bits heat up dramatically while in use, and can burn you. 2. Slide Direction Selector to its midposition. 3. While holding ring behind collar of Chuck with one hand, rotate collar counterclockwise to open jaws. 4.
Maintenance And Servicing Procedures not specifically explained in this manual must be performed only by a qualified technician. To prevent serious injury from accidental operation: Release the Trigger and remove the Battery Pack before performing any inspection, maintenance, or cleaning procedures. Cleaning, Maintenance, and Lubrication 1. BEFORE EACH USE, inspect the general condition of the tool.
Troubleshooting Problem Tool will not start. Performance decreases over time. Excessive noise or rattling. Overheating. Possible Causes 1. Battery not installed or properly charged. 2. Internal damage or wear. (Wiring or Trigger, for example.) 1. Accessory dull or damaged. 2. Carbon brushes worn or damaged. Internal damage or wear. (Motor bearings, for example.) 1. Forcing tool to work too fast. 2. Accessory misaligned. 3. Accessory dull or damaged. 4. Blocked motor housing vents. Likely Solutions 1.
Parts List and Diagram Part 1 2 3 4 5 6 7 8 9 10 11 Description Keyless Chuck Front Cover Screw Screw Gear Switch Trigger Direction Switch Gear Switch Spring Left Housing Right Housing Gear Box SKU 68126 Qty. 1 1 3 7 1 1 1 2 1 1 1 Part 12 13 14 15 16 17 18 19 20 21 Description Rear Cover Wire White LED LED Cover Screw Terminal Board Screw Battery Pack - ITEM 68059 (12V, 1300mAh Lithium-Ion) Motor Charger (not shown) For technical questions, please call 1-800-444-3353. Qty.
LIMITED 90 DAY WARRANTY Harbor Freight Tools Co. makes every effort to assure that its products meet high quality and durability standards, and warrants to the original purchaser that this product is free from defects in materials and workmanship for the period of 90 days from the date of purchase.