
Portable Generator User Manual


Page 16
For Generator technical questions, please call 1-800-444-3353.
For Engine technical questions, please call 1-800-520-0882.
Item 69672 / 69674
SAFETY OPERATION MAINTENANCESETUP
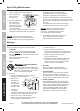
Spark Plug Maintenance
1. Disconnect spark plug cap from end of plug.
Clean out debris from around spark plug.
2. Using a spark plug
wrench, remove
the spark plug.
3. Inspect the spark plug:
If the electrode is
oily, clean it using a
clean, dry rag. If the
electrode has deposits
on it, polish it using
emery paper. If the white insulator is cracked or
chipped, the spark plug needs to be replaced.
NOTICE: Using an incorrect spark plug may
damage the engine. See the Specications chart
for your Generator for the type and gap required.
4. When installing a new spark plug, adjust
the plug’s gap to the specication on the
Specications chart. Do not pry against the
electrode, the spark plug can be damaged.
5. Install the new spark plug or the cleaned spark plug
into the engine. Gasket-style: Finger-tighten until the
gasket contacts the cylinder head, then about 1/2-2/3
turn more.
Non-gasket-style: Finger-tighten until the plug
contacts the head, then about 1/16 turn more.
NOTICE: Tighten the spark plug properly. If
loose, the spark plug will cause the engine
to overheat. If overtightened, the threads
in the engine block will be damaged.
6. Apply dielectric spark plug boot protector
(not included) to the end of the spark
plug and reattach the wire securely.
Storage
When the equipment is to remain idle for longer than
20 days, prepare the engine for storage as follows:
1. CLEANING:
Wait for engine to cool, then clean engine with
dry cloth. NOTICE: Do not clean using water.
The water will gradually enter the engine and cause
rust damage.
Apply a thin coat of rust preventive
oil to all metal parts.
2. FUEL:
WARNING! TO PREVENT SERIOUS
INJURY FROM FIRE:
Drain the fuel tank in a well-ventilated area
away from ignition sources. If the engine is
hot from use, shut the engine off and wait
for it to cool before draining fuel.
Do not smoke.
a. Place a funnel leading to a proper gasoline
container below the carburetor.
b. Remove the
drain bolt from
the bottom of
the carburetor
bowl and allow
the fuel to drain.
If present on
your model,
remove the small sediment cup next to the bowl
and allow the fuel to drain from there as well.
c. Open the fuel valve. After all fuel has
drained, reinstall the drain bolt and sediment
cup (if equipped). Tighten securely.
3. LUBRICATION:
a. Change engine oil.
b. Clean out area around spark plug.
Remove spark plug and pour one tablespoon of
engine oil into cylinder through spark plug hole.
c. Replace spark plug, but leave spark
plug cap disconnected.
d. Pull Starter Handle to distribute oil in cylinder.
Stop after one or two revolutions when you
feel the piston start the compression stroke
(when you start to feel resistance).
4. BATTERY:
Disconnect battery cables (if equipped).
Recharge batteries monthly while in storage.
5. STORAGE AREA:
Cover and store in a dry, level, well-ventilated
area out of reach of children. Storage area
should also be away from ignition sources, such
as water heaters, clothes dryers, and furnaces.
6. AFTER STORAGE:
Before starting the engine after storage, keep
in mind that untreated gasoline will deteriorate
quickly. Drain the fuel tank and change to fresh
fuel if untreated gasoline has been sitting for
a month, if treated gasoline has been sitting
beyond the fuel stabilizer’s recommended
time period, or if the engine does not start.
Cylinder
Assembly
Spark Plug
Drain Plug
Air Filter Assembly
Cylinder
Assembly