ELECTRIC PALM SANDER 95020 Assembly And Operation Instructions Due to continuing improvements, actual product may differ slightly from the product described herein. ® 3491 Mission Oaks Blvd., Camarillo, CA 93011 Visit our website at: http://www.harborfreight.com To prevent serious injury, read and understand all warnings and instructions before use. Copyright© 2006 by Harbor Freight Tools®. All rights reserved.
Specifications Electrical Requirements Motor No Load Speed Dust Opening Dimensions Backing Pad Dimensions Weight 120 V~, 60 Hz, 2 A 13,000 RPM 11/4” OD (Dust bag included) 41/2” W x 67/8” L x 53/4” H 4” W x 41/2” L 21/2 lb. 93MA E194601 Save This Manual You will need this manual for the safety warnings and precautions, assembly, operating, inspection, maintenance and cleaning procedures, parts list and assembly diagram. Keep your invoice with this manual.
grounded. If the tools should electrically malfunction or break down, grounding provides a low resistance path to carry electricity away from the user. 2. Double insulated tools are equipped with a polarized plug (one blade is wider than the other). This plug will fit in a polarized outlet only one way. If the plug does not fit fully in the outlet, reverse the plug. If it still does not fit, contact a qualified electrician to install a polarized outlet. Do not change the plug in any way.
6. Use safety equipment. Always wear eye protection. Dust mask, nonskid safety shoes, hard hat, or hearing protection must be used for appropriate conditions. Always wear ANSI approved safety goggles and a dust mask/respirator when using or performing maintenance on this tool. Tool Use And Care 1. Use clamps (not included) or other practical ways to secure and support the workpiece to a stable platform. Holding the work by hand or against your body is unstable and may lead to loss of control. 2.
SPECIFIC SAFETY RULES 1. Maintain labels and nameplates on the Palm Sander. These carry important information. If unreadable or missing, contact Harbor Freight Tools for a replacement. 2. When using a handheld power tool, always maintain a firm grip on the tool with both hands to resist starting torque. 3. Avoid unintentional starting. Make sure you are prepared to begin work before plugging in the Palm Sander. 4.
9. Warning! Exposure to aluminum oxide (a dust generated from material removing processes) can result in eye, skin, and respiratory irritation. Always use a NIOSH (National Institute for Occupational Safety and Health) approved respirator and ANSI approved safety goggles. Avoid skin exposure. Proper ventilation in the work area is required. 10. Warning! The warnings, cautions, and instructions discussed in this instruction manual cannot cover all possible conditions and situations that may occur.
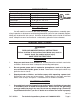
3. Your tool must be plugged into an appropriate outlet, properly installed and grounded in accordance with all codes and ordinances. The plug and outlet should look like those in the following illustration. (See Figure A.) FIGURE B FIGURE A Double Insulated Tools: Tools With Two Prong Plugs Note: This item has a two prong plug. 1. Tools marked “Double Insulated” do not require grounding.
6. If you are using an extension cord outdoors, make sure it is marked with the suffix “W-A” (“W” in Canada) to indicate it is acceptable for outdoor use. 7. Make sure your extension cord is properly wired and in good electrical condition. Always replace a damaged extension cord or have it repaired by a qualified electrician before using it. 8. Protect your extension cords from sharp objects, excessive heat, and damp or wet areas.
Unpacking When unpacking, check to make sure that the item is intact and undamaged. If any parts are missing or broken, please call Harbor Freight Tools at the number shown on the cover of this manual as soon as possible. ASSEMBLY INSTRUCTIONS Note: For additional information regarding the parts listed in the following pages, refer to the Assembly Diagram on page 12.
OPERATING INSTRUCTIONS Note: For additional information regarding the parts listed in the following pages, refer to the Assembly Diagram on page 12. 1. CAUTION: Always make sure the Power Cord (26) of the Sander is unplugged from its electrical outlet prior to making any adjustments to the tool. 2. Clamp your workpiece down, or insert it in a vise. Make sure the object you are sanding does not have any nails or metal of any kind in it, or you will ruin the sandpaper and damage the Backing Pad (22). 3.
PARTS LIST Part 1 2 3 4 5 6 7 8 9 10 11 12 13 14 15 Description Bottom Enclosure Top Enclosure Switch Stator Rotor and Fan Rubber Cylinder Switch Cover Brush Holder Carbon Brush Bearing 6 x 19 x 6 Bearing 9 x 26 x 8 Dust Bag Balance Fan Bottom Board Screw M4 x 8 Q’ty 1 1 1 1 1 4 1 2 2 1 1 1 1 1 2 Part 16 17 18 19 20 21 22 23 24 25 26 27 28 29 Description Gasket Clamp Wire Bearing 12 x 28 x 8 Ring Gasket Screw M4 x 12 Backing Pad Cord Anchorage Screw ST3 x 12 Cord Guard Power Cord and Plug Label Screw ST
ASSEMBLY DIAGRAM 29 PLEASE READ THE FOLLOWING CAREFULLY The manufacturer and/or distributor has provided the parts list and assembly diagram in this manual as a reference tool only. Neither the manufacturer or distributor makes any representation or warranty of any kind to the buyer that he or she is qualified to make any repairs to the product, or that he or she is qualified to replace any parts of the product.
LA PONCEUSE ÉLECTRIQUE 95020 LES INSTRUCTIONS D’ASSEMBLAGE ET OPÉRATION IMPORTANT! Cette édition de langue française est une traduction du manuel anglais original accompagnant ce produit. Si une partie du manuel anglais original est inconsistante avec cette traduction, le manuel anglais original gouvernera. En raison des améliorations continuantes, le produit réel peut différer légèrement du produit décrit ici. ® 3491 Mission Oaks Blvd., Camarillo, CA 93011 Visitez notre site Internet à http://www.
Caractéristiques Puissance Nécessaire Moteur Aucune Vitesse de Charge Glissière à poussière Dimensions Tampon en caoutchouc Poids 120 V~, 60 Hz, 2 A 13, 000 tr-min 1-1\4 po OD (Un sac à poussière inclus) 4-1\2 po W x 6-7\8 po L x 5-3\4 po H Dimensions: 4 po W x 4-1\2 po L 2 1\2 lb. 93MA E194601 GARDEZ CE GUIDE Gardez ce guide pour les conseils de sécurités et précautions, assemblage, instructions d’utilisation, inspection, entretien et nettoyage, la liste des pièces et le schéma du produit.
ments pertinents. Ne modifiez jamais la fiche de quelque façon que ce soit, par exemple en enlevant la broche de mise à la terre. N’utilisez pas d’adaptateur de fiche. Si vous n’êtes pas certain que la prise de courant est correctement mise à la terre, adressez-vous à un électricien qualifié. En cas de défaillance ou de défectuosité électrique de l’outil une mise à la terre offre un trajet de faible résistance à l’électricité qui autrement risquerait de traverser l’utilisateur. 2.
3. Évitez les démarrages accidentels. Assurez-vous que l’interrupteur se trouve à la position d’arrêt (OFF) avant de brancher l’outil. Le fait de transporter l’outil en gardant le doigt sur l’interrupteur ou de le brancher alors que l’interrupteur est en position de marche (ON) peut provoquer un accident. 4. Retirez les clés de réglage ou les autres clés avant de mettre l’outil en marche. Le fait de laisser une clé quelconque en prise sur une pièce rotative de l’outil peut causer des blessures. 5.
7. Vérifiez si des pièces mobiles sont désalignées ou coincées, si des pièces sont endommagées ou toute autre situation pouvant nuire au bon fonctionnement de l’outil. Si l’outil est endommagé, faites-le réparer avant de vous en servir. De nombreux accidents sont causés par des outils mal entretenus. 8. Utilisez uniquement les accessoires recommandés par le fabricant. Des accessoires convenant à un outil en particulier peuvent être dangereux s’ils sont utilisés avec un autre outil. ENTRETIEN 1.
5. Ne déposez jamais l’outil avant que le moteur ait complètement cessé de tourner. Le moteur en rotation risque de causer des blessures. 6. Lorsque l’outil est branché, ne laissez-le jamais sans surveillance. Mettez l’interrupteur en position « arrêt » puis retirez la fiche de la prise avant de sortir. 7.
MISE À LA TERRE AVERTISSEMENT! Une mauvaise connexion du fil de terre de l’outil peut entraîner un risque de choc électrique. En cas de doutes, consultez un électricien qualifié ou une personne affectée à l’entretien. Ne modifiez pas la fiche de l’outil. Ne modifiez pas la fiche mise à la terre à trois broches. N’utilisez pas l’outil si le cordon d’alimentation ou la fiche est endommagé. S’il est endommagé le faites réparer dans un centre de service avant de l’utiliser.
qui se conforme aux exigences de OSHA et conforme aux normes de Underwriters Laboratories, Inc., de L’Association Canadienne de Normalisation et du Code Electrique National. (Voir L’IMAGE B.) 2. Les outils à double isolation peuvent être utilisé dans l’un ou l’autre de la prise de courant d’un circuit de 120 volts comme le montre l’illustration ci-dessus. (Voir L’IMAGE B.) CORDONS DE RALLONGE 1. L’outil avec mise à la terre doit utiliser une rallonge à trois fils.
CALIBRE MINIMUM DES RALLONGES * (Courant de 120 ou 240 V seulement) L’INTENSITÉ NOMINALE (au maximum) 25 pieds 50 pieds 0 – 2.0 18 18 18 18 16 2.1 – 3.4 18 18 18 16 14 3.5 – 5.0 18 18 16 14 12 5.1 – 7.0 18 16 14 12 12 7.1 – 12.0 18 14 12 10 - 12.1 – 16.0 14 12 10 - - 16.1 – 20.0 12 10 - - - L’IMAGE C Longueur de la rallonge en pieds 75 pieds 100 pieds 150 pieds *Basé sur limitant le volt du cordon, baissez à cinq volts à 150 % de l’intensité nominale.
LES INSTRUCTIONS D’ASSEMBLAGE Remarque: Pour obtenir plus de renseignements sur les pièces qui figurent sur les pages suivantes, reportez-vous au Schéma du Produit à la page 13. Attention: Assurez – vous de débrancher toujours Le Cordon d’Alimentation (26) avant d’effectuer un réglage. ATTACHER LE SAC À POUSSIÈRE (12) 1. Pour attacher Le Sac à poussière (12) à la ponceuse, mettez l’ouverture du Sac à Poussière (12) au – dessus de l’ouverture de la Porte de Poussière de la Ponceuse et appuyez.
FONCTIONNEMENT Remarque: Pour obtenir plus de renseignements sur les pièces qui figurent��������������� sur les pages suivantes, reportez-vous au SCHEMA DU PRODUIT à la page 13. 1. Attention : Assurez – vous de brancher Le Cordon d’alimentation (26) de l’outil avant de faire des réglages, de changer des accessoires. 2. Utilisez des serre-joints ou un autre moyen pratique de retenir et de soutenir la pièce à travailler.
LES PIÈCES Pièce 1 2 3 4 5 6 7 8 9 10 11 12 13 14 15 16 Description Enceint au dessous Enceint au dessus L’Interrupteur Anneau Redresser Rotor et Ventilateur Cylindre à Caoutchouc Couvercle d’Interrupteur Support de brosse Balai de Carbone Alésage 6 x 19 x 6 Alésage 9 x 26 x 8 Le Sac à Poussière Ventilateur Équilibre Planche à fond Vis M4 x 8 Joint Q’ty 1 1 1 1 1 4 1 2 2 1 1 1 1 1 2 2 Pièce 17 18 19 20 21 22 23 24 25 26 27 28 29 Description Fil de Serre-joint Alésage 12 x 28 x 8 Bague Joint Vis M4 x 12
SCHÈMA DU PRODUIT 29 LISEZ S’IL VOUS PLAÎT LE SUIVANT SOIGNEUSEMENT LE FABRICANT ET-OU LE DISTRIBUTEUR A FOURNI LA LISTE DE PIÈCES ET LE DIAGRAMME DE MONTAGE DANS CE MANUEL COMME UN INSTRUMENT DE RÉFÉRENCE SEULEMENT. AUCUN LE FABRICANT OU LE DISTRIBUTEUR FONT N’IMPORTE QUELLE REPRÉSENTATION OU GARANTIE DE N’IMPORTE QUELLE SORTE À L’ACHETEUR QU’IL OU ELLE EST AUTORISÉ POUR FAIRE N’IMPORTE QUELLES RÉPARATIONS AU PRODUIT, OU QU’IL OU ELLE EST AUTORISÉ POUR REMPLACER N’IMPORTE QUELLES PIÈCES DU PRODUIT.