-1/2" Gasoline Powered Clear Water Pump Item 68328 Using an engine indoors CAN KILL YOU IN MINUTES. Engine exhaust contains carbon monoxide. This is a poison you cannot see or smell. NEVER use inside a home or garage, EVEN IF doors and windows are open. Only use OUTSIDE and far away from windows, doors, and vents. When unpacking, make sure that the product is intact and undamaged. If any Pump parts are missing or broken, please call 1-800-444-3353 as soon as possible.
Specifications Pump Suction & Discharge Size 1-1/2" NPT Discharge Capacity 75 GPM Maximum Discharge Head 79 ft. Maximum Suction Head 26 ft. Maximum Pressure 34.2 PSI Mechanical Seal Ceramic Included Accessories Intake Strainer Hose Clamps Spark Plug Wrench Engine Displacement 99cc Engine Type Horizontal Single Cylinder 4 stroke OHV Cooling System Forced air cooled Type Fuel Engine Oil 87+ octane unleaded gasoline Capacity 0.
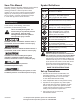
Save This Manual Symbol Definitions Keep this manual for the safety warnings and precautions, assembly, operating, inspection, maintenance and cleaning procedures. Write the product’s serial number in the front of the manual near the assembly diagram (or month and year of purchase if product has no number). Keep this manual and the receipt in a safe and dry place for future reference. Symbol RPM Property or Statement Revolutions Per Minute WARNING marking concerning Risk of Eye Injury.
5. Use only lubricants and fuel recommended in the Specifications chart of this manual. 6. Wear ANSI-approved safety goggles, heavy-duty work gloves, and dust mask/respirator during set up. Engine Precautions Follow engine precautions and instructions in the included engine instruction manual. Operating Precautions Carbon Monoxide Hazard Using an engine indoors CAN KILL YOU IN MINUTES. Engine exhaust contains carbon monoxide. This is a poison you cannot see or smell. 1. 9.
23. Before use, check for misalignment or binding of moving parts, breakage of parts, and any other condition that may affect the equipment’s operation. If damaged, have the equipment serviced before using. Many accidents are caused by poorly maintained equipment. 24. Use the correct equipment for the application. Do not modify the equipment and do not use the equipment for a purpose for which it is not intended. Service Precautions 1. Before service, maintenance, or cleaning: a.
Controls Fuel Tank Cap Fuel Tank Muffler Choke Throttle Starter Handle Air Filter Oil Dipstick Engine Switch Priming Cap Discharge Port Intake Port Water Drain Plug Page 4 For Pump technical questions, please call 1-800-444-3353. For Engine technical questions, please call 1-800-520-0882.
Set up The emission control system for this Pump’s Engine is warranted for standards set by the U.S. Environmental Protection Agency. For warranty information, refer to the last pages of this manual. 3. Slide one of the Hose Clamps over the end of the suction hose (a). Slide the Hose onto the Hose Coupler (b). Use a screwdriver (not included) to tighten the Hose Clamp until secure. CAUTION: Use only a non-collapsible intake hose. Connecting Hoses Note: Hose coupling components and hoses not included.
5. For the discharge hose, slide a Hose Coupling Ring over the remaining Hose Coupler (a) and place a Gasket onto the end of the Hose Coupler (b) (all not included). 7. Slide a Hose Clamp over the end of the Discharge Hose (a). Slide the Discharge Hose onto the Hose Coupler (b). Use a screwdriver to tighten the Hose Clamp until secure. b a a b 6. Thread the Hose Coupling Ring clockwise onto the Discharge Port until tightened securely.
Locating the Water Pump Locate the Water Pump on a flat, level, sturdy surface capable of supporting the weight of the Pump. 1. For best Pump performance, place the Pump near the water level and use hoses that are no longer than necessary. This will allow the Pump to produce the greatest output with the least self-priming time. See diagram below. Discharge Head Water Pump Total Head Suction Head Strainer 4. Secure the Intake Hose in place to keep it from moving once the Pump is turned on.
Checking and Filling Engine Oil Operation Read the entire Important Safety Information section at the beginning of this manual including all text under subheadings therein before set up or use of this product. Pre-Start Checks CAUTION! Your Warranty is VOID if the engine’s crankcase is not properly filled with oil before each use. Before each use, check the oil level. Do not run the engine with low or no engine oil. Running the engine with no or low engine oil WILL permanently damage the engine. 1.
Starting the Engine 1. To start a cold engine, move the Choke to the CHOKE position. To restart a warm engine, leave the Choke in the RUN position. 1 2. Slide the Throttle to 1/3 away from the SLOW position (the “turtle”). 2 O 3. Turn the Engine Switch on. OFF ON 4. Grip the Starter Handle of the Engine loosely and pull it slowly several times to allow the gasoline to flow into the Engine’s carburetor. Then pull the Starter Handle gently until resistance is felt.
IMPORTANT: Allow the engine to run at no load for five minutes with no load after each start‑up so that the engine can stabilize. 6. Adjust the Throttle as needed. 7. Break-in Period: a. Breaking-in the engine will help to ensure proper equipment and engine operation. b. The operational break-in period will last about 3 hours of use. During this period: • Do not apply a heavy load to the equipment. • Do not operate the engine at its maximum speed. c.
Maintenance and Service WARNING To prevent serious injury from accidental starting: Turn the Power Switch of the equipment to its “OFF” position, wait for the engine to cool, and disconnect the spark plug cap before performing any inspection, maintenance, or cleaning procedures. To prevent serious injury from equipment failure: Do not use damaged equipment. If abnormal noise, vibration, or excess smoking occurs, have the problem corrected before further use. Follow all service instructions in this manual.
Checking and Filling Fuel WARNING! To prevent serious injury from fire: Fill the fuel tank in a well-ventilated area away from ignition sources. If the engine is hot from use, shut the engine off and wait for it to cool before adding fuel. Do not smoke. 1. Clean the Fuel Cap and the area around it. 2. Unscrew and remove the Fuel Cap. 3. If needed, fill the Fuel Tank to up to the top of the Fuel Level marker on the fuel filter with 87 octane or higher unleaded gasoline. Full level Full level 7.
Spark Plug Maintenance Spark Plug Cap 1. Disconnect spark plug cap from end of plug. Clean out debris from around spark plug. 2. Using a spark plug wrench, remove the spark plug. 3. Inspect the spark plug: If the electrode is oily, clean it using a clean, dry rag. If the electrode has deposits on it, polish it using emery paper. If the white insulator is cracked or chipped, the spark plug needs to be replaced.
Storage When the equipment is to remain idle for longer than 20 days, prepare the engine for storage as follows: c. After all fuel has drained, reinstall the drain bolt and tighten securely. 3. Lubrication: 1. CLEANING: Wait for engine to cool, then clean engine with dry cloth. NOTICE: Do not clean using water. The water will gradually enter the engine and cause rust damage. Apply a thin coat of rust preventive oil to all metal parts. a. Change engine oil. 2. FUEL: d.
Pump Troubleshooting Problem Pump overheats Possible Causes 1. Incorrect lubrication or not enough lubrication. 2. Worn parts. 1. Low engine speed. Unit stalls Pump does not pump water 2. 3. 1. 2. 3. 4. 5. 6. 7. 1. Low Pump Output 2. 3. 4. Severely clogged air filter. Improper lubrication. Pump is not primed. Intake Strainer clogged. Air leak at intake connector. Hose leaks. Suction hose has collapsing wall. Hose has too small diameter. Pump is too high above water surface.
Engine Troubleshooting Problem Possible Causes Engine will not start Fuel Related: 1. No fuel in tank or fuel valve closed. 2. Choke not in CHOKE position, cold engine. 3. Gasoline with more than 10% ethanol used. (E15, E20, E85, etc.) Probable Solutions 9. Clogged Fuel Filter. Fuel Related: 1. Fill fuel tank and open fuel valve. 2. Move Choke to CHOKE position. 3. Clean out ethanol rich gasoline from fuel system. Replace components damaged by ethanol. Use fresh 87+ octane unleaded gasoline only.
Engine Troubleshooting (cont.) Problem Engine misfires Possible Causes 1. Spark plug cap loose. 2. Incorrect spark plug gap or damaged spark plug. 3. Defective spark plug cap. 4. Old or low quality gasoline. 5. Incorrect compression. Engine stops suddenly 1. Low oil shutdown. 2. Fuel tank empty or full of impure or low quality gasoline. 3. Defective fuel tank cap creating vacuum, preventing proper fuel flow. 4. Faulty magneto. 5. Disconnected or improperly connected spark plug cap.
Parts List (Including Item 68124 99cc engine) Part 1 2 3 4 5 6 7 8 9 10 11 12 13 14 15 16 17 18 19 20 21 22 23 24 25 26 27 28 29 30 31 32 33 34 35 36 37 38 39 40 41 42 Description Cylinder Head Subassembly Cylinder Head Gasket Cylinder Head Cover Subassembly Cylinder Head Cover Gasket Breather Tube Bolt Stud Stud Pin Cylinder Head Bolt Spark Plug Tension Line Block Oil Seal Drain Plug Flat Washer Crankcase Subassembly Bearing Gear Assy, Governor Governor Arm Circlip Pin Oil Seal Crankcase Cover Bearing Cr
Item 68328 110 6 6 12 106 6 109 107 6 111 3 4 104 105 111 112 111 112 111 108 112 112 10 10 5 10 10 11 89 93 90 103 92 93 8 99 97 101 102 100 93 92 28 22 1 8 91 7 94 96 89 95 95 94 28 93 92 23 99 89 98 92 98 113 28 28 28 28 93 93 94 94 31 7 2 For Pump technical questions, please call 1-800-444-3353. For Engine technical questions, please call 1-800-520-0882.
Emission Control System Warranty Warranties Limited 90 Day Warranty United States Emission Control Defects Warranty Statement Harbor Freight Tools Co. makes every effort to assure that its products meet high quality and durability standards, and warrants to the original purchaser that this product is free from defects in materials and workmanship for the period of 90 days from the date of purchase.
3. Consequential Damages Coverage required maintenance is warranted for the period of time up to the first scheduled replacement point for that part. Any replacement part, provided it is equivalent in durability and performance, may be used in performance of maintenance or repairs. The owner is responsible for commissioning a qualified technician/mechanic to perform all required maintenance, as outlined in the Inspection, Cleaning, and Maintenance section in this manual.
Notes 3491 Mission Oaks Blvd. • PO Box 6009 • Camarillo, CA 93011 www.harborfreight.