Installation and Operating Manual Magnafire Series Coal Stoves - Mark I, II, and III R4 SAFETY NOTICE PLEASE READ THIS ENTIRE MANUAL BEFORE YOU INSTALL OR USE YOUR NEW ROOM HEATER. FAILURE TO FOLLOW THESE INSTRUCTIONS MAY RESULT IN PROPERTY DAMAGE, BODILY INJURY, OR EVEN DEATH. APPROVED FOR USE IN THE U.S. AND CANADA IF THIS HARMAN STOVE IS NOT INSTALLED CORRECTLY, A HOUSE FIRE MAY RESULT. FOR YOUR SAFETY, FOLLOW INSTALLATION DIRECTIONS PRECISELY.
Introduction Thank you for purchasing a Harman Magnafire coal stove. The Magnafire series has been designed and built to last. Whether you’re heating a room or heating your whole house, you’ve made the right choice. Please read this entire instruction manual before attempting to install or operate your new stove. If you have further questions regarding your new stove, contact your Harman dealer. Follow these instructions and you will have many years of warmth and comfort enjoying your new coal stove.
Index 1. Safety Considerations - Warnings to operator of possible dangers, fire hazards and cautions. 1.1 1.2 1.3 1.4 Keep children away -- may cause serious burns Fuel/Firing Warnings Curing Paint Mobile Homes 2. Assembly & installation 3. Venting 2.1 Unpacking and Inspection Of Parts 2.2 Locating The Stove 2.3 Assembly 2.4 General Information 3.1 3.2 3.3 3.4 4. Grates 4.1 5.
Installation 1. Safety Considerations: 1.1 KEEP CHILDREN AWAY - MAY CAUSE SERIOUS BURNS. CAUTION: All surfaces of the stove are hot while in operation. Do not touch. Keep Children Away. Wear gloves while tending stove. Serious burns will result if special care is not taken. 1.2 Fuel / Firing Information. DANGER! FIRE HAZARD! DO NOT USE CHEMICALS OR FLUIDS TO START OR “FRESHEN UP” A FIRE. SEVERE BODILY INJURY AND/OR A FIRE IN THE HOME MAY RESULT.
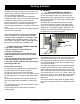
Installation 2.3 Assembly. Slide the blower into the slotted bracket on the rear of the stove. The blower will rest at the bottom of the slot. 2.4 GENERAL INFORMATION. Installation Checklist: A. Have your stove installed by a trained installer. Preferably one who is certified by the National Fireplace Institute or similar certification agency. B. Before starting Installation, check for proper clearance to combustibles where the stove is going to be located. C.
Venting Where an existing chimney is used, it must be large enough to provide a draft adequate for removing the gaseous products of combustion. The cross-sectional area of the chimney must be at least 25 percent greater than that of the connector. As a general rule, common 8” X 8” flue liner has an actual interior crosssectional area of 42 to 49 inches. This is adequate for a 6 inch stove connector, which matches the appliance flue collar.
Venting & Grates E) Improperly sized flue - Too small of a chimney is incapable of moving the volume of air necessary. Too large of a flue could have trouble warming up to create the necessary upward flow. F) Chimney offsets - Offset chimneys should be avoided if possible. Not only can the offset affect draft, it is also a place for debris to collect over time. G) Too many elbows - The flue connector has more than two elbows in it.
Operation 5. Operating Instructions 5.1 STARTING A FIRE Place seven or eight sheets of crumpled newspaper onto the top of the grates. Next, lay in some small kindling wood (approximately 3/4” or less) on top of the newspaper. Layer the kindling in a criss-cross fashion to allow for maximum air flow. Open the draft control to it’s full open position. Light the paper nearest the center of the door opening and close and latch the load door.
Maintenance 5.6 SAFETY Whenever a loading door is opened, it should always be cracked slightly to allow oxygen to enter and burn any gasses that may be present. Failure to do this may result in a sudden ignition of the gasses, leading to an explosion. A Stove should never be filled with excess coal to where the exhaust is impeded. Burning coal generates carbon monoxide. If the flue gas exit is blocked, the carbon monoxide can be forced out of the stove and into your living space, with fatal consequences.
Optional Water Coil 7.
Optional Water Coil To install the optional hot water coil, Two holes will need to be drilled or cut into the side of the stove. There is a template for the hole location(s) that is included with the coil. Keep the holes above the firebricks and toward the back of the firebox. This location is best to not interfere with loading. Thermo- Siphon Method This is the simple and most economical method, however, the hot water tank must be no more than ten feet from the stove.
8. Warranty Information: Hearth & Home Technologies Inc. LIMITED LIFETIME WARRANTY Hearth & Home Technologies Inc., on behalf of its hearth brands (”HHT”), extends the following warranty for HHT gas, wood, pellet, coal and electric hearth appliances that are purchased from an HHT authorized dealer.
WARRANTY CONDITIONS: • • • • This warranty only covers HHT appliances that are purchased through an HHT authorized dealer or distributor. A list of HHT authorized dealers is available on the HHT branded websites. This warranty is only valid while the HHT appliance remains at the site of original installation. Contact your installing dealer for warranty service. If the installing dealer is unable to provide necessary parts, contact the nearest HHT authorized dealer or supplier.
9. Service Parts Mark I Service Parts Magnafire Freestanding Coal Stove Beginning Manufacturing Date: N/A Ending Manufacturing Date: Active 1-70-03224-1 (Black), 1-70-03224-2 (Charcoal), 1-70-03224-3 (Goldenfire), 1-70-03224-4 (Metallic Blue), 1-70-03224-10 (Mojave Red), 1-70-03224-12 (Forest Green) 1 2 3 4 5 IMPORTANT: THIS IS DATED INFORMATION. When requesting service or replacement parts for your appliance please provide model number and serial number.
Mark I Service Parts Beginning Manufacturing Date: N/A Ending Manufacturing Date: Active IMPorTaNT: THIS IS daTed INForMaTIoN. When requesting service or replacement parts for your appliance please provide model number and serial number. all parts listed in this manual may be ordered from an authorized dealer.
Mark II Service Parts Magnafire Freestanding Coal Stove Beginning Manufacturing Date: N/A Ending Manufacturing Date: Active 1-70-03225-1 (Black), 1-70-03225-2 (Charcoal), 1-70-03225-3 (Goldenfire), 1-70-03225-4 (Metallic Blue), 1-70-03225-10 (Mojave Red), 1-70-03225-12 (Forest Green) 1 2 3 4 5 IMPorTaNT: THIS IS daTed INForMaTIoN. When requesting service or replacement parts for your appliance please provide model number and serial number.
Mark II Service Parts Beginning Manufacturing Date: N/A Ending Manufacturing Date: Active IMPorTaNT: THIS IS daTed INForMaTIoN. When requesting service or replacement parts for your appliance please provide model number and serial number. all parts listed in this manual may be ordered from an authorized dealer.
Mark III Service Parts Magnafire Freestanding Coal Stove Beginning Manufacturing Date: N/A Ending Manufacturing Date: Active 1-70-03227-1 (Black), 1-70-03227-2 (Charcoal), 1-70-03227-3 (Goldenfire), 1-70-03227-4 (Metallic Blue), 1-70-03227-10 (Mojave Red), 1-70-03227-12 (Forest Green) 1 2 3 4 5 IMPorTaNT: THIS IS daTed INForMaTIoN. When requesting service or replacement parts for your appliance please provide model number and serial number.
Mark III Service Parts Beginning Manufacturing Date: N/A Ending Manufacturing Date: Active IMPorTaNT: THIS IS daTed INForMaTIoN. When requesting service or replacement parts for your appliance please provide model number and serial number. all parts listed in this manual may be ordered from an authorized dealer.
Service & Maintenance Log Date Of Service Performed By Description Of Service
Service & Maintenance Log Date Of Service Performed By Description Of Service
Proudly Printed On 100% Recycled Paper