
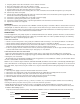
Instructions / Assembly


5. Strip the yellow motor wire and install a 1/4 in. female connector.
6. Place the yellow motor wire onto the switch as shown.
7. Strip the red and blue motor wires and connect together with wire nut.
8. Strip the black motor wire and add a wire nut to insulate.
9. Replace the main switch cover ensuring wires are clear of switches and accessible through the top cover plate
10. Remove top switch cover plate.
11. Install a proper conduit fitting thru the side hole of the main switch cover and feed the power supply wires and the
thermostat control leads (optional) into housing.
12. Connect the orange and white wires to the 230 volt power supply.
13. Connect the green (ground) wire to the ground source.
14. Connect the yellow auxiliary wires as previously described to the thermostat control circuit leads
15. Replace the switch cover top plate
OPERATION
After proper installation, the operation of the HARTELL condensate pump is automatic. Water is collected in the reservoir
and pumped out when the float raises to a pre-set point. As the water level goes down the float turns off the motor at
another pre-set point. Under most circumstances the pump requires little maintenance for efficient operation. If a prob-
lem occurs, please refer to the maintenance instructions below.
MAINTENANCE
In normal applications, this pump requires no scheduled maintenance for efficient operation. However, to extend motor
bearing life it is recommended that they be oiled every six months with S.A.E. 20. If a problem develops, the following
guidelines can help to return the pump to service.
PUMP DOES NOT RUN
— Check to see that the power to the system (air conditioner and/or furnace) is on to allow production of condensate.
— Check that the pump is plugged in and the circuit is active (i.e. fuse or breaker not blown).
— Check the level of water in the reservoir; the level must be within 2” of the reservoir top to activate the switch. (The
inlet tube may be blocked and require cleaning if no water is entering the reservoir).
— If there is a proper amount of water in the reservoir, the float may be stuck due to dirt or algae formation. (Flush the
reservoir with warm water and a mild soap or detergent). See note below.
PUMP MOTOR RUNS WITH NO DISCHARGE
- Inspect the discharge tubing for its full length to make sure it is clear; make sure the tubing end is not plugged.
- Make sure the check valve is not clogged. (If clogged, UNPLUG THE PUMP, remove the fitting and clean with mild soap
or detergent). See note below.
- The discharge port of the impeller chamber may be clogged due to an accumulation of debris. (See instructions below
on how to disassemble unit and clean chamber).
NOTE: In case of extreme algae formation, UNPLUG THE PUMP, and fill the reservoir with a commercially available algae-
cide. Follow directions for destroying the algae. After the proper waiting period DUMP the algaecide out of the reservoir.
Rinse with water, repeat if necessary. Be careful not to clog the check valve when starting the pump after this thorough
cleaning.
DISASSEMBLY
1. Turn off power supply at fuse box and then drain water from reservoir.
2. Remove the four switch plate screws and carefully remove the switch/float assembly from the reservoir.
3. Remove the three impeller cover plate screws and loosen impeller cover plate.
4. Remove the four reservoir cover plate screws and remove the motor/cover assembly.
5. Remove all debris from inside the reservoir and wipe with damp cloth.
REASSEMBLY
Apply a small amount of gasket sealer (e.g., Silicone, Permatex, etc.) around the impeller chamber and reassemble by
reversing the above procedure. Restore power to the unit and check operation.
* Hartell’s Model A2-X-1965 DV has been tested to, and yielded results that fell within the acceptance criteria of UL
Standard 2043, Third Edition, “Fire Test for Heat and Visible Smoke Release for Discrete Products and Their Accessories
Installed in Air-Handling Spaces.”
Keep these instructions with the pump. They may be valuable if service is needed under the terms of the warranty.
Model #
Date of Installation:
Installer:
Date Code:
Dealer:
#901113 Rev C 8/2011