User’s Guide Slide Feeder for Flextight 949 Scanners by Hasselblad
© 2005 Hasselblad A/S. All rights reserved. Slide Feeder for Flextight 949 Scanners, Part No 75020088 revision B. The information in this manual is furnished for informational use only, is subject to change without notice, and should not be construed as a commitment by Hasselblad A/S. Hasselblad A/S assumes no responsibility or liability for any errors or inaccuracies that may appear in this manual.
Table of Contents Introduction Important Warnings and Restrictions System Requirements Feeder Diagram Slide Original Holder Diagram 4 4 5 6 7 Mounting and Unmounting the Slide Feeder 8 8 15 Loading Slides 18 18 19 Scanning with the Slide Feeder 22 22 25 Troubleshooting 28 Aligning the Feeder 30 30 30 Preparing the Feeder for Transport 32 Preventive Maintenance 33 Disposal 33 Technical Information 34 34 35 Mounting the Feeder Unmounting the Feeder Loading Directly into the Feeder Usi
Introduction The Slide Feeder is an optional accessory for Flextight 949 Scanners. It enables you to use your scanner to load individual slides and to batch scan up to 50 slides at a time. It features a removable magazine, which enables operators to scan one magazine while a second magazine is being loaded. While in use, the Slide Feeder loads slides one at a time from the magazine and into the scanner, where light is shown through the slide and the image is scanned to your computer.
• • • • • • Install the scanner and Slide Feeder in a location where they are not accessible by children. The units contain small openings and moving parts that can cause injury. Do not touch the Slide Feeder while the magazine is moving. Do not touch the originals or the original holder during scanning. When you switch on the scanner with the Slide Feeder attached, the unit move the Feeder into its “home” position if it is not already there. Do not touch the Slide Feeder while the magazine is moving.
Feeder Diagram A B E F G C D Figure 1: Features of the Slide Feeder A Magazine drawer clasp: holds the drawer closed; to open the drawer, pull here and swing down. B Slide holder supports: support the slide holder and guide it into the scanner. C Magazine drawer with magazine and slides mounted: this is where your slides are held until they are scanned. The magazine holds up to 50 slides. D Magazine drawer hinge: when you open the magazine drawer, it rotates around this hinge.
Slide Original Holder Diagram A B C D E F Figure 2: Slide original holder features A Loading tab: This tab must face into the scanner. A magnet inside the scanner grabs the holder here. B White calibration slot: Before each scan, the scanner makes a white calibration through this opening. C Tension springs: ensure that each slide is positioned correctly as it loads into the holder. D Slide clasp: grabs each slide from the magazine.
Mounting and Unmounting the Slide Feeder The procedures for both mounting and unmounting the Feeder to/ from your scanner require that you use the software-guided procedure described below, which ensures that the mechanical pars of the scanner and Feeder are correctly aligned for each step. Always use this software feature when you need to mount or unmount the Feeder. Otherwise, you may damage your Feeder and/or scanner.
5. Select Maintenance > Feeder from the FlexColor menu bar. The Feeder window opens. Click on the Mount button. 6. The Mount feeder window opens, which guides you through each step of preparing the scanner for the Feeder. The procedure here in this manual also describes each step. Click on the Continue button. 7. The scanner then positions itself to accept the Feeder and shuts itself down. The Mount feeder window updates with new instructions. 8. Get the Slide Feeder and study its back panel.
A B Figure 3: Back panel of the Slide Feeder, showing the electrical connector (A) and mounting pins (B). 9. Lift the batch-feeder panel on the front of the Flextight 949 Scanner and locate the connector (A) and two mounting holes (B) inside the scanner, as shown in Figure 4 below. These match the pins and connector of the Feeder. Figure 4: Flextight 949 Scanner with the batch-feeder panel open, showing the electrical connector (A) and mounting holes (B).
10. Grasp the Slide Feeder firmly with one hand while holding the batchscan door open on the scanner with your other hand. Align the pins and connector on the back of the Feeder with the holes and connector inside the scanner. Gently press the Feeder down and in place, making sure that the Feeder sits firmly and has a good connection with the connector. 11. Turn on the scanner by pressing its on/off switch. 12. FlexColor detects that the scanner has been turned back on.
A B C D Figure 5: The Slide Feeder attached to a scanner and with its magazine drawer open, showing the original-holder supports (A), drawer hinge (B), magazine (C) and drawer top (D). 15. Take the slide holder and position it with the heavy metal plate facing up and the tab facing into the scanner. Hold it with both hands, grasping its lower right and lower left corners respectively as shown in Figure 6.
Figure 6: Inserting the Slide original holder. 16. Position the Slide holder on the two supports extending from the front of the Slide Feeder and slide the holder into the scanner. A magnet inside the scanner will grab the holder. Gently press the holder into the scanner to make sure it is fully inserted. Do not force it. 17. Go back to your computer and click on Done in the Mount feeder window. The scanner draws the holder inside and sets the drum in the “parked” position.
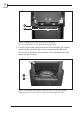
18. Click on Done to close the Feeder window. 19. Close the magazine drawer by rotating it up and pressing it into place so that the metal clasp clicks in it at the top. 20. The Slide Feeder is mounted and ready for use. Figure 7: Flextight scanner with the Slide Feeder attached and ready for use.
Unmounting the Slide Feeder To unmount the feeder, you must always use the software-guided procedure below to ensure that the scanner drum and the magazine drawer are positioned correctly before detaching. 1. Turn on the scanner and launch the FlexColor software. 2. Select Maintenance > Feeder from the menu bar. 3. The Feeder window opens. Press the Unmount button. The feeder will move the slide magazine drawer into storage position 4. FlexColor displays the Mount feeder window.
5. The Mount feeder window updates with new instructions. As instructed in the window, remove the holder from the scanner with both hands, grasping the left and right extended corners, and gently pull it out and away from the scanner as shown in Figure 8, below. Put the holder away in a safe place. Figure 8: Removing the slide original holder. 6. When you have removed the holder, click Continue in the Mount feeder window. The scanner then shuts down.
7. The Mount feeder window updates with new instructions. Close the magazine drawer by rotating it up and pressing it into place so that the metal clasp holds it at the top. Unmount the feeder and place it in it’s original packaging. 8. Click on Done in the Mount feeder window. 9. Open the scanner light table and switch on the power.
Loading Slides Depending on your work load and preferred working method, you might decide to load slides directly into the Feeder, or to work using two (or more) magazines, filling one magazine while the other one is being scanned. Loading Directly into the Feeder 1. Open the magazine drawer by grasping it at the top and pulling it down. It rotates forward on its hinge (B) and then stops, exposing the magazine (C) with magazine drawer top (D) facing out (see Figure 9, below).
2. Remove any slides that you have already scanned. Then, starting at the front/top of the magazine, load new slides in the order in which you would like to scan them. When standing in front of the scanner, position each slide with the top pointing up and with any text showing forward (not in mirror image). 3. Work your way towards the back of the magazine until you have mounted all of the slides you want to scan or until there are no slots left.
Figure 10: Removing the magazine drawer from its hinge. 4. Place the drawer flat on a table with its magazine facing up. 5. Using both hands, pinch the four corners of the magazine together (is shown in Figure 11 below) until you are able to lift the magazine away from the drawer. Figure 11: Pinch the magazine at its four corners (as indicated by the arrows) to free it from the magazine drawer.
6. Take the second magazine, which you just finished loading, and position it the same way as the magazine you just removed. At one end, the magazine has a broad metal plate (A) and flared rails with a notch at each side (B); this must face the bottom of the drawer, with the first slide facing the top (see Figure 12, below). Align the slots on the rails with the bottom tabs of the drawer and press the magazine down into place until it clicks at both the top and bottom ends.
Scanning with the Slide Feeder Batch Scanning with 3f The Slide Feeder is intended as a tool for scanning large number of slides in a production environment. For this application, we strongly recommend the 3f workflow for maximum efficiency and flexibility. The 3f image-file format preserves your full-resolution, 16-bit raw scans and keeps a record of settings applied to each exported image.
3. Instead of using the standard preview/scan workflow in FlexColor, click on the 3f button to open the Scan 3f window. 4. Make the various 3f settings as described in the FlexColor User’s Guide. Note the following: • Use the Destination setting to select a parent folder in which to save your 3f files.
• • • • • FlexColor to analyze each image to decide whether it is negative or positive. It will then use either the Positive Setup or Negative Setup that you have selected. If all of your originals are either positive or negative, then you can set the Film Type to match (though you could also use auto detection). In this case, only one setup selection will be available (Positive Setup or Negative Setup), depending on the film type you have selected.
As you work with the 3f images in the light table, you can load each image into FlexColor to make settings and then save the settings back in the history for the 3f image. When you have finished making settings for an entire batch, you can then batch-process all images to save them as TIFF or JPEG files with your settings applied.
1. Click on the Batch Scan button to open the Batch Scan window. 2. If it is not already shown, expand the Feeder heading in the Batch Scan window by clicking on the triangle next to the heading. 3. Set the Position field to the slide number you wish to scan. You can enter the number directly using your keyboard, or select it by clicking on the up and down buttons next to the field. 4. In the main FlexColor window, make sure that the auto-focus button (labeled AF) is enabled.
If you are using the Manual list, then continue taking previews and adding scans until you have defined all of the scans you wish to make in this batch; then click on Scan in the Batch Scan window to scan them all. For complete details about how to work with the Batch Scan window, please see the FlexColor User’s Guide.
Troubleshooting Below are a few common problems and how to solve them. Problem: Solution: I am not able to mount the Feeder to my scanner. First, make sure you are using the latest version of FlexColor. Then, use the software-guided procedure for mounting the Feeder as described in “Mounting the Feeder” on page 8. Problem: The Feeder is not recognized by the scanner or FlexColor software. The electronic connection between the scanner and Feeder is probably not secure enough.
Solution 2: Move the drum to its home position. To do this, run FlexColor and select Maintenance > Feeder to open the Feeder window. Then set the Drum position drop-down list to “home”. Try scanning again. Solution 3: Make sure that the magazine is pressed fully into the drawer hinge. See also “Loading Slides” on page 18. Solution 4: Check that light is not shining directly into the scanner.
Aligning the Feeder The Feeder is pre-adjusted to align perfectly with most individual scanners. However, some scanners may have a drum that is aligned slightly outside of the tolerance range of the Feeder. If the slide original holder is not being drawn correctly into the scanner, then you may need to adjust your Feeder alignment as described below. In most cases, however, this is not necessary. Usually, you will need to do this just once if at all.
Figure 13: Unlocking/locking the Feeder position. Two nuts hold the Feeder in place—one is visible above; the other is located on the other side of the mounting plate, close to the connector. 3. Use a wrench to loosen both of the nuts just slightly, but do not remove them. 4. Adjust the position of the mounting plate in the direction and distance indicated from your inspection of the original holder position above. 5. Tighten the nuts again. 6.
Preparing the Slide Feeder for Storage or Transport To prepare the Feeder for storage or transportation: 1. Detach the Feeder using the software-guided procedure given “Unmounting the Slide Feeder” on page 15. Note that the Feeder must be in its “home” position in order to fit into the box. 2. Retrieve the box in which your Feeder was originally delivered. This box is made of sturdy cardboard and includes a foam lining custom cut to hold the Feeder safely and securely. 3.
Preventive Maintenance All Flextight scanners should be serviced every 25,000 scans or every 12 months, whichever comes first. If a Feeder is mounted, the recommended number of scans is 15,000 provided that the feeder is mounted for all scans. Please note that previews are also counted as scans. Newer Flextight scanners have a counter installed so that the number of scans can be monitored from FlexColor. Please refer to the FlexColor manual to learn more about monitoring the number of scans.
Technical Information Specifications Scanner supported Flextight 949 Scanner footprint with feeder 36 x 42 cm Weight 3.1 kg Maximum batch 50 slides Original types 35 mm slides Scan software FlexColor 4.0.2 or later Computer OS Mac OS X 10.2.1 (or later) Windows 2000 (or later) (See FlexColor data sheet or manual for full computer requirements) Maximum resolution up to 8000 ppi Scanning speed 50 slides scanned to 50 MB 3f files takes approximately 60 minutes.
CE Declaration