
Full Product Manual
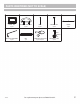


#1
#2
#6
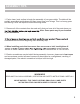
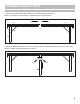
3. Attach one HANDLE ASSEMBLY #2 to each outside end of TABLE TOP #1 using two Bolts, Washers and
Nuts on each. Bolts are inserted through handle from outside of table with Washers and Nuts on inside.
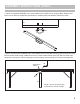
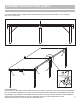
4. Attach one NET POST ASSEMBLY #6 to each MIDDLE LEG #4 using Nut and Spring (part of assembly). Insert
bolt end of NET POST through middle LEG hole from outside of table and slip spring over bolt from inside, then
thread nut on until secure. Leave enough play in spring to adjust net post locking pin in and out of locking holes.
#4
*Locking Pin
Holes
*NOTE: Top hole is used for play,
bottom hole is used for storage.
ASSEMBLY INSTRUCTIONS (CONT.)
6