
Datasheet
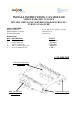
C-VS-1000-TAH_INST_12-10.docx rev 11-13
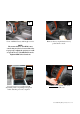
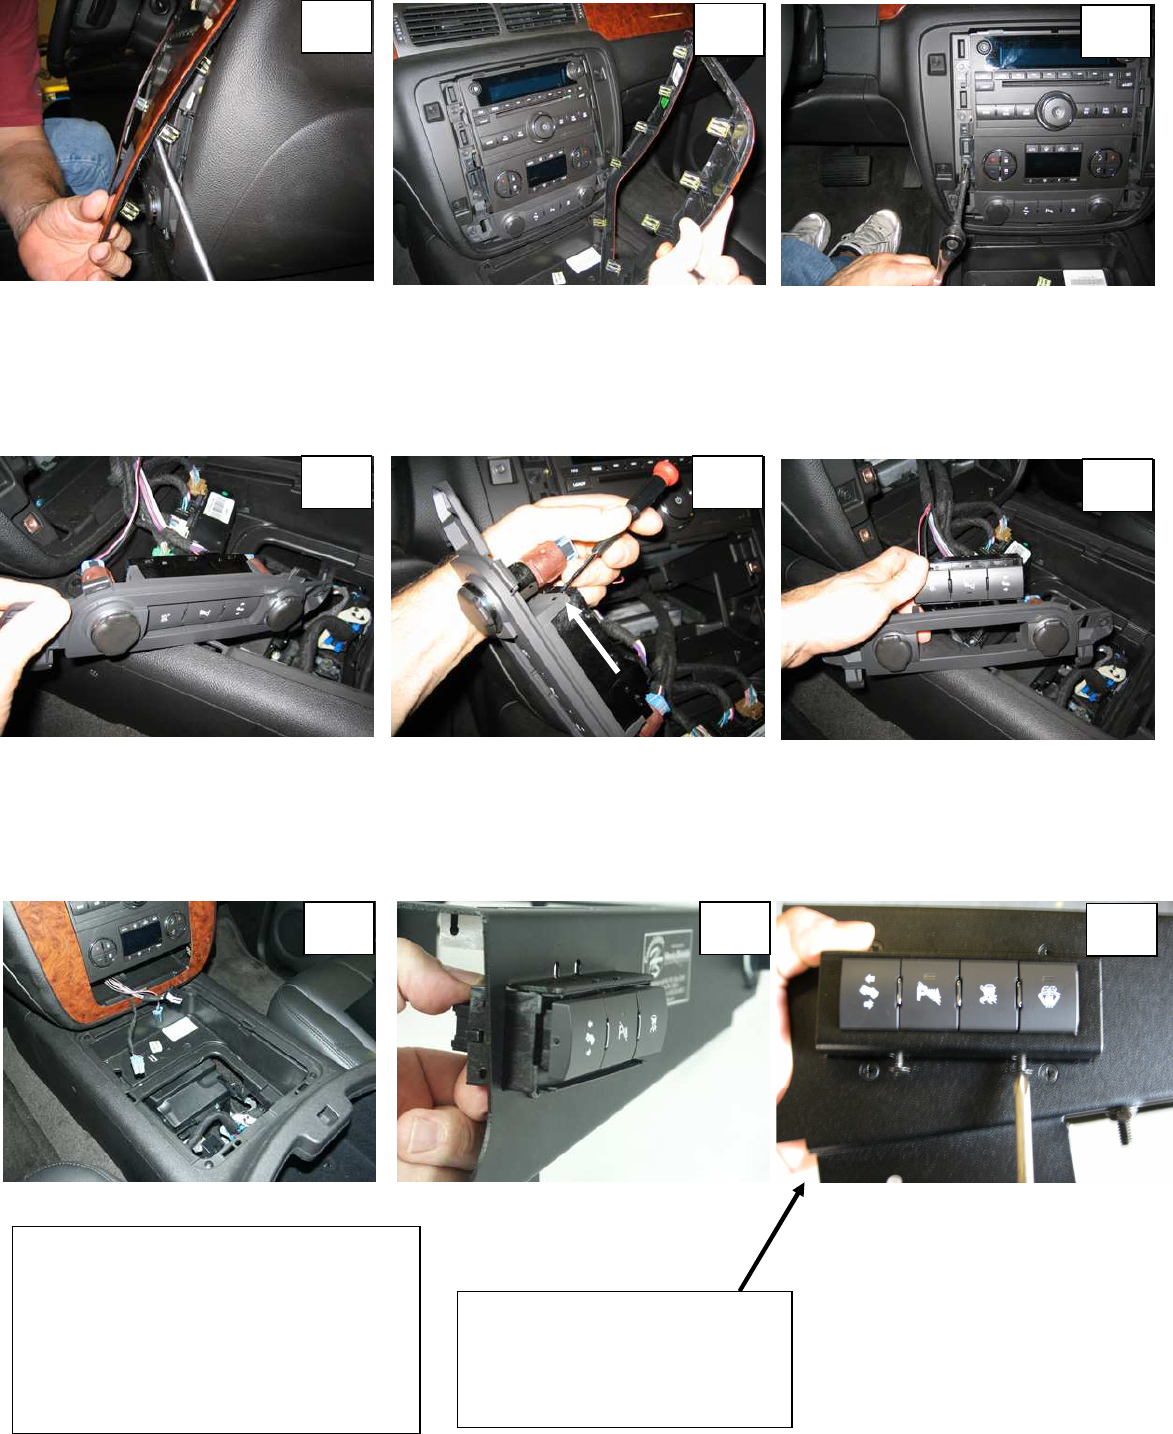
Using a flat head screwdriver
concentrate pressure on or around
the trim bezels “J” clips
Remove entire bezel and put aside.
Remove factory trim screws to
remove the lower switch panel on
dashboard
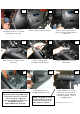
#6
#5
#4
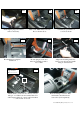
Install switch box into
C-VS-1000-TAH (if necessary)
View of factory console at this time
Attach switch box to console
using T-20 torx screws. Do not
over tighten screws. This will
cause the switches to “stick” in
the ON position.
#12
#11 #10
Unplug switch and set aside for
later install
Remove factory switch box from
trim panel
Using a small flat head
screwdriver, unclip fastener
#7
#9
#8
NOTE:
The mount bolts for the OEM center
console may need to be loosened in
order to properly readjust the
position so it will accept the New C-
VS-1000-TAH console.
Tighten OEM bolts when done.
NOTE: Wrapping the switch
assembly with electrical tape
works well for the screws to
push against in step #12.