Spartan Wireless Cameras User’s Manual PLEASE READ CAREFULLY BEFORE USING CAMERA
Package Contents Mounting Strap 1 Trail Camera 1 Antenna 1 USB Cable 1 User’s Manual 1 Camera Body and Ports Antenna Port 1
2
Keys & Buttons • MENU: Enter the program menu in preview mode • ▲▼◄►: Move between the menu items and change the value • OK: o Save parameter settings in menu mode o Play videos in playback mode • : In live preview window, switch between Playback button playback and preview mode • DEL: delete an image in playback mode • Use Shortcuts: In live preview window, o ▲ is the shortcut to choose Video mode, and o ▼ is the shortcut for the Camera mode o OK is for capture photos or record a video manually
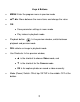
Quick Start 1. Make sure the power switch is at OFF position. Load the batteries into the battery compartment according to the polarities indicated. Load a set of 12 (recommended), 8 or 4 (emergency, left 2 columns) batteries. Or connect 6 V external power supply to the camera by using the correct cable and external battery. The following batteries can be used: • • • 2. 3. 4. 5. 6. 7. High-performance alkaline batteries Lithium batteries Rechargeable Ni-MH batteries Insert a SD card (32GB or smaller).
8. 9. 10. 11. 12. 13. 14. 15. 16. to move between the tabs (submenu) which contains different group of items. Press the ▲ or ▼ buttons to activate the submenu and edit different items. Press ◄► to change the value. Press the OK button to save. Navigate to the Wireless tab; scroll down to enter the submenus. Change the Send Mode to Instant. Leave the Send To on Phone mode if you are sending the email to a cell phone number. Or change to Email mode if you are sending to your email address.
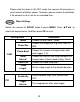
Please note that even in the OFF mode, the camera still consumes a small amount of battery power. Therefore, please remove the batteries if the camera is not in use for an extended time. Menu Settings Switch the camera to SETUP mode & press MENU. Press ▲▼◄► to select the desired value, And then press OK to save. Setting Items Mode CAM Photo Size Choose the image size, e.g. 5MP, 8MP or 3MP. Photo Burst Choose the number of images taken after each trigger (1-5).
Time Lapse The camera can be triggered by timer at a preset time interval. Please note that even in Time Lapse mode, the camera still can be triggered unless the Sensitivity is set to OFF. Start-Stop 1/2 The camera can be set to operate only at specific time period. To enable this function select ON and press ok. The start-stop menu will then appear. This menu contains the settings for times to start and stop as well as the trigger interval and time lapse interval.
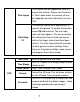
Default Information Restore all settings to factory default values. Show version of firmware on the camera. Password This option allows a 6 digits password to be set. Send Mode Choose to send the image Instantly, just send the Daily report or just turn the wireless function Off. Send To Send the images to Phone, Email or Both. Send Via Choose to send the image via MMS (MMS plan) or Internet (Data plan). SMS Control Turning the SMS command function On or Off.
Setup Tool Download the Setup Tool to your SD card so you can set up the carrier’s network parameters if they are not pre-programmed to the camera. It will also allow user to set up some advanced functions. Copy Para Copy the current network parameter settings to the SD card. Playback Button (Viewing Photo or Video) • • • • • • • • • • Switch to SETUP mode. to view the latest picture (or video). Press Playback button Press OK button to start playing the video clips.
How to use the Setup Tool If your wireless carrier’s network parameters are not pre-programmed into the camera from the factory, you will need to use the Setup Tool to program them into the camera manually. 1. Go to the camera Menu > Wireless > Setup Tool. Download the Setup Tool to your SD card from the camera menu. 2. Take the SD card out and read the SD card from your computer. The setup tool will only work on PC. Run HCOSetup.exe on your SD card. 3. You will see the setup window as below: 4.
11
Technical Specifications Picture Resolution 8MP Video Resolution WVGA (800*480@30FPS) / QVGA (320*240@30FPS) / 720p @30fps / 1080p @10fps Trigger Time 1s Lens FOV (Field of View) = 52° Night Illumination InfraRed Display Screen 2.
WARRANTY INFORMATION The Camera purchased from our authorized dealers is warranted to be free from defects in material and workmanship for 2 year from the original date of purchase under normal use.
Should your product prove defective during this warranty period, please contact us to obtain a RMA number prior to returning the defective unit. *RMA number is required for all returns. Include $11.95 for return shipping & insurance. (For U.S. customers only. CHECK OR MONEY ORDER ONLY PLEASE, NON-REFUNDABLE). If the product is beyond the warranty period, the price for repairing or replacing may vary. Please allow 6-8 weeks for delivery. International customers pay different amount of shipping & insurance.
CUSTOMER SERVICE CONTACT E-mail: sales@hcooutdoors.com Website: www.hcooutdoors.com Phone: 1-770-582-0004 HCO Outdoor Products 6665 Corners Industrial Ct. Suite D Norcross, GA 30092 U.S.A.