Photomatix Pro 3.
Introduction Photomatix Pro processes multiple photographs of a high contrast scene into a single image with details in both highlights and shadows. This manual offers step-by-step instructions for using the main features of the Photomatix Pro software. The first section offers tips for taking photographs intended for High Dynamic Range (HDR) processing. The second section describes how to create HDR images and process them through tone mapping.
Workflow Shortcuts Panel The functions of Photomatix Pro can be accessed via the menus. To allow faster access, some core functions can be launched via the “Workflow Shortcuts” panel shown here: Workflow Shortcuts Panel Drag & Drop You can drag files from the Finder or other image browsers and drop them to the Photomatix Pro icon on your Dock. If you drag & drop multiple image files, you will be able to access the HDR creation or Exposure Blending processes.
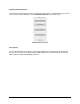
Table of Contents Table of Contents Section 1: Tips for taking photographs intended for HDR processing ..........................................1 1.1 Automatic Exposure Bracketing (AEB) ..............................................................................1 1.2 Manual Exposure Bracketing for DSLR cameras...............................................................3 1.2.1 Manual Exposure Bracketing with Compact Digital Cameras .....................................4 1.
Section 1: Tips for Taking Successful Source Images Section 1: Tips for taking photographs intended for HDR processing Photographing a high contrast scene requires taking several exposures in order to capture information in both the brightest highlights and deepest shadows of the scene. Photographs can be made with digital or film-based cameras. The only requirement is that the exposure can be adjusted when taking pictures.
Section 1: Tips for Taking Successful Source Images AEB Settings on top LCD of a Nikon D80 (3 shots with +/- 2EV) Canon Rebel XTi/400D LCD showing AEB with +/-2 increments selected. o Select an appropriate number of auto-bracketed frames if your camera offers different options for the number of frames. For instance, if your camera can autobracket at a maximum of +/- 1 EV increments, then select 5 or more frames if your camera allows it.
Section 1: Tips for Taking Successful Source Images 1.2 Manual Exposure Bracketing for DSLR cameras In scenes with extreme differences between light and dark detail, manual exposure bracketing over a greater exposure value range may provide better source images than Auto Exposure Bracketing. t is the only option if your camera does not offer automatic bracketing over a wide enough range to cover your scene. The following suggestions will help you to take optimal pictures using manual exposure bracketing.
Section 1: Tips for Taking Successful Source Images Figure 2.2 Histogram depicts the darkest image elements (shadows) overexposed. 1.2.1 Manual Exposure Bracketing with Compact Digital Cameras Consult your camera’s user manual to determine if manual exposure is possible. If this is possible, you can follow the steps for Manual Exposure Bracketing with a DSLR.
Section 2: HDR Generation and Tone Mapping Section 2: HDR Generation and Tone Mapping Creating images that display the High Dynamic Range captured by photographs taken under different exposure settings is a two-step process: The first step is to merge your differently exposed photographs into a single 32-bit HDR image. Because of its high dynamic range, an HDR image will not display properly on conventional monitors.
Section 2: HDR Generation and Tone Mapping The Generate HDR – Selecting source images window will display. Click Browse. The Select differently exposed images window will display to allow you to select the source images to be combined. Highlight the images that you wish to use for HDR Generation. Then click on the Select button. The selected image files will be listed on the Generate HDR - Selecting source images window.
Section 2: HDR Generation and Tone Mapping Photomatix Pro can generate an HDR image from 8-bit, 16-bit and RAW source files. Supported file types include JPEG, TIFF, PSD, DNG and RAW files from many camera models. As the list of supported camera models often changes when a new sub-version of Photomatix Pro is released, we suggest that you consult the Photomatix Pro FAQ on the www.hdrsoft.com website to check whether your camera model is supported.
Section 2: HDR Generation and Tone Mapping General settings for Generate HDR Alignment settings The Align source images option is checked by default. The Align images option corrects for misalignment problems if the camera moved slightly between the bracketed frames. This is the case with hand-held photographs, but may also happen when shooting with the aid of a tripod. Photomatix offers two alignment methods based on different algorithms.
Section 2: HDR Generation and Tone Mapping the tonal values of the images are linear relative to the values of light captured. Please note that the terminology linear may be used with a different meaning depending on the RAW converter (in Adobe Camera RAW, for instance, linear is relative to the Adobe RGB color space and not to the values of light).
Section 2: HDR Generation and Tone Mapping • • • Step one of the two-step process is now complete. Until Tone Mapping is applied, the 32-bit image seen on screen cannot display its full tonal range. The small view on top of the “HDR viewer” window shows a local section of the HDR image viewed at the appropriate exposure. Saving the 32-bit HDR image at this point will allow you to apply different Tone Mapping settings to the HDR source image without repeatedly following the Generate HDR procedure.
Section 2: HDR Generation and Tone Mapping 2.2 Tone Mapping The generated HDR image cannot be represented properly on screen without further processing. An unprocessed HDR image is somewhat similar to a film negative or the RAW file of a digital camera. It needs further processing for display or printing. In Photomatix Pro, this processing is called Tone Mapping. There are two tone mapping methods for processing the HDR image: Details Enhancer and Tone Compressor. 2.2.
Section 2: HDR Generation and Tone Mapping Details Enhancer incorporates the following image adjustment sliders: General adjustments Strength: Controls the strength of contrast enhancements. A value of 100 gives the maximum increase in both local and global contrast enhancements. Color Saturation: Controls the saturation of the RGB color channels. The greater the saturation, the more intense the color. A value of zero produces a grayscale image. The value affects each color channel equally.
Section 2: HDR Generation and Tone Mapping Color adjustments Color Temperature: Adjusts the color temperature of the tone mapped image relative to the temperature of the HDR source image. Moving the slider to the right will give a “warmer”, more yellow-orange colored look. Moving the slider to the left gives a “colder” more bluish look. A value of zero will preserve the original color temperature of the HDR source image.
Section 2: HDR Generation and Tone Mapping Shadows/Highlights adjustments Highlights Smoothing: Reduces the contrast enhancements in the highlights. The value of the slider sets how much of the highlights range is affected. This control is useful to prevent white highlights from turning grey, or uniform light blue skies becoming dark blue-grey. It is also useful reducing halos around objects placed against bright backgrounds. Shadows Smoothing: Reduces the contrast enhancements in the shadows.
Section 2: HDR Generation and Tone Mapping Edit>Undo Tone Mapping will undo the tone mapping settings applied to the original HDR image. The tone-mapped image will revert to a 32-bit HDR image, which can then be tone mapped again. The resulting tone mapped image always has a bit depth of 16 bits/channel. This is even the case if the source images were JPEGs or 8-bit TIFF files. Saving the tone mapped image Save the resulting file using the File>Save As menu. .
Section 2: HDR Generation and Tone Mapping If you open a large HDR file (larger than the threshold set in preferences, by default 30 Megapixels) the following window will show: If you click yes the HDR file will be opened in preview. You will get the same tone mapping window and the preview as shown above. The only difference is that you cannot view the file at 100% in the Loupe. The same dialog shows for both Tone Mapping methods.
Section 2: HDR Generation and Tone Mapping 2.2.2 Tone Mapping with Tone Compressor From the Tone Mapping window, select the Tone Compressor tab. Use the slider controls to adjust the image. The preview on the right provides a view of what the image will look like once Tone Compressor is applied to the entire HDR source image.
Section 2: HDR Generation and Tone Mapping Tone Compressor incorporates the following image adjustment sliders: Brightness: Influences the tone mapping process done on the HDR image in regards to overall image brightness. Tonal Range Compression: Controls how the tonal range of the 32bit image is compressed into the 0-256 range of 8-bit monitors. The higher the value, the more both shadows and highlights will be shifted toward the center of the histogram.
Section 2: HDR Generation and Tone Mapping Edit>Undo Tone Mapping will undo the tone mapping settings applied to the original HDR image. The tone mapped image will revert to a 32-bit HDR image which can then be tone mapped again. Saving the tone mapped image Save the resultant file using the File>Save As menu (you have the same options as shown in the previous section on Details Enhancer). Process>Save settings will save the applied tone mapping settings as an .
Section 2: HDR Generation and Tone Mapping Inspecting the preview with the Loupe tool Loupe shows 100% pixel view Both Tone Mapping methods feature a Loupe panel so that you can inspect fine details in your image. If you move the mouse over the preview you see a square marquee. If you click at some position the content of that square will show up in the Loupe panel. The option Refresh loupe only can be used to avoid refreshing the main preview when you change settings.
Section 2: HDR Generation and Tone Mapping If you save the tone mapped image as a TIFF file, the tone mapping settings will be automatically embedded as XMP metadata in the TIFF file. If you open the file in Photoshop, you can then view the tone mapping settings under File->Info->Advanced.
Section 4: Batch Processing Section 3: Exposure Blending In addition to the two-step HDR processing described in the previous pages, Photomatix Pro also offers several single-step exposure blending methods. These will combine differently exposed images to show detail in both shadows and highlights. These blending methods combine differently exposed photographs into a single image.
Section 4: Batch Processing 3.1 Blending Exposures To start Exposure Blending, drag your images to the Photomatix Pro icon, and select the option Blend exposures Alternatively, you can also click on the Exposure Blending button of the Workflow Shortcuts, or go to the Process menu and select the Exposure Blending item. The Exposure Blending – Select source images window will display. Load your images via the Browse button (not needed if you use drag & drop).
Section 4: Batch Processing Click on OK and the Exposure Blending dialog will show. Select the Exposure Blending method of your choice. Some methods allow settings and some are fully automatic. Try different methods to get the most pleasing results. The default method Highlights & Shadows – Adjust is often a good choice. 3.1.1 Highlights & Shadows – Adjust Adjust the settings sliders Strength: Controls the strength of local contrast enhancements.
Section 4: Batch Processing 3.1.3 Highlights & Shadows – 2 Images This method blends only two images. The displayed dialog allows you to select which images get blended. 3.1.4 Highlights & Shadows – Intensive Strength: Controls the strength of local contrast enhancements. Color Saturation: Allows the increase or decrease of image saturation. Radius: Controls the area used to calculate the weighting of the source images. A higher radius reduces halos, but increases processing times significantly. 3.1.
Section 4: Batch Processing Click Process. Photomatix Pro will create an Exposure Blended image. Highlight & Shadows – Adjust: Resulting blended image Save the processed file using the File>Save As menu. Available file formats The TIFF 16-bit option is only available if the source images were also 16 bits/channel. Exposure Blending does not change the channel bit-depth. The resulting image will have the same channel bit-depth as the source images.
Section 4: Batch Processing Inspecting the preview with the Loupe tool Loupe shows 100% pixel view Exposure Blending features a Loupe panel so that you can inspect fine details in your image. Moving the mouse over the preview displays a square marquee. If you click at some position, the content of that square will show up in the Loupe panel. The option Refresh loupe only can be used to avoid refreshing the main preview when you change settings.
Section 4: Batch Processing Section 4: Automate Photomatix supports two different batch process functions: Batch Processing: Processes multiple photos taken at different exposures Single File Conversion: Processes single image files Batch Processing may be used to: Process an exposure series to create HDR image files ready to be tone mapped individually.
Section 4: Batch Processing 4.1 Batch Processing Click on the Automate menu and select Batch Processing or use the Batch Processing button on the Workflow Shortcuts panel. The batch can process sub-folders with different numbers of source images in each folder. It is important to note that when you are processing different sets of source images in a single folder, each set must contain the same number of source images.
Section 4: Batch Processing Check this option if you want to create a 32-bit HDR image. Click the Settings button to open an option window. The first checkbox will force the EV spacing to the specified value. This option can be used when the exposure information is not available in the EXIF data (or if two or more images have the same exposure information), or to force the EV spacing in all cases. In the latter case, the exposure information in the EXIF data will be ignored.
Section 4: Batch Processing Option B: Process with Details Enhancer Check this option if you want to automatically tone map the HDR image with the Details Enhancer method. Click the Settings button to open a window which allows the adjustment of the Details Enhancer settings (described in Section 2). You may load settings, which were saved in an XMP file in this window. When the option Save is checked, the settings will be saved in an XMP file alongside the tone mapped images.
Section 4: Batch Processing Option C: Process with Tone Compressor Check this option is you want to automatically tone-map the HDR image with the Tone Compressor method. Click the Settings button to open a window that allows the adjustment of the Tone Compressor settings (described in Section 2). You may load settings that were saved in an XMP file in this window. Batch Processing lets you tone map your HDR images with Details Enhancer and Tone Compressor simultaneously.
Section 4: Batch Processing Option D: Average Check this option if you want to combine the source images using the average method. There are no other options available. Option E: Highlights & Shadows – Auto Check this option if you want to combine the source images with the exposure blending method Highlights & Shadows – Auto. There are no other options available.
Section 4: Batch Processing Number of Source Images to process Select the number of source images to process at a time: 2-11 or All. All should only be selected if you are using the Process Subfolders option, or if the folder processed contains only one set of bracketed exposures. When All is selected, Photomatix will attempt to process all images in each folder, so it is important that only one set of source images be in each subfolder.
Section 4: Batch Processing with varying numbers of source images if each series is in its own subfolder and All is selected. Select a file type from the Filter by File Type dropdown. Options are: All, TIFF, JPEG, PSD and RAW. This option is useful if a source folder contains RAW+JPEG from a camera, and you are processing only one file type. Select a Destination location By default, Same as source is selected.
Section 4: Batch Processing Start Batch Processing Click Run to start batch processing. The window below the Run button will show the status of each process in real time.
Section 4: Batch Processing 4.2 Single File Conversion Single File Conversion lets you batch tone map existing HDR image files or create pseudoHDR images from single RAW files. • Click on the Automate menu and select Single File Processing. • Check the desired conversion option. Tone Map HDR image files: Processes HDR image files with Details Enhancer and/or Tone Compressor. For Settings, read more in the Batch Processing section of this manual.
Section 4: Batch Processing Section 5: Advanced Tips and Techniques 5.1 Chromatic Aberrations (CA) Often you may see on your tone mapped or merged image artifacts like these: CA shown in Photomatix Pro after merging This is the result of chromatic aberrations (sometimes called fringing). What are chromatic aberrations? Most lenses are not perfect and can sometimes focus the red, green and blue channels on different planes (relative to the sensor).
Section 4: Batch Processing • Correct chromatic aberrations in all RAW files inside Lightroom CA correction in Lightroom Setting Defringe to All Edges can improve the correction. • Copy (Synch) the chromatic aberrations settings to all RAW files that you will merge in Photomatix Pro. • Export all files as 16-bit TIFF files from Lightroom. • Merge the images in Photomatix Pro with your method of choice (HDR + tone mapping or exposure blending).
Section 4: Batch Processing 5.2 Image Alignment It is believed that using a tripod can avoid any mis-alignment of the photos. This is often not the case because of: • Wind • Shutter slap (even using mirror lockup) • Shaky ground This can be checked using a 200mm telephoto lens. It is surprising how much the exposures can be out of alignment. The good news is that the Photomatix Pro alignment functions can often properly align them.
Section 4: Batch Processing 5.3 Processing RAW files in 3rd party raw converters If a RAW converter is used (e.g. Adobe Lightroom or Camera Raw), images should be processed with the following settings: • • WB (White Balance): Same WB for all involved photos. Basic settings: Should be all set to zero. Sample Settings • Curves: Both Parametric and Point Curves should be linear.
Section 4: Batch Processing 5.4 Blurred Images If bracketed images are merged and the resulting image is blurred, the reason can be one of the following: • • Images are too far out of alignment and the image alignment functions cannot handle it. One or more images show motion blur due to too long shutter speed (even using image stabilized lenses or a tripod). In this case, it is recommended that the individual images are checked for motion blur. 5.
Section 4: Batch Processing Resources For more information, we recommend the Photomatix Pro FAQ on the HDRsoft website at http://www.hdrsoft.com/support/faq_photomatix.html.