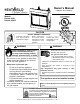
Owner’s Manual Installation and Operation Models: Dakota 42-B Dakota 42H-B CAUTION Important operating • and maintenance instructions included. Read, understand • and follow these instructions for safe installation and operation. T O N RD O A D SC I • D DO NOT DISCARD THIS MANUAL L e a v e t h i s manual with party responsible for use and operation. WARNING WARNING If the information in these instructions is not followed exactly, a fire may result causing property damage, personal injury, or death.
Read this manual before installing or operating this appliance. Please retain this owner’s manual for future reference. Congratulations Congratulations on selecting a Heat & Glo LifeStyle Collection gas appliance—an elegant and clean alternative to wood burning appliances. The Heat & Glo LifeStyle Collection gas appliance you have selected is designed to provide the utmost in safety, reliability, and efficiency.
Table of Contents 1 Listing and Code Approvals A. B. C. D. Appliance Certification . . . . . . . . . . . . . . . . . . . . . . . . . 4 Glass Specifications . . . . . . . . . . . . . . . . . . . . . . . . . . 4 BTU Specifications . . . . . . . . . . . . . . . . . . . . . . . . . . . 4 High Altitude Installations . . . . . . . . . . . . . . . . . . . . . . 4 2 Getting Started A. Design and Installation Considerations . . . . . . . . . . . . 5 Moisture Resistance: . . . . . . . . . . . . . . . . . . . . . .
1 Listing and Code Approvals A. Appliance Certification MODELS: Dakota 42-B, Dakota 42H-B LABORATORY: Underwriters Laboratories, Inc. (UL) TYPE: Vented Gas Appliance STANDARD: ANSI Z21.50-2003—CSA2.22-M2003 This product is listed to ANSI standards for “Vented Gas Fireplaces” and applicable sections of “Gas Burning Heating Appliances for Manufactured Homes and Recreational Vehicles”, and “Gas Fired Appliances for Use at High Altitudes”. B.
2 Getting Started A. Design and Installation Considerations These appliances must be installed outdoors. The Dakota 42-B Series Outdoor Gas Fireplace is designed for outdoor use. It may also be installed in screened porches and lanais that meet these minimum requirements: • Minimum porch area - 96 square feet • Minimum ceiling height - 84 in. A minimum of two walls can be screened but must be open to outside ventilation. • • Minimum screen area - 64 square feet Minimum screen top height - 80 in.
B. Tools and Supplies Needed Before beginning the installation be sure that the following tools and building supplies are available. Reciprocating saw Framing material Pliers Hi temp caulking material Hammer Gloves Phillips screwdriver Framing square Flat blade screwdriver Electric drill and bits (1/4 in.) Plumb line Safety glasses Manometer Voltmeter Tape measure Level Non-corrosive leak check solution 1/2 - 3/4 inch length, #6 or #8 Self-drilling screws C.
3 Framing and Clearances Note: • • • WARNING Illustrations reflect typical installations and are FOR DESIGN PURPOSES ONLY. Illustrations/diagrams are not drawn to scale. Actual installation may vary due to individual design preference. Fire Risk Provide adequate clearance: • Around air openings. • To combustibles. • For service access. Locate appliance away from traffic areas. A.
B. Clearances Framing Dimensions B C D in. 24-1/8 mm 613 43-7/8 49 43-7/8 1114 1245 1114 D Header height. Use only noncombustible material below the top of the top standoffs. B C A Upper front can be covered with non-combustible material or removed and replaced with non-combustible material. A 0 in. to level of standoffs 1-1/2 in. (38 mm) 84 in. (2134 mm) to ceiling 1-1/2 in. (38 mm) 1/2 in. (13 mm) Combustible Object Drywall Figure 3.2 0 in. 36 in. (914 mm) 0 in.
4 Termination Locations A. Vent Termination Minimum Clearances O P G N R FP A D FP H Q E (See Note 2) B L FP F B FP B FP FP I M FP A FP = FIREPLACE OPENING A = B = D** = F G* = = H = I = * ** *** J or K X = AIR SUPP LY INLET 0 in. . . . . . . . . . clearances above grade, veranda, porch, deck or balcony. 12 in. . . . . . . . . . clearances to window or door that may be opened, or to permanently closed window. 36 in. . . . . . . . . . vinyl windows or siding. 47 in. . . .
5 Appliance Preparation CAUTION B. Securing and Leveling Appliance WARNING Sharp Edges • Wear protective gloves and safety glasses during installation. Fire Risk • • A. Remove Logs and Shipping Cover Remove locking screw at the top of the doors (shown in Figure 5.1). Open the doors by sliding the handles toward the outside edges of the doors. Remove the cartons of logs from their shipping location in the appliance. Set the logs and door lock bracket screw aside for later reinstallation.
6 Gas Information A. Fuel Conversion C. Gas Connection Before making gas connections ensure appliance being installed is compatible with the available gas type. Note: Have the gas supply line installed in accordance with local building codes, if any. If not, follow ANSI 223.1. Installation should be done by a qualified installer approved and/or licensed as required by the locality. (In the Commonwealth of Massachusetts installation must be performed by a licensed plumber or gas fitter.
WARNING Fire Risk Explosion Risk • Gas build-up during line purge may ignite. • Purge should be performed by qualified technician. • Ensure adequate ventilation. • Ensure there are no ignition sources such as sparks or open flames. • A small amount of air will be in the gas supply lines. When first lighting appliance it will take a short time for air to purge from lines. When purging is complete, the appliance will light and operate normally. D. High Altitude Installations U.L.
E. Valve Access • • • The gas valve can be accessed behind the cement refractory panel on the right side of the fireplace. Lift doors out and set aside. There is a washer under each door. Be careful not to loose those washers. Remove the inside valve access panel by lifting it up and out. Washer Figure 6.4 • Figure 6.1 • • • Lift Out Doors Use a phillips screwdriver to remove the exterior valve access panel (remove four screws). Remove logs if access is necessary after installation is complete.
7 Electrical Information A. Intellifire Ignition System Wiring • WARNING This appliance is equipped with an Intellifire control valve which operates on a 3 volt system. This appliance is supplied with a battery pack which is located in the ON/OFF switch terminal box. A wiring diagram is shown in Figure 7.1. The battery pack requires two D cell batteries (not included). See Section 12.B. for battery replacement. • • Shock Risk • Replace damaged wire with type 105° C rated wire.
8 Finishing A. Mantel Projections Figure 8.1 shows the minimum vertical dimension of appliance mantels or other combustible projections above the top front edge of the appliance. Roof or Overhang 12 in. (305 mm) max. combustible mantel depth re ctu u r St ll al wa n io de dit Si Ad or Fi re pl ac 84 in. (2134 mm) minimum height e St Ma ru nte ct ur l e B in. mm in. mm Figure 8.
B. Facing Material WARNING Fire Risk Do NOT obstruct air inlet or outlet grilles. Do NOT modify grilles. • Modifying or covering grilles could cause temperature rise and fire hazard. Finishing materials must not interfere with: • Air flow through grilles or louvers. • Operation of louvers or doors. • Access for service. Finish wall material may be combustible, top & sides. Upper front can be covered with non-combustible material or removed and replaced with noncombustible material. 0 in. 0 in.
9 Appliance Setup A. Clean the Appliance C. Positioning the Logs Clean/vacuum any sawdust that may have accumulated inside the firebox or underneath in the control cavity. • • See Section 13.B. for log descriptions and illustrations. Place right rear log on the grate against the appliance right side wall. WARNING Shock Risk Fire Risk Use ONLY optional accessories approved for this appliance. • Using non-listed accessories voids warranty. • Using non-listed accessories may result in a safety hazard.
• Place front log in front of the main grate with its left end resting on left rear log as shown. Figure 9.5 • • Front Left Log (SRV722) Place right log against the rightmost front grate bar and rest its rear on right rear log, angled towards the corner as shown. Figure 9.8 Front Log (SRV727) Place front left log between locating bars so it rests against log left side log and on top of front log. Figure 9.
D. Glass Assembly E. Placing Lava Rock • WARNING Handle glass with care. • Inspect the glass for cracks, chips or scratches. • Do NOT strike, slam or scratch glass. • Do NOT operate appliance with glass door removed, cracked, broken or scratched. • Replace glass door assembly as a complete assembly. • • • The glass doors are included with and pre-installed in the appliance. To adjust doors, open them and loosen screws on top and bottom pivot pins. Slide each door as necessary and tighten screws.
10 Operating Instructions A. Before Lighting Appliance Before operating this appliance, have a qualified technician: • Remove all shipping materials from inside and/or underneath the firebox. Review proper placement of logs, rockwool, lava rock and vermiculite. Check the wiring. Check the air shutter adjustment. Ensure that there are no gas leaks. Ensure that the flow of combustion and ventilation air is not obstructed (front grilles).
B. Lighting the Appliance Intellifire Ignition FOR YOUR SAFETY READ BEFORE LIGHTING WARNING: If you do not follow these instructions exactly, a fire or explosion may result causing property damage, personal injury or loss of life. A. This appliance is equipped with • Do not touch any electric switch; do an intermittent pilot ignition (IPI) not use any phone in your building. device which automatically lights • Immediately call your gas supplier the burner. Do not try to light the from a neighbor’s phone.
C. After the Appliance is Lit CAUTION Initial Break-in Procedure When you light the appliance, you may notice that it produces heat which does have an associated odor or smell. If you feel this odor is excessive it may require the initial three to four hour continuous burn on high followed by a second burn up to 12 hours to fully drive off any odor from paint and lubricants used in the manufacturing process.
11 Troubleshooting With proper installation, operation and maintenance your gas appliance will provide years of trouble-free service. If you do experience a problem, this troubleshooting guide will assist a qualified service person in the diagnosis of a problem and the corrective action to be taken. This troubleshooting guide can only be used by a qualified service technician. A. Intellifire Ignition System Symptom 1. 2. 3. 4. Possible Causes The ignitor/module makes noise, but no spark.
12 Maintaining and Servicing the Appliance Although the frequency of appliance servicing and maintenance will depend on use and the type of installation, a qualified service technician should perform an appliance check-up at the beginning of each heating season. WARNING Risk of injury or property damage Before servicing: • Turn off gas. • Turn off electricity to appliance. • Disable remote control, if one is present. • Ensure appliance is completely cooled.
A. Valve Service and Replacement • Tools Required Phillips screwdriver 7/16 in., 5/8 in., 13/16 in., 15/16 in. wrenches Remove the inside valve access panel by lifting it up and out. Figure 12.4 Remove Valve Access Panel Figure 12.1 Tools Required • • • The valve can be accessed through the valve access panel on the right side of the fireplace. Lift doors out and set aside. Remove grate and pilot shield (see Figure 6.2). • Using a phillips screwdriver remove the exterior valve access panel.
• Using two 3/4 in. wrenches, disconnect the burner supply tube. B. Battery Replacement • Figure 12.9 Switch Cover Plate Figure 12.7 Disconnect Burner Supply Tube • Remove the two screws securing the valve to the valve bracket. Remove switch cover plate from the wall. • Replace two D-cell battieres. Ground Wire Figure 12.10 Batteries Figure 12.8 Remove Valve from Valve Bracket • • 26 Disconnect the pilot and orifice tubes using a 7/16 in. and a 5/8 in. wrench.
B. Maintenance and Service Tasks: Inspect Maintenance Tasks Doors, surrounds and fronts 1. Inspect for scratches and nicks that can lead to breakage when exposed to heat. 2. Verify no obstructions to airflow through the louvers. 3. Verify proper clearance to combustible household objects is maintained. Glass assembly and glass 1. Inspect glass panels for scratches and nicks that can lead to breakage when exposed to heat. 2. Confirm there is no damage to glass or glass frame. Replace as necessary. 3.
13 Reference Materials A. Appliance Dimension Diagram Dimensions are actual appliance dimensions. Use for reference only. For framing dimensions and clearances refer to Section 3. 31 in. (787 mm) 23-1/4 in. (591 mm) 1 in. (25 mm) 7/8 in. (22 mm) 43-1/2 in. (1105 mm) 37-1/8 in. (943 mm) 23-1/8 in. (587 mm) 42 in. (1067 mm) 48 in. (1219 mm) 6-3/4 in. (171 mm) 12-5/8 in. (321 mm) 15-5/8 in. (397 mm) Figure 13.
Heat & Glo LifeStyle Collection • Dakota 42-B/Dakota 42H-B • 4036-909 • Rev J 11/08 29 8 7 6 12 15 14 11 5 4 14 16 9 10 13 17 Part number list on following page. 3 2 1 22 23 24 18 27 21 19 25 28 29 20 26 10/08 Beginning Manufacturing Date: Feb 2006 Ending Manufacturing Date: Active DAKOTA42-B, DAKOTA42H-B Service Parts Diagram 42 in.
Heat & Glo LifeStyle Collection • Dakota 42-B/Dakota 42H-B • 4036-909 • Rev J 11/08 6 5 3 9 8 7 Post Serial #OD9288 4 2 17 16 15 8 22 7 6 Part number list on following page. 1 9 14 23 13 26 25 24 21 Pre Serial #OD9288 10 5 11 20 12 27 19 18 Post Serial #OD9287 (Kit is retro-fittable.) 28 29 30 10/08 Beginning Manufacturing Date: Feb 2006 Ending Manufacturing Date: Active DAKOTA42-B, DAKOTA42H-B Service Parts Diagram 42 in.
Heat & Glo LifeStyle Collection • Dakota 42-B/Dakota 42H-B • 4036-909 • Rev J 11/08 31 SRV724 SRV723 SRV740 SRV727 4036-713(Log Set Box #3) 4036-712(Log Set Box #2) SRV720 4036-711(Log Set Box #1) SRV728 SRV722 SRV742 10/08 Beginning Manufacturing Date: Feb 2006 Ending Manufacturing Date: Active DAKOTA42-B, DAKOTA42H-B Service Parts List 42 in. Outdoor Gas Fireplace Service Parts B.
This page intentionally left blank.
This page intentionally left blank.
¨ C. Warranty Hearth & Home Technologies LIMITED WARRANTY Hearth & Home Technologies (“HHT”) and its respective brands extends the following warranty for HHT gas, wood, pellet and electric appliances purchased from an authorized HHT dealer and installed in the United States of America or Canada. Warranty starts with date of purchase by the original owner (End User) except as noted for replacement parts.
C. Warranty (continued) This limited warranty does not extend to or include surface finish on the appliance or terminations, door gasketing, glass gasketing, glass discoloration, firebrick, pellet logs, kaowool or other ceramic insulating materials. Rust and/or corrosion on any of the metal surfaces, cast iron components, baffles, firepots, doors, or firebox area are not covered by this warranty.
D. Contact Information Please contact your Heat & Glo LifeStyle dealer with any questions or concerns. For the number of your nearest Heat & Glo dealer, please visit www.heatnglolifestyle.com. - NOTES - CAUTION Important operating • and maintenance instructions included. Read, understand • and follow these instructions for safe installation and operation. L e a v e t h i s manual with party responsible for use and operation.