
User Guide


INSTALLATION OVERVIEW
2
The following should be always
observed for safety
....................
3
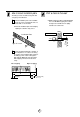
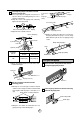
Installation of indoor, outdoor
unit
................................................
4
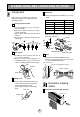
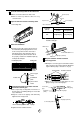
Flaring work and connection of
piping
...........................................
6
Connection of piping(Indoor)
......
7
For left rear piping
For right rear piping
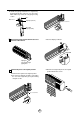
Connection of piping(Outdoor)
................................................
12
Connecting the cable between
indoor unit and outdoor unit
......
....................................................
13
Checking the drainage and
Forming the piping
..................
15
Air purging
...............................
17
Charging
...................................
19
Test running
.............................
20
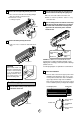
❏ Installation plate
❏ Four type "A" screws
❏ Connecting cable
❏ Pipes: Suction line
................
5/8"
Evaporator line
..........
3/8"
(Refer to page 4)
❏ Insulation materials
❏ Additional drain pipe
(
Outer Diameter
....
15.5mm(0.61in))
❏ Two type "B" screws
❏ Level gauge
❏ Screw driver
❏ Electric drill
❏ Hole core drill(ø70mm(2.76in))
❏ Flaring tool set
❏ Specified torque wrenches
4.2kg
.
m, 6.6kg
.
m
(different depending on model No.)
(Refer to page 10)
❏ Spanner......................Half union
❏ A glass of water
❏ Screw driver
❏ Hexagonal
wrench(4mm(0.16in))
❏ Gas-leak detector
❏ Vacuum pump
❏ Gauge manifold
❏ Owner's manual
❏ Thermometer
❏ Holder Remote Control
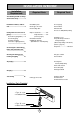
Installation
Requirements
Required Parts Required Tools
Installation Parts Provided
1. Type "A" screw
2. Installation Plate
3. Type "B" screw
4. Holder Remote Control