
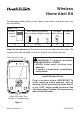
Installation Instructions


3
Helpful Videos – www.hzsupport.com Helpful Answers – 1-800-858-8501
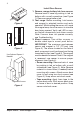
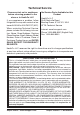
Use Optional
Spacer if Needed
4. Mount magnet. Repeat step 3 to attach
magnet (and spacer if needed) to door using
two screws (provided). Note: If using spacer,
use the two long screws (provided).
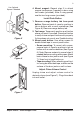
Install Push Button
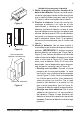
1. Remove orange battery tab from push
button. Remove back of case by pushing in
tab on bottom with a small screwdriver (see
Figure 6). Remove orange battery tab.
2. Test range. Temporarily position push button
where you want it mounted. Press push button
to verify chime and push button work properly.
If chime does not sound, see Troubleshooting.
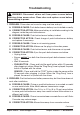
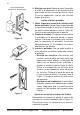
3. Mount push button. Use either screws or
double sided tape to mount push button.
• Screw mounting: To mount with screws,
remove back of case by pushing in tab on
bottom with a small screwdriver (see Figure
6). Note: Remove material in screw holes (if
needed) before mounting with screws. Attach
back of case to door jamb or wall (see Figure
7). Snap front of push button on.
• Tape mounting: When attaching push but-
ton using double sided tape, make sure the
surface of the door jamb or wall is clean.
Adjust Chime Volume Control
Unplug chime and adjust volume control to
desired volume (see Figure 1). Plug chime back
into wall outlet.
Figure 5
Figure 6
Figure 7