
Installation Guide


10
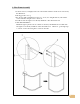
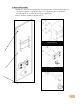
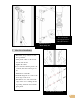
8. Unit Assembly
a. Connect the front frame with two side-back walls. For some of the models, the ½”
stainless steel screws must be put on from the backside of the shower. Therefore, this
connection must be done off the shower base. Have doors removed from the front
frame.
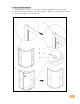
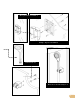
b. For model S-3232, S-3636, S-3535, and S-3838, connect water supply to the shower.
You may need to move the front-frame-backwall assembly onto the base but leave
enough room for water connections.
c. For all other models, place front-frame-backwall assembly onto the base. You need two
people to move the assembly. Put the function panel close to its designated place and
connect hot and cold water supplies, water supplies to overhead shower, hand-held
shower, body jets, foot massager (if apply), and electrical wires to LED lights, Fan, and
speaker.
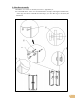
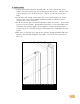
d. Place the roof of the unit on tip of the shower enclosure, aligning it with the walls, and
fixing it to the wall studs through the edge foldup. Note: Some of the units may not
have roofs.
Backwall is attached to the stile of the front frame