
Installation Guide


11
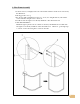
9. Unit installation
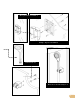
a. Connect and secure all water lines to the shower/bath enclosure. Make sure all
connections are water tight! If your unit comes with a built-in radio, plug it into a 120V
outlet.
b. Match up the electrical wire connectors (by pictures on the tags) for LED lights, speaker,
and fan. (The DC powers both lights If your unit has both dome and panel LED lights.)
c.
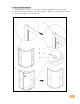
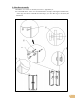
You may apply silicone sealant to the outer edge of the base to secure the unit to the wall.
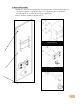
d.Secure the unit to the wall using the 3” dry wall screws. Place the dry wall screws
through the holes located at the top of the enclosure walls. The screws MUST be
screwed into a stud. If a stud is not available, insert a stud extender.
The second way of securing the shower unit to the wall is as follows. Mount a 17” long
2by 4 stud lumber horizontally and at the height that is right under the shower wall’s top
edge. Shower unit is then screwed to these two 2 by 4s.
The third way of securing the shower unit to the wall is to use 3” drain wall screws to
attach the front frame stiles to the drywall. S-3535 and S-3838 have holes pre-drilled.
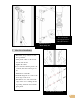
e.Secure the roof top (if applicable) to drywall studs through the foldup edge.
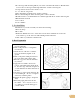
10. Caulking
Use silicon sealant to seal all of the seams or joints from inside the shower